
How to Configure the Top Magento Navigation Menu?
Setting up the Magento navigation menu helps run a Magento store efficiently. It grants you greater control over the website layout and significantly enhances the user experience. This guide provides step-by-step guidance on customizing a Magento navigation menu for better functionality. It also covers key features for creating an intuitive and user-friendly navigation menu.
Key Takeaways
-
Learn how to create and edit categories in your Magento 2 navigation menu for a better user experience.
-
Discover how to set the depth of your top navigation to control category visibility.
-
Explore techniques for customizing your menu, including reordering, adding new menus, and integrating Magento CMS blocks.
-
Troubleshoot common issues like menus not showing or mobile menu malfunctions.
-
Gain insights into Magento extensions that can further enhance your navigation menu.
Steps for Setting Up Magento Navigation Menu
To set up the top navigation menu in Magento 2, follow these steps:
1. Create a category
-
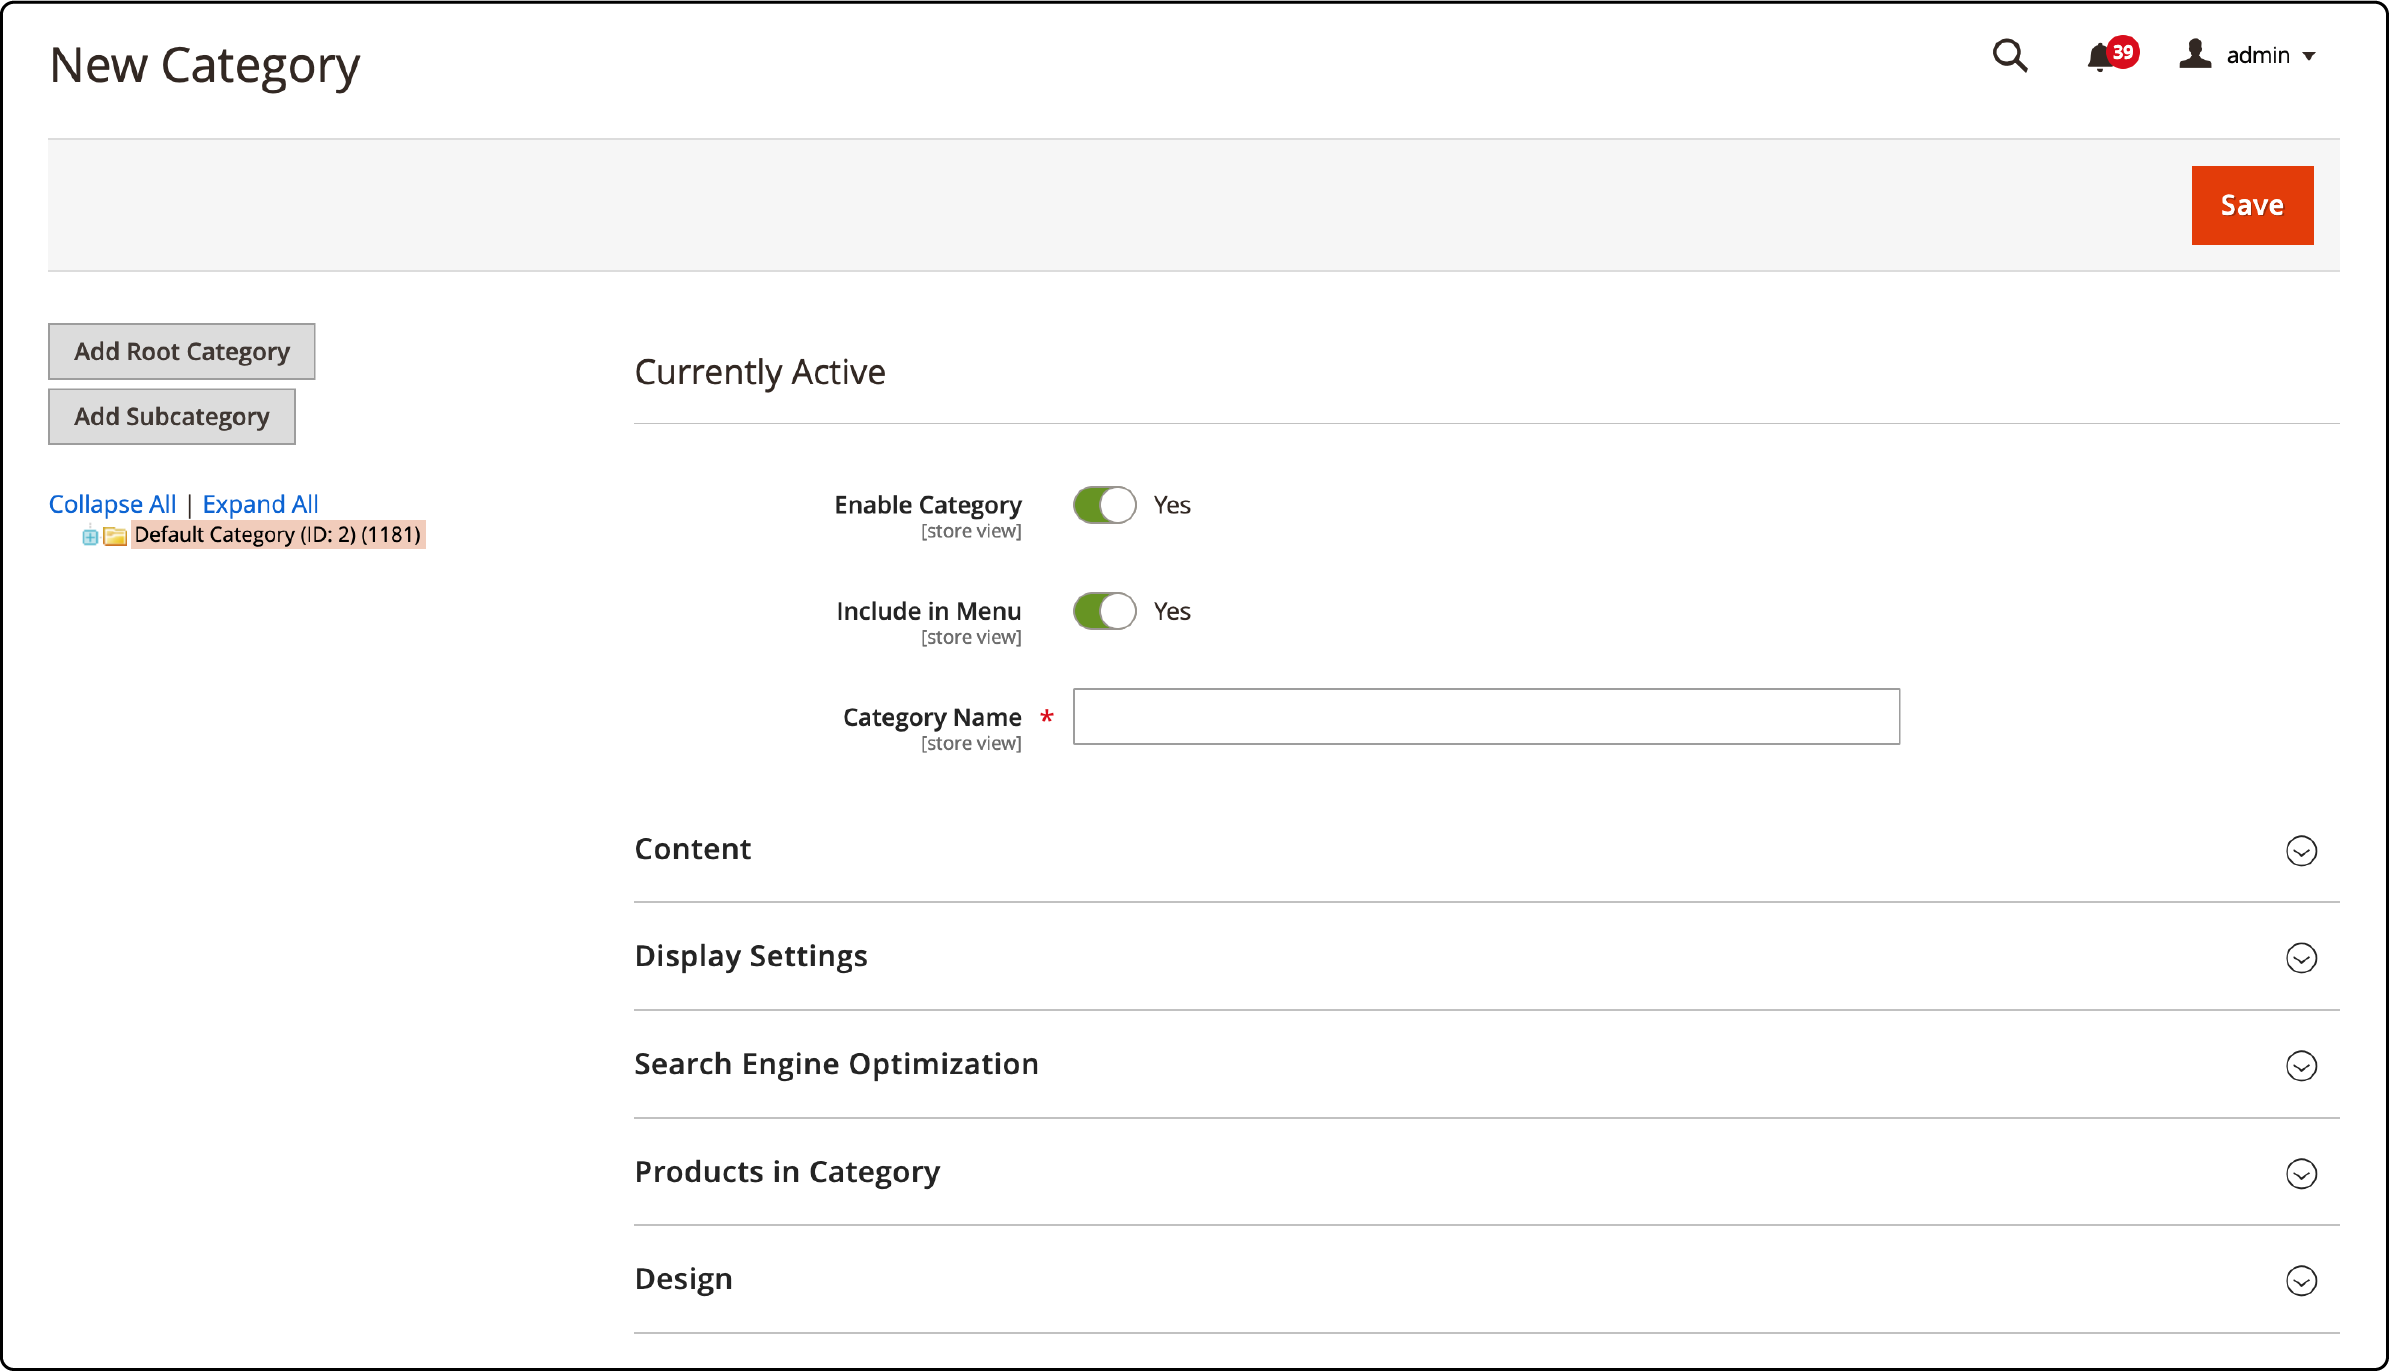
Go to the Admin sidebar and select Products. Then, click on Categories.
-
Choose "Default Category" on the Category page to highlight it in pale orange.
-
Click "Add Subcategory" to create a new level 2 category and edit its content.
-
Don't forget to click "Save" when you're done.
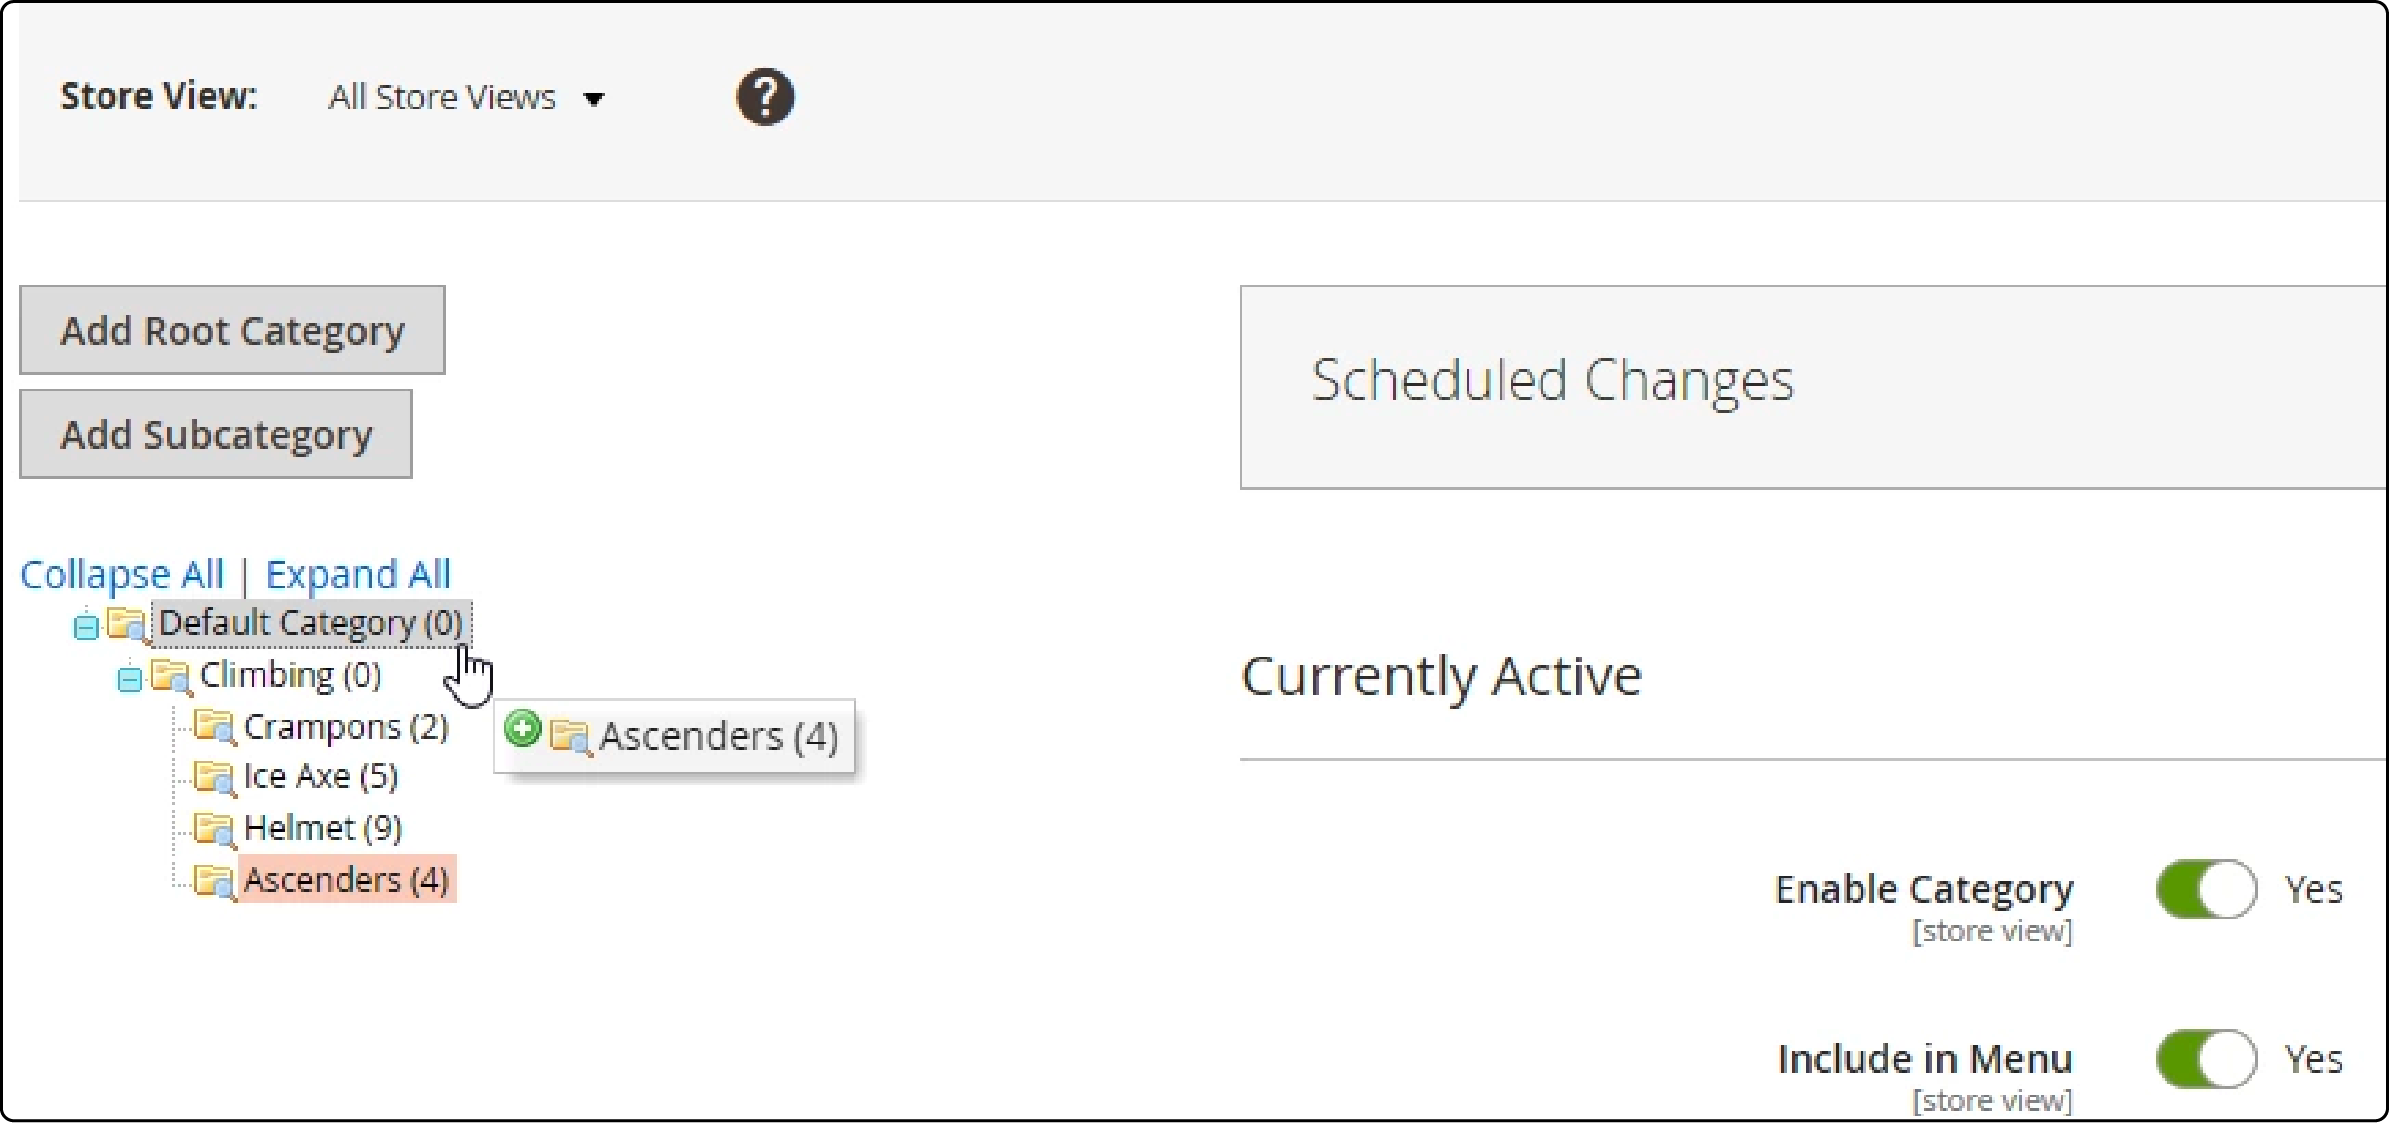
Drag and drop the new Category to the desired position. Confirm the changes and check the front end.
2. Setting the depth of the top navigation
-
To access the Admin sidebar, click on Stores. Then, choose Configuration under Settings.
-
On the Configuration Window, scan Catalog and expand; choose the first item Catalog to appear in the first position.
-
See Category Top Navigation at the fourth position above from the end of the list of configuration items; click the arrow to expand.
-
Go to settings. The depth of the top Magento navigation determines how many categories will be visible.
The global scope applies to all websites, stores, and views in your Magento 2 backend.

The maximum depth default value is 0, meaning subcategories have no restrictions. You can set the number of subcategory levels from 1 to 4 or more.
How to Edit and Customize the Top Navigation Menu
1. Reordering and deleting menu items
To change the order of your Magento navigation menu items, follow these steps:
Simply drag and drop the categories in your desired sequence. If there's a category you no longer need, it's easy to remove it from your menu.
-
On the Admin sidebar, select 'Products,' then 'Categories.'
-
Locate the category you wish to delete or move.
-
To delete, select the category and click 'Delete.' Confirm your decision in the pop-up window.

- To rearrange the order, click and drag the category to its new position.
- Always remember to save your changes to finalize the edits.
2. Adding new menus
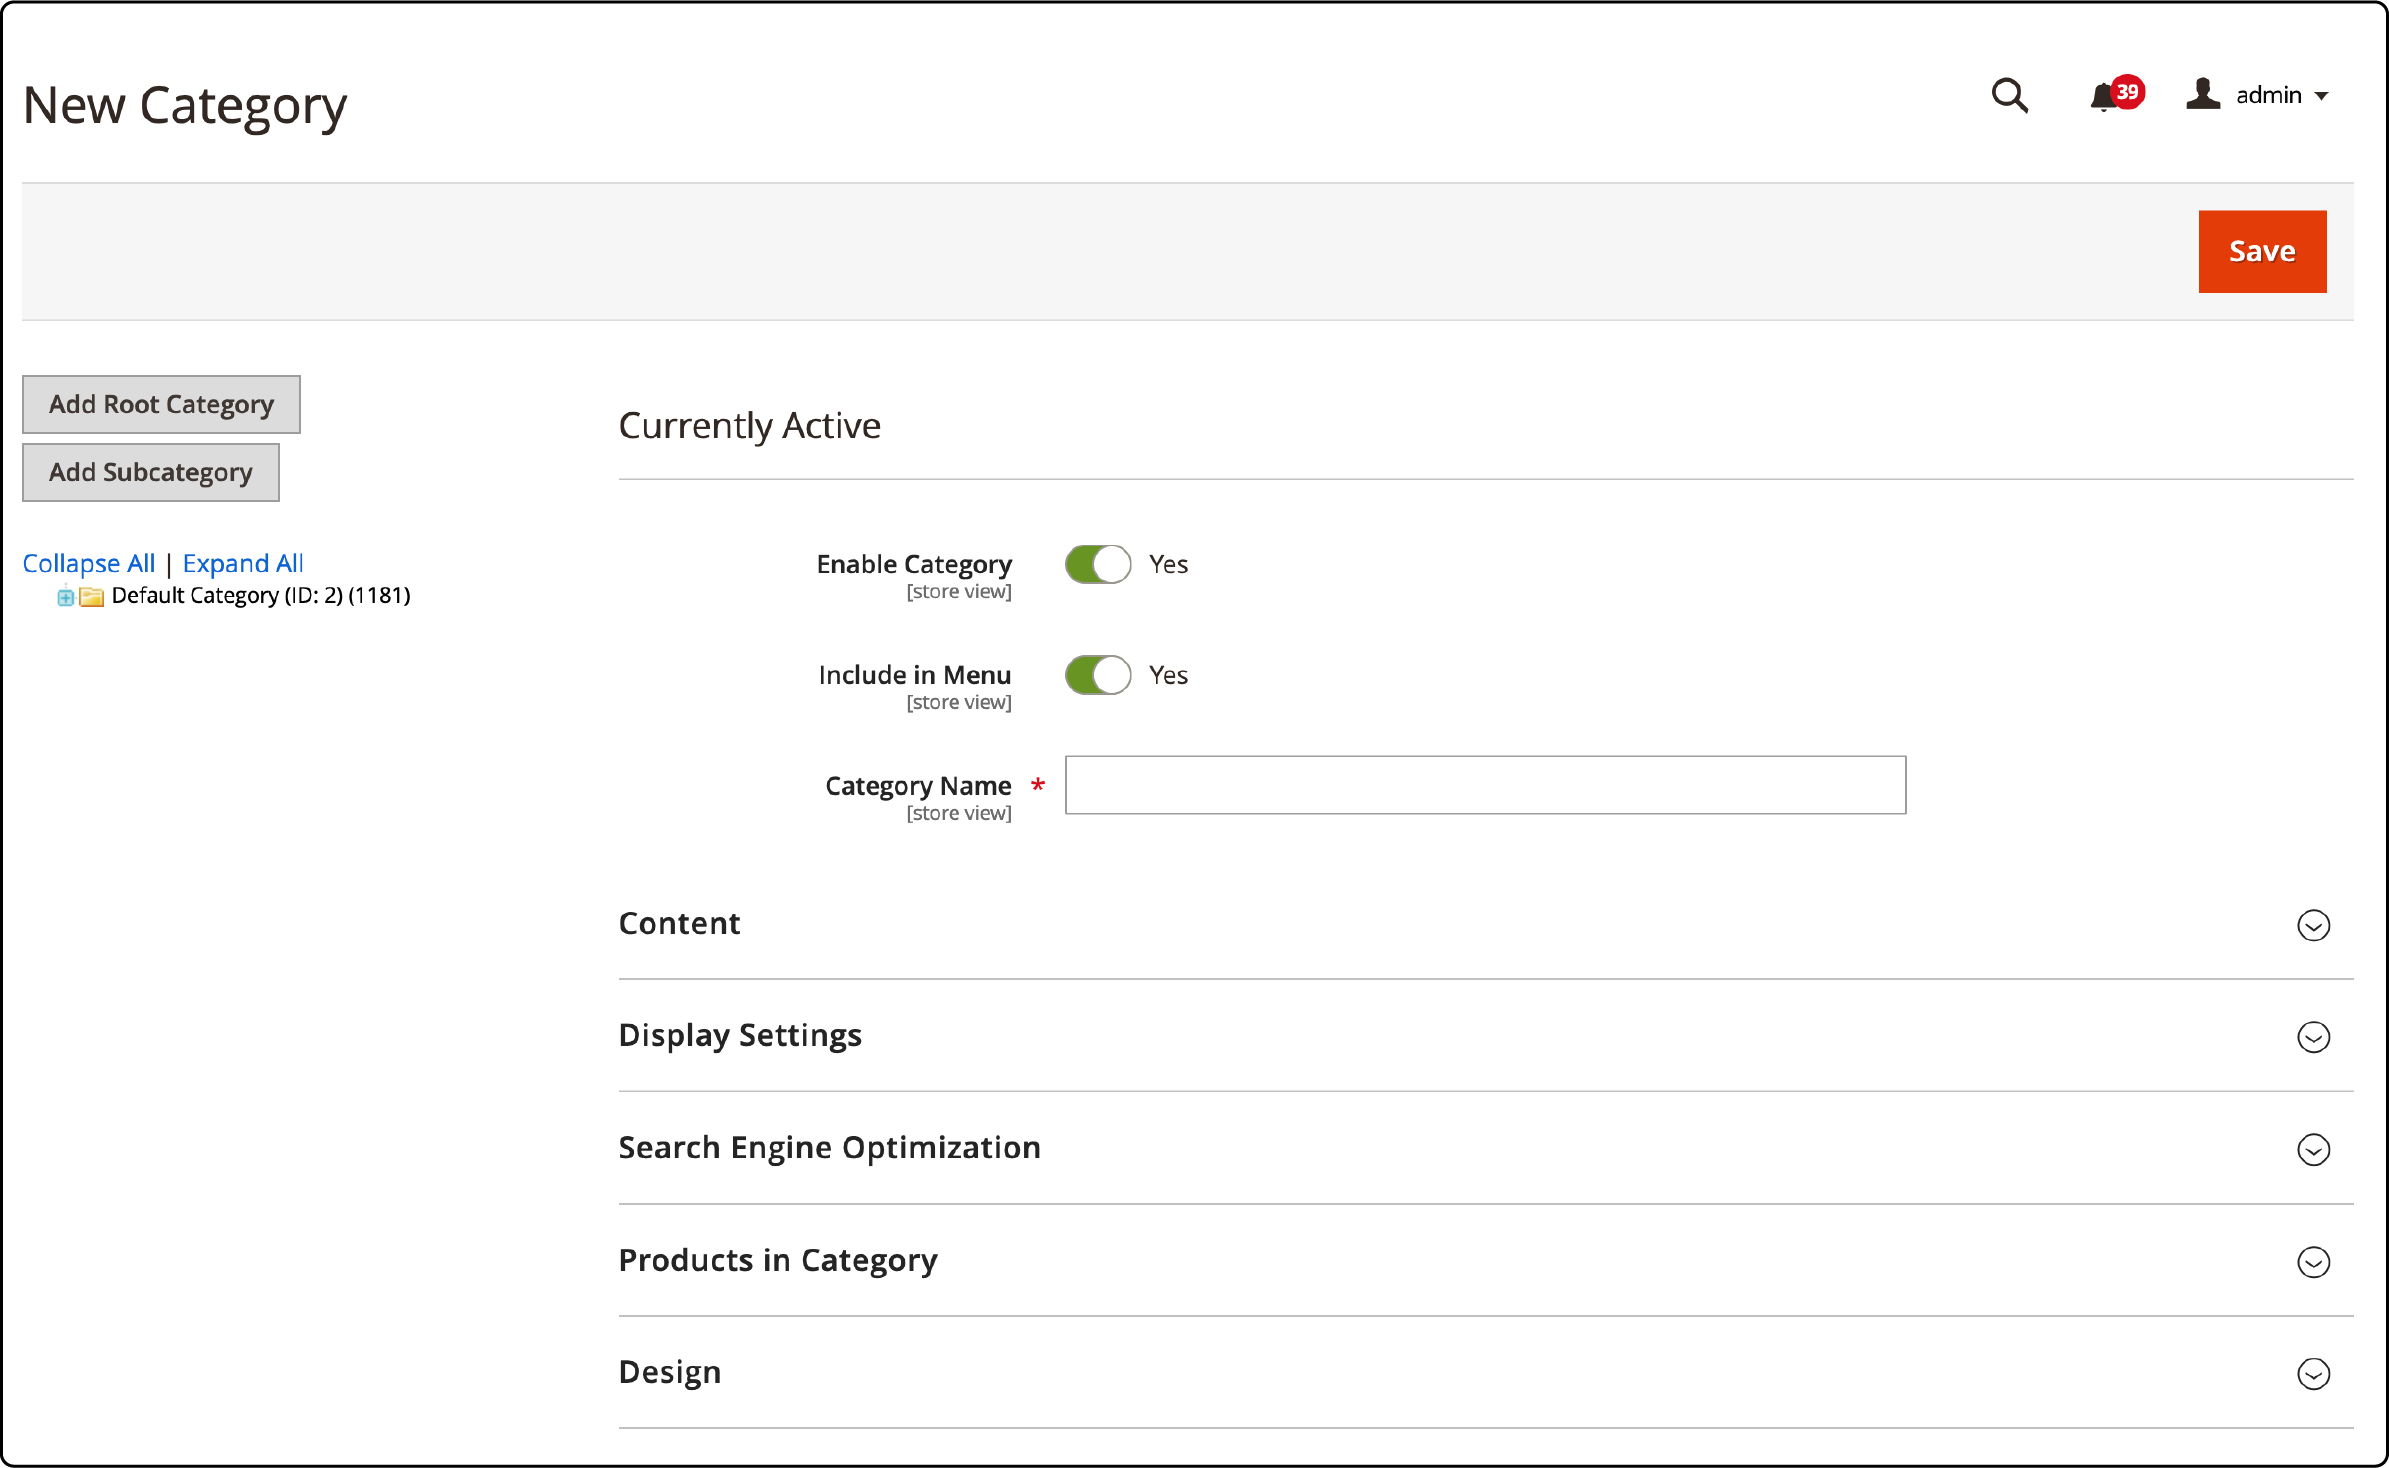
Adding new menus to your Magento navigation is similar to creating new categories. Let's walk through the steps to accomplish this:
-
Navigate to the Admin sidebar, select 'Products,' then 'Categories.'
-
Click on the 'Add Subcategory' or 'Add Root Category' if you want the new category at the top level.
-
Fill out the necessary information for your new category in the 'General Information’ section.
-
Save your work to set your changes in place.
3. Utilizing additional blocks or CMS blocks
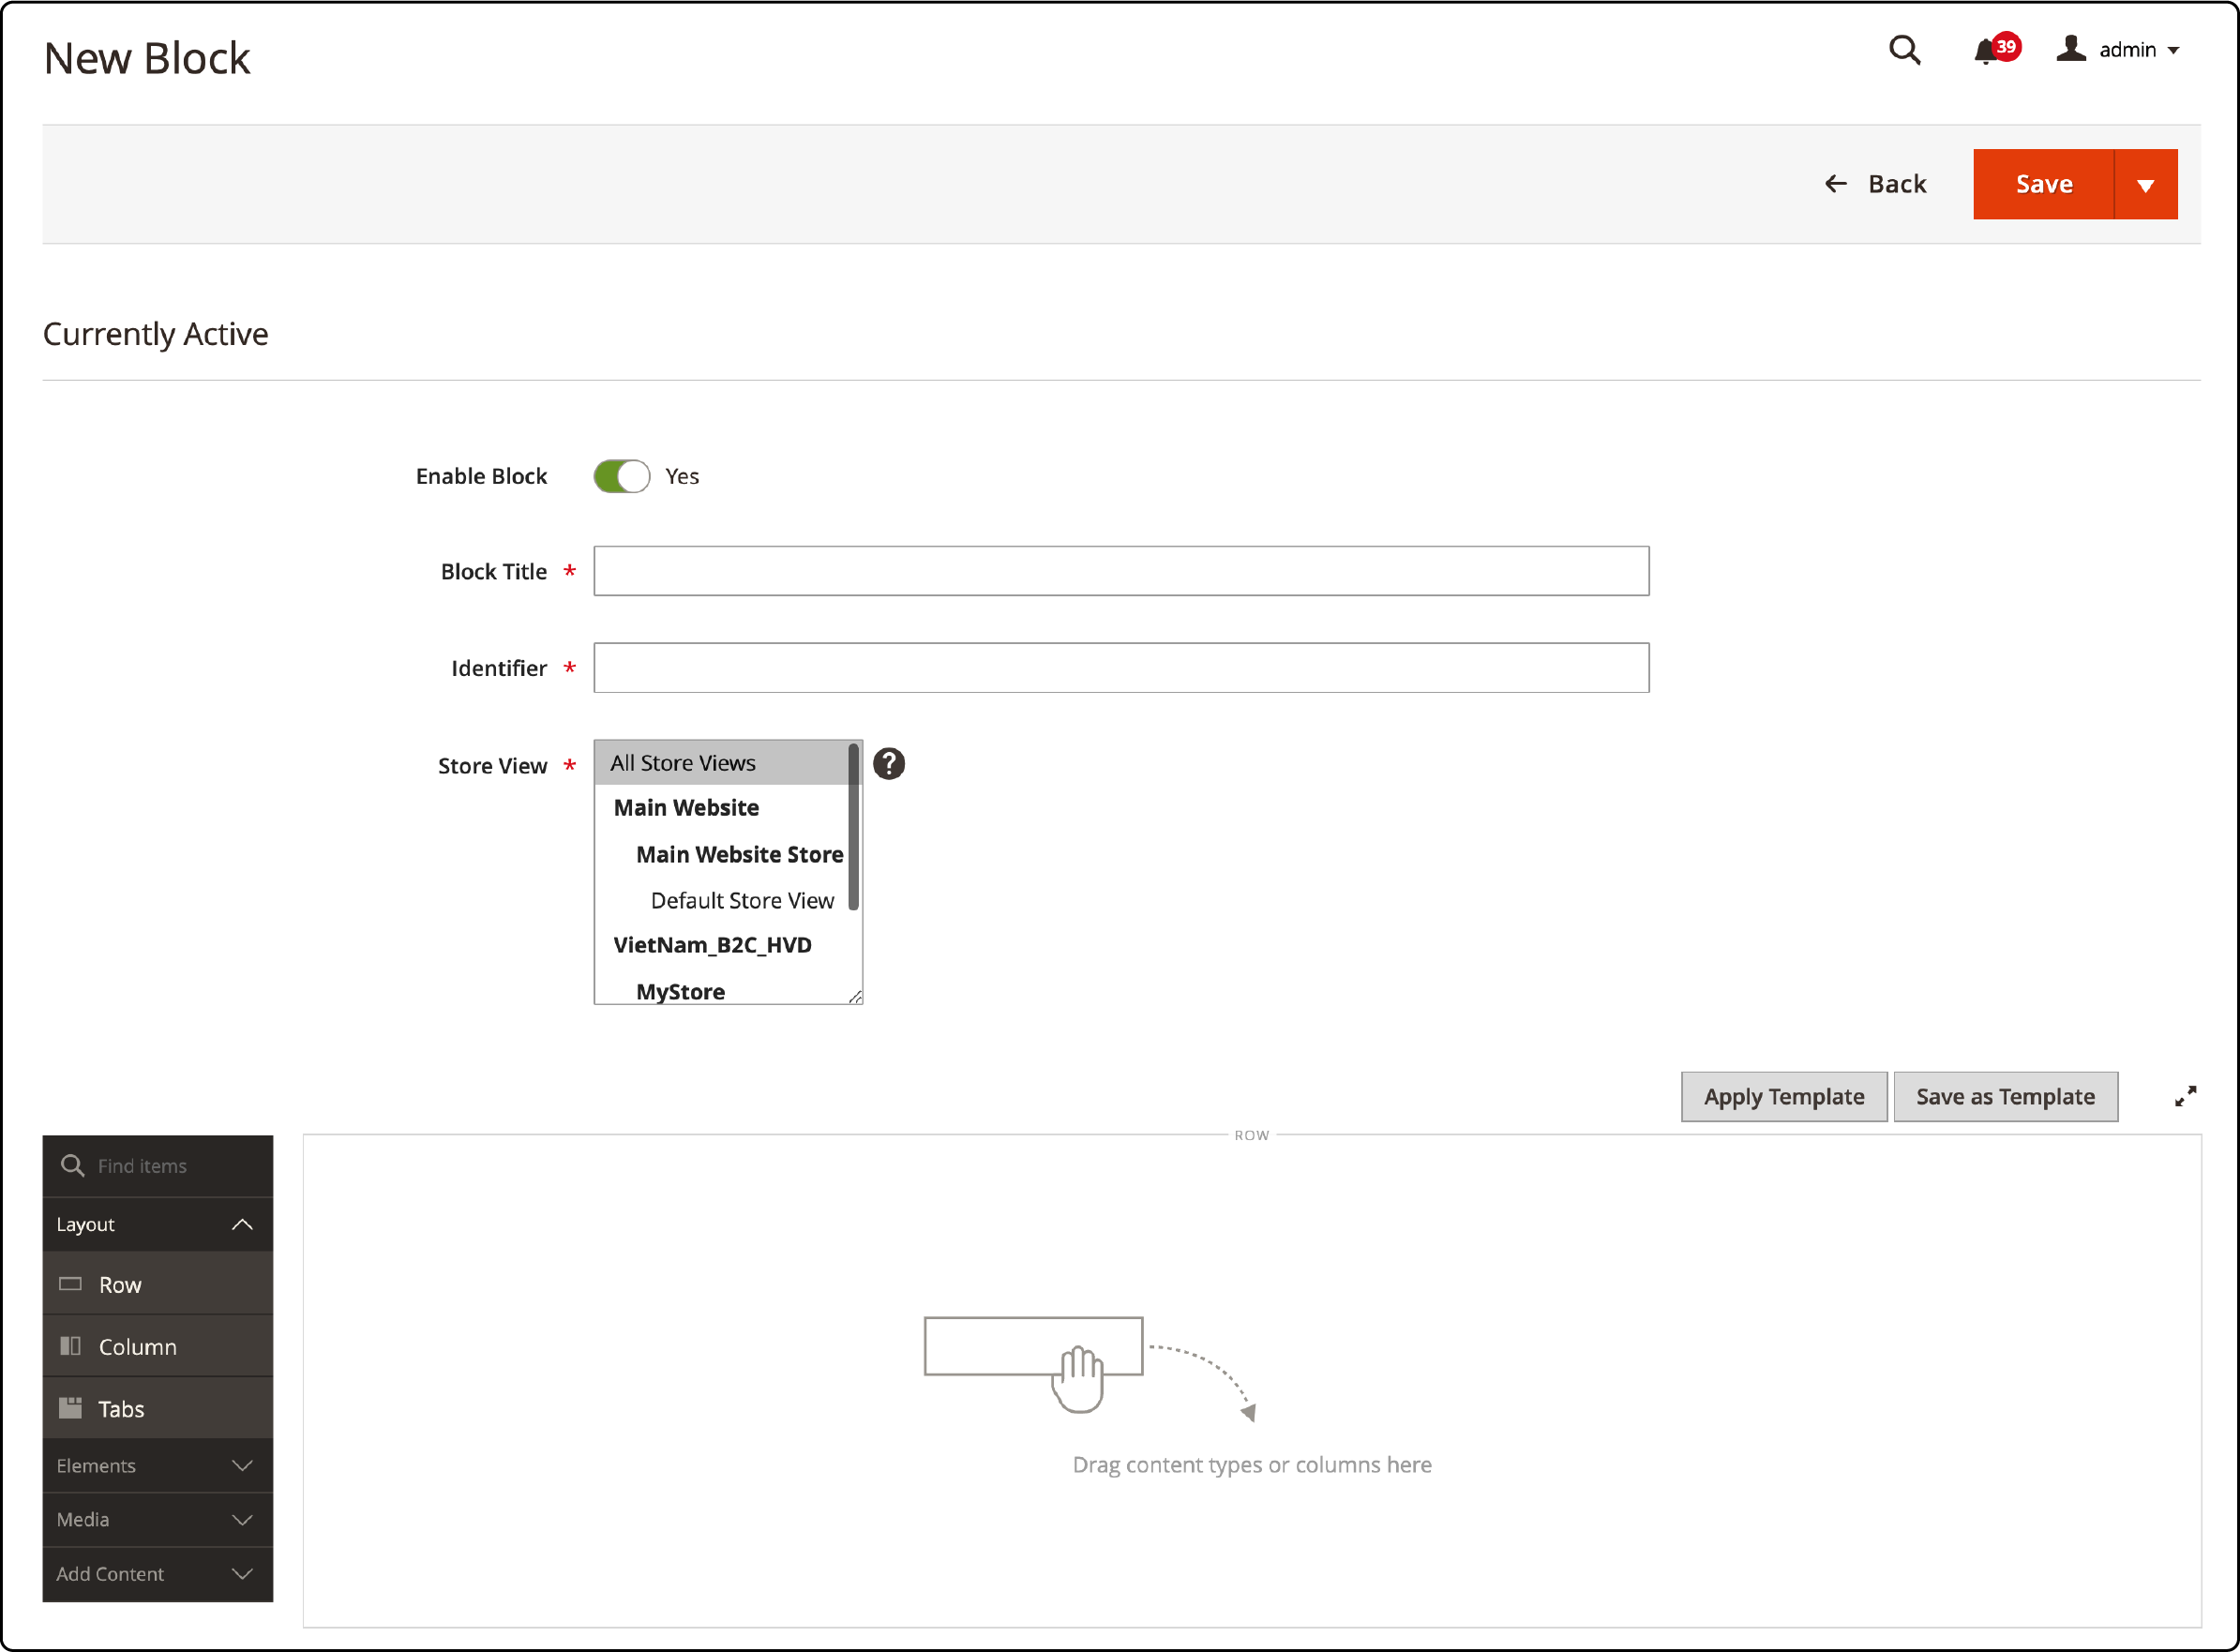
Adding CMS blocks to your Magento navigation menu feature special promotions, announcements or even links to specific pages . These blocks add a touch of uniqueness to your online store. Let's explore how to integrate them into your menu.
-
Begin by accessing the Admin sidebar. Choose 'Content,' then 'Blocks.'
-
Click 'Add New Block' and fill out the necessary information.
-
Once created, assign the CMS block to your category. Head back to 'Products' and then 'Categories.'
-
Choose the category to assign the block and head to the 'Design' section.
-
Under 'Layout Update XML,' add your block's ID, save your changes.
Fixing the Top Navigation Menu Issues in Magento 2
1. Common issues of menu not showing and its solution
Magento store owners and developers often face a common problem. The navigation menu may not be showing up on their website. It negatively impacts user experience and makes it challenging for customers to navigate.
a. Add a new root category
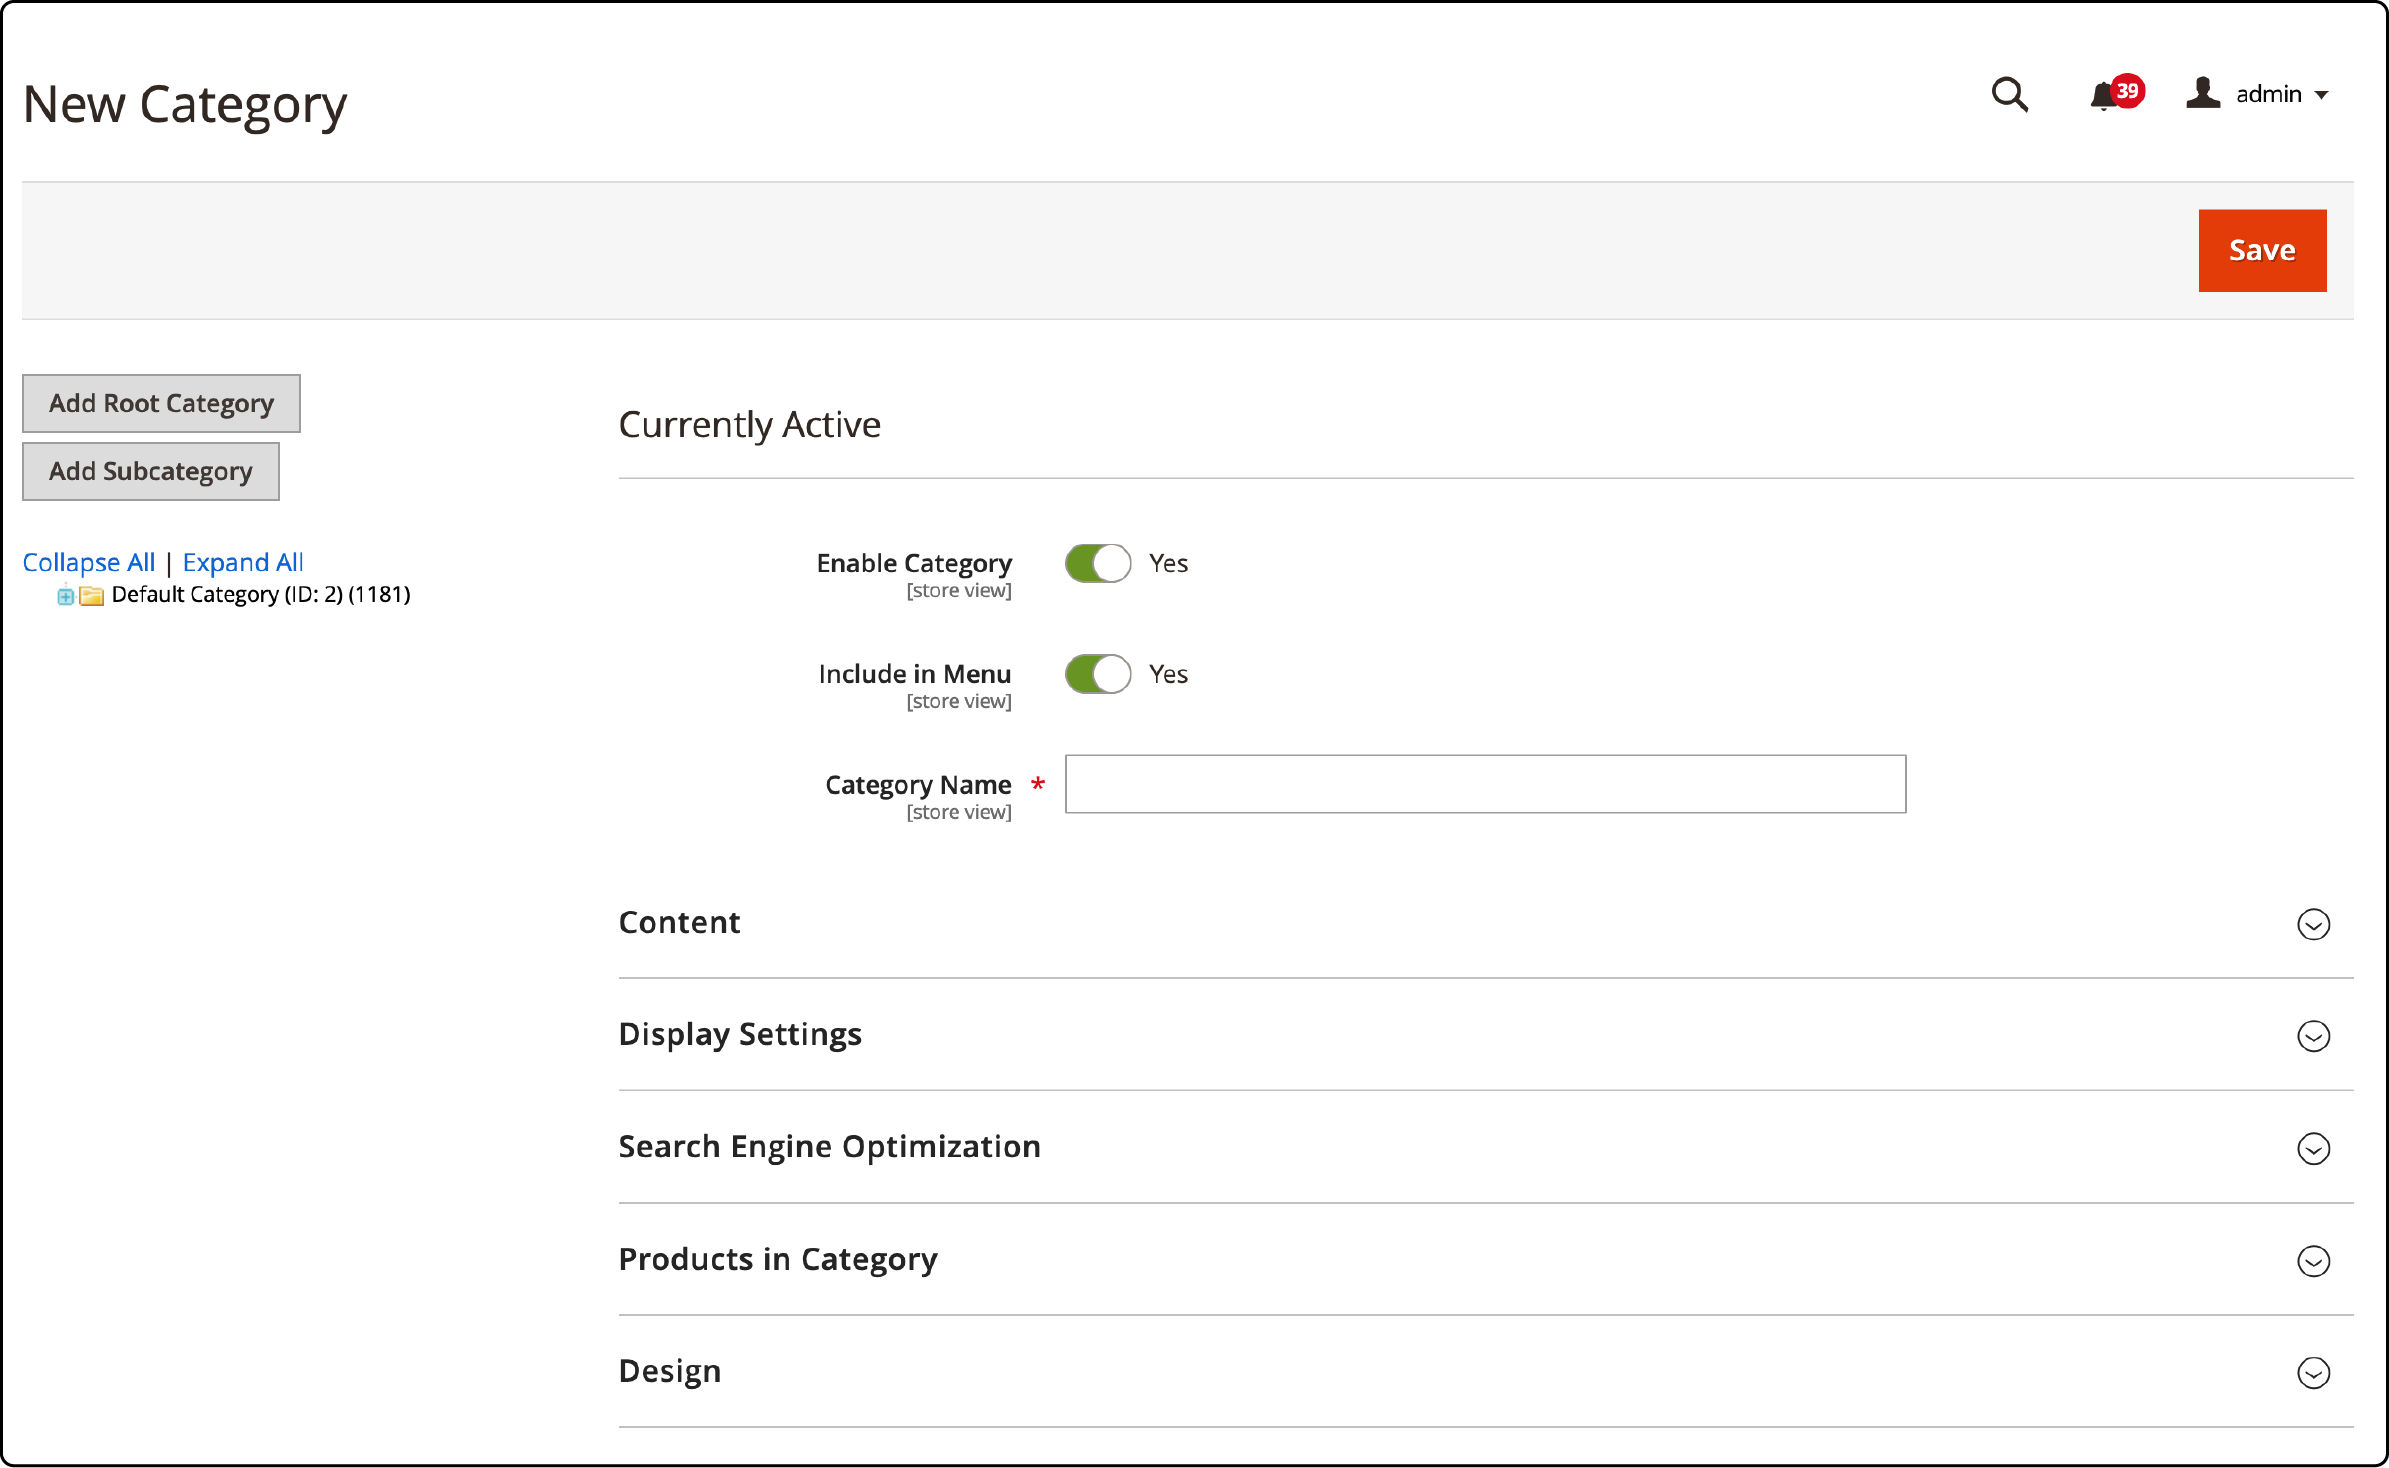
To start, go to the Admin sidebar and select Product, followed by Categories. Then, click on Add Root Category. Next, navigate to the General Information tab, and there:
-
Enter the name of your Root Category (root-site name) in the "Name" box.
-
Ensure the "Is Active" box is set to "Yes".
-
Ensure the "Include in Navigation Menu" option is set to "Yes".
b. Add a subcategory of the new root category
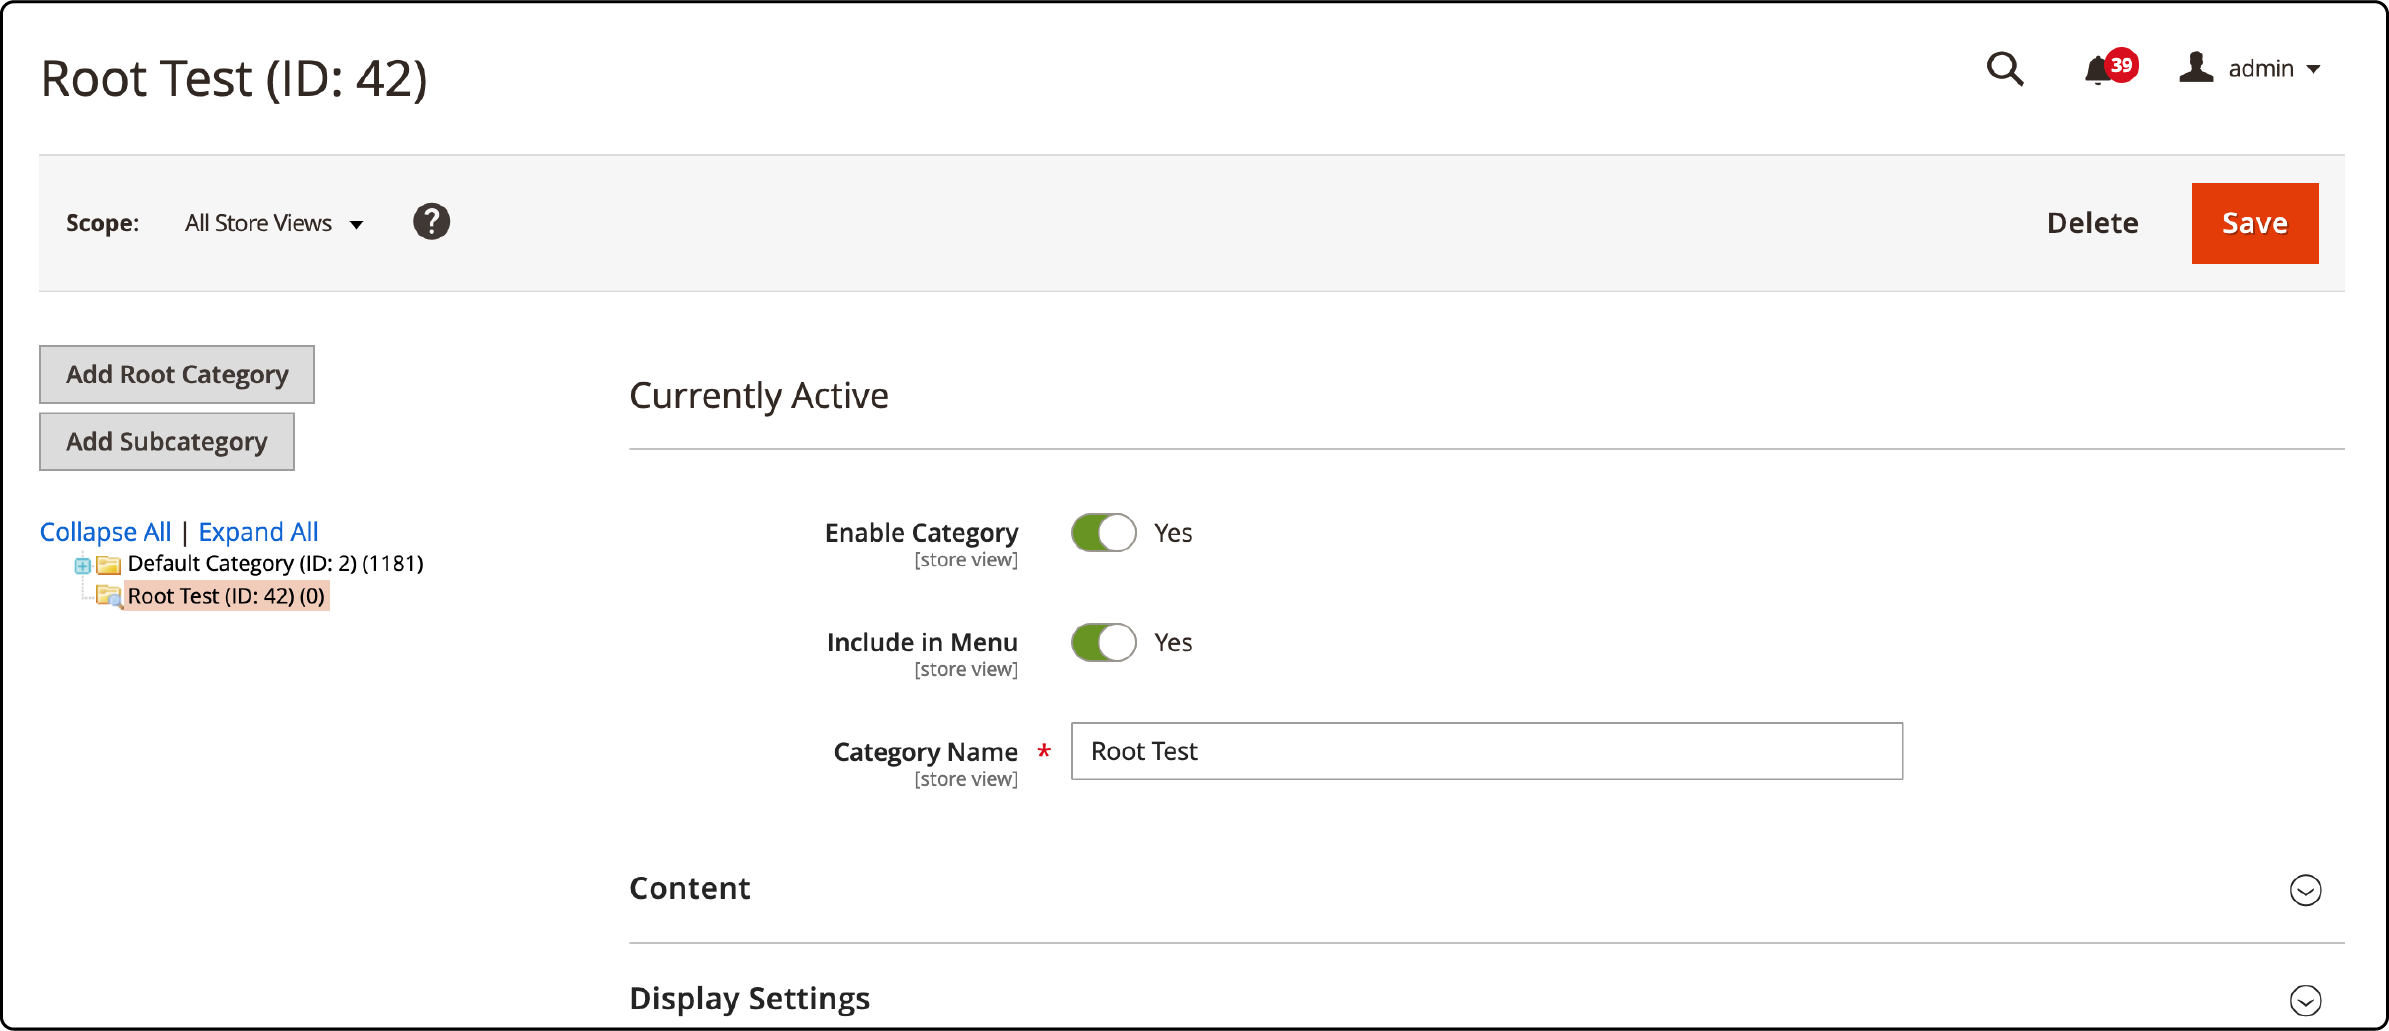
-
Choose the recently created Category.
-
Using the new Root Category, select Add SubCategory.
-
Ensure the Name is filled in the Name box; change Is Active to Yes and Included on the Nav Menu to Yes.
-
Save the Category by clicking on Save Category.
c. Choose the new Root Category
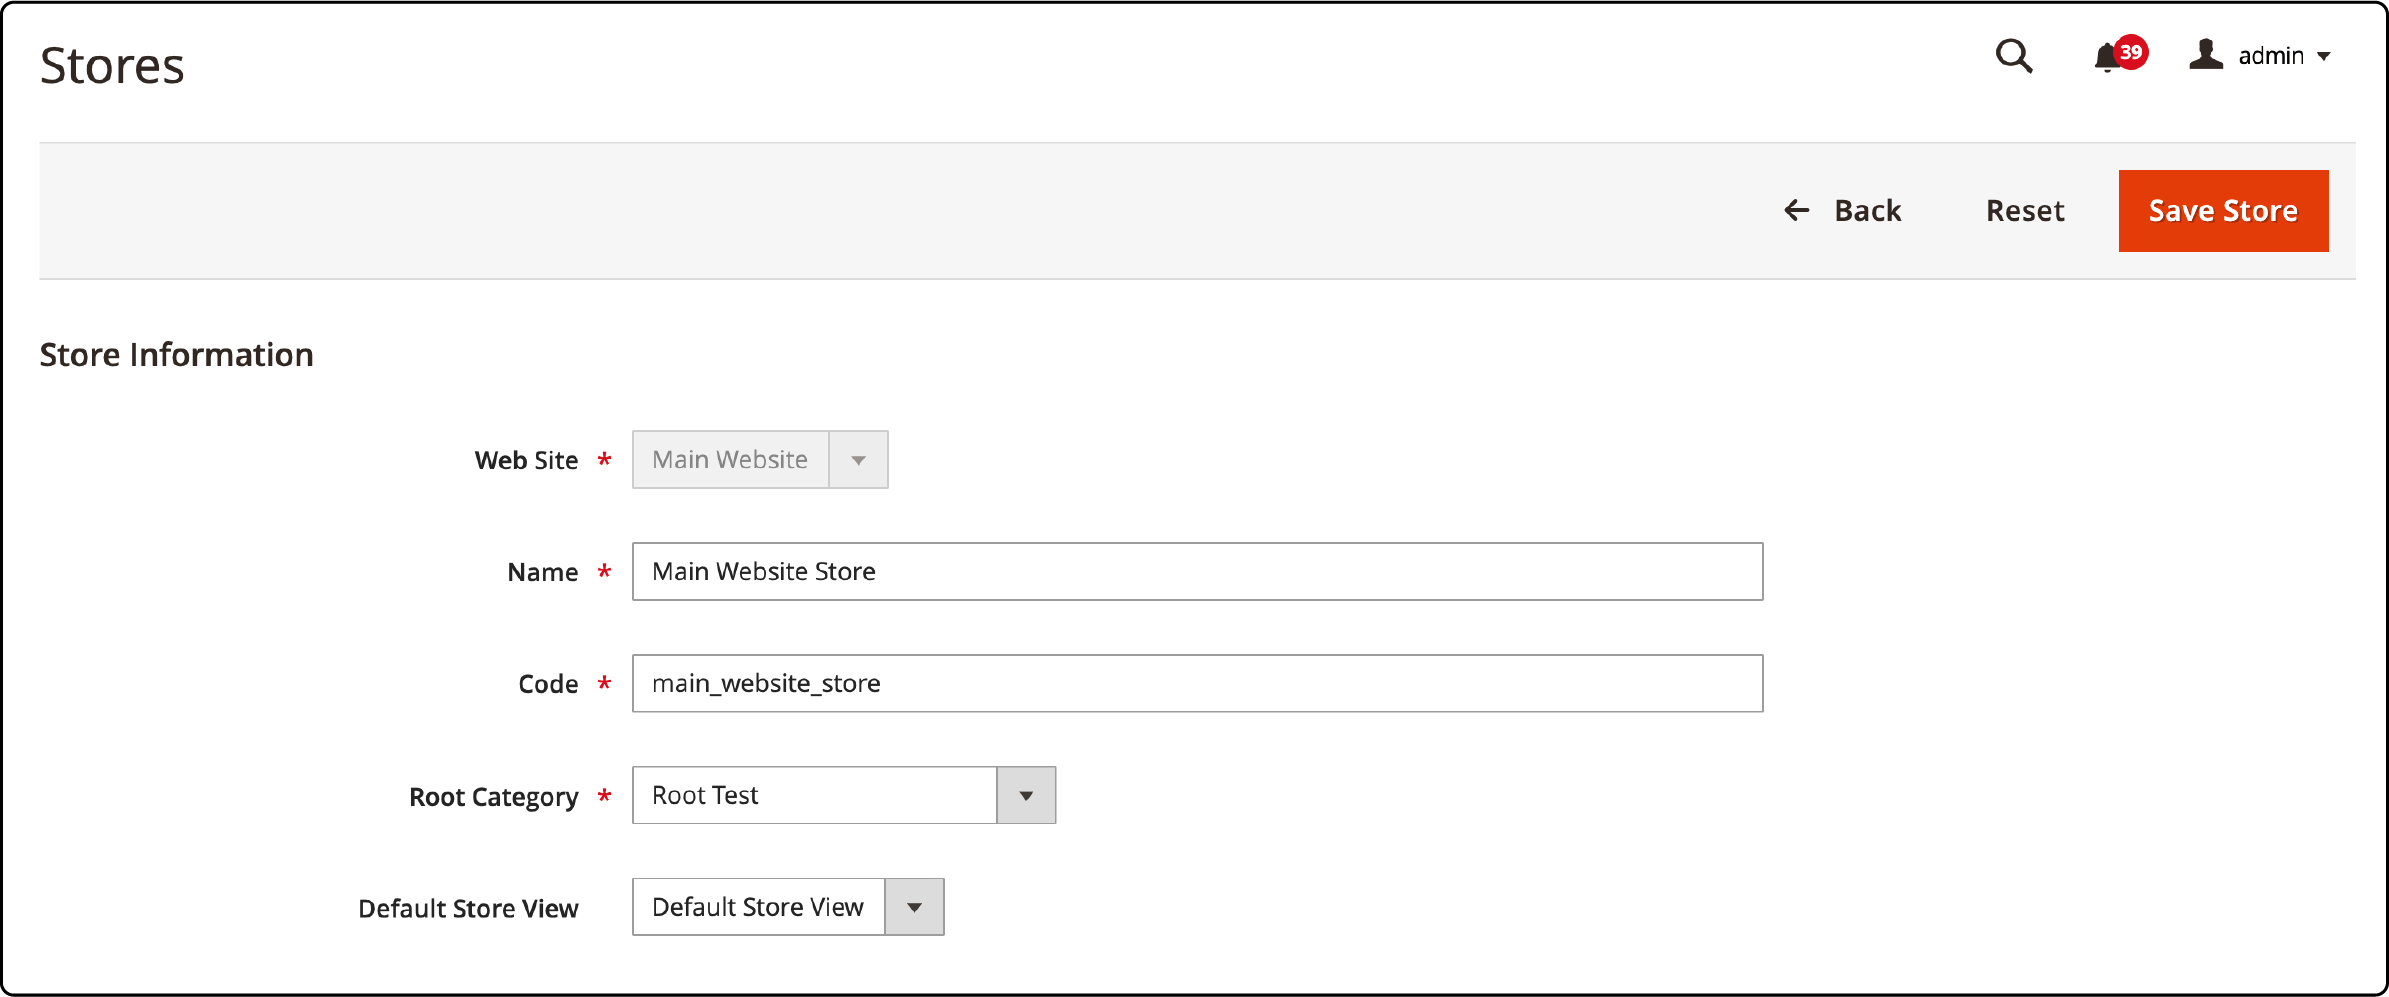
-
Go to the "Admin" section on the sidebar and select "Stores" followed by "All Stores".
-
Open the link for the "Main Menu Store" in the second column and browse through its content.
-
Within the "Root Category" section, expand the list of all categories and choose the newly created Root Category (root- Sitename).
-
Save the changes by clicking on "Save Store".
You should now see any newly created categories on the Navigation menu. If you're experiencing any issues, make sure to refresh the entire cache by navigating to "System" > "Cache Management" and selecting "Flush Magento Cache."
2. Mobile menu not working in mobile view
A common issue with Magento 2 is the mobile menu not working correctly on a mobile device.
The solution is simple: install a mobile menu extension. The plugin allows you to customize your store's mobile menu to ensure it works correctly on all mobile devices. It also provides a user-friendly interface, allowing customers to navigate your website and find what they want easily.
FAQs
1. How can I customize the Magento 2 navigation menu?
You can customize your Magento 2 navigation menu using the Mega Menu extension. The module lets you configure and modify the top navigation menu according to your needs, including adding subcategories and widgets.
Boosting your Magento store's performance is achievable through reliable Magento hosting. It ensures optimal speed and responsiveness, leading to a better user experience.
2. How can I add a submenu to the Magento 2 catalog?
To add a submenu in Magento 2, you'll have to go to the backend and select 'Catalog.' Here, you can create subcategories, which will appear as a submenu in the front end. Remember to clear the cache and check the changes on your Luma theme.
3. Can the navigation menu in Magento 2 be responsive for mobile view?
Magento 2's menu is mobile-responsive by default. However, for better mobile navigation, consider using a Mega Menu extension. It allows you to configure a mobile menu that provides an optimal experience for users accessing your site from various devices.
4. How can I customize the Magento 2 top navigation menu?
You can customize the top menu in Magento 2 using the Magento 2 Mega Menu extension. This extension allows you to create a custom navigation menu, add dropdowns, and arrange items in layers to enhance your store's navigability.
5. Can I add a dropdown menu to the default Magento menu bar?
You can add a dropdown menu to the default Magento menu bar. Creating a menu with subcategories in Magento's backend will automatically appear as dropdowns in the frontend. Remember to clear the cache to see the changes.
6. Are there any extensions for Magento that can help me create a custom menu?
Several extensions for Magento can help you create a custom menu. For instance, the Magento 2 Mega Menu extension allows you to build a custom menu with various features, including adding images and labels to menu items and creating mobile-responsive menus.
Summary
The Magento navigation menu ensures a seamless shopping experience. It impacts how customers navigate, find items, and make purchase decisions. With dropdowns and mega menus, Magento provides various options to enhance site navigation. In this tutorial, we discussed various aspects of the Magento navigation menu. We explored different ways to customize the top menu using extensions.
Consider leveraging Magento hosting services now to optimize your Magento store's performance and guarantee uptime.


