How to Customize Magento Email Templates?
Magento emails are an essential part of eCommerce customer communication. Customizing and managing email templates in Magento 2 ensures that your brand remains consistent across all touchpoints.
This tutorial will guide you through customizing and managing email ecommerce templates. It includes loading and editing the templates and assigning the template information.
Steps to Customize Email Templates in Magento 2
Step 1: Loading Templates
- Navigate to the Magento Admin Panel.
- Go to Marketing > Communications > Email Templates.
- Click 'Add New Template.'
- Choose the type of template (header, footer, or message) you want to customize.

- Click 'Load Template' to display the default format for the selected template type.
Step 2: Editing Template Information
-
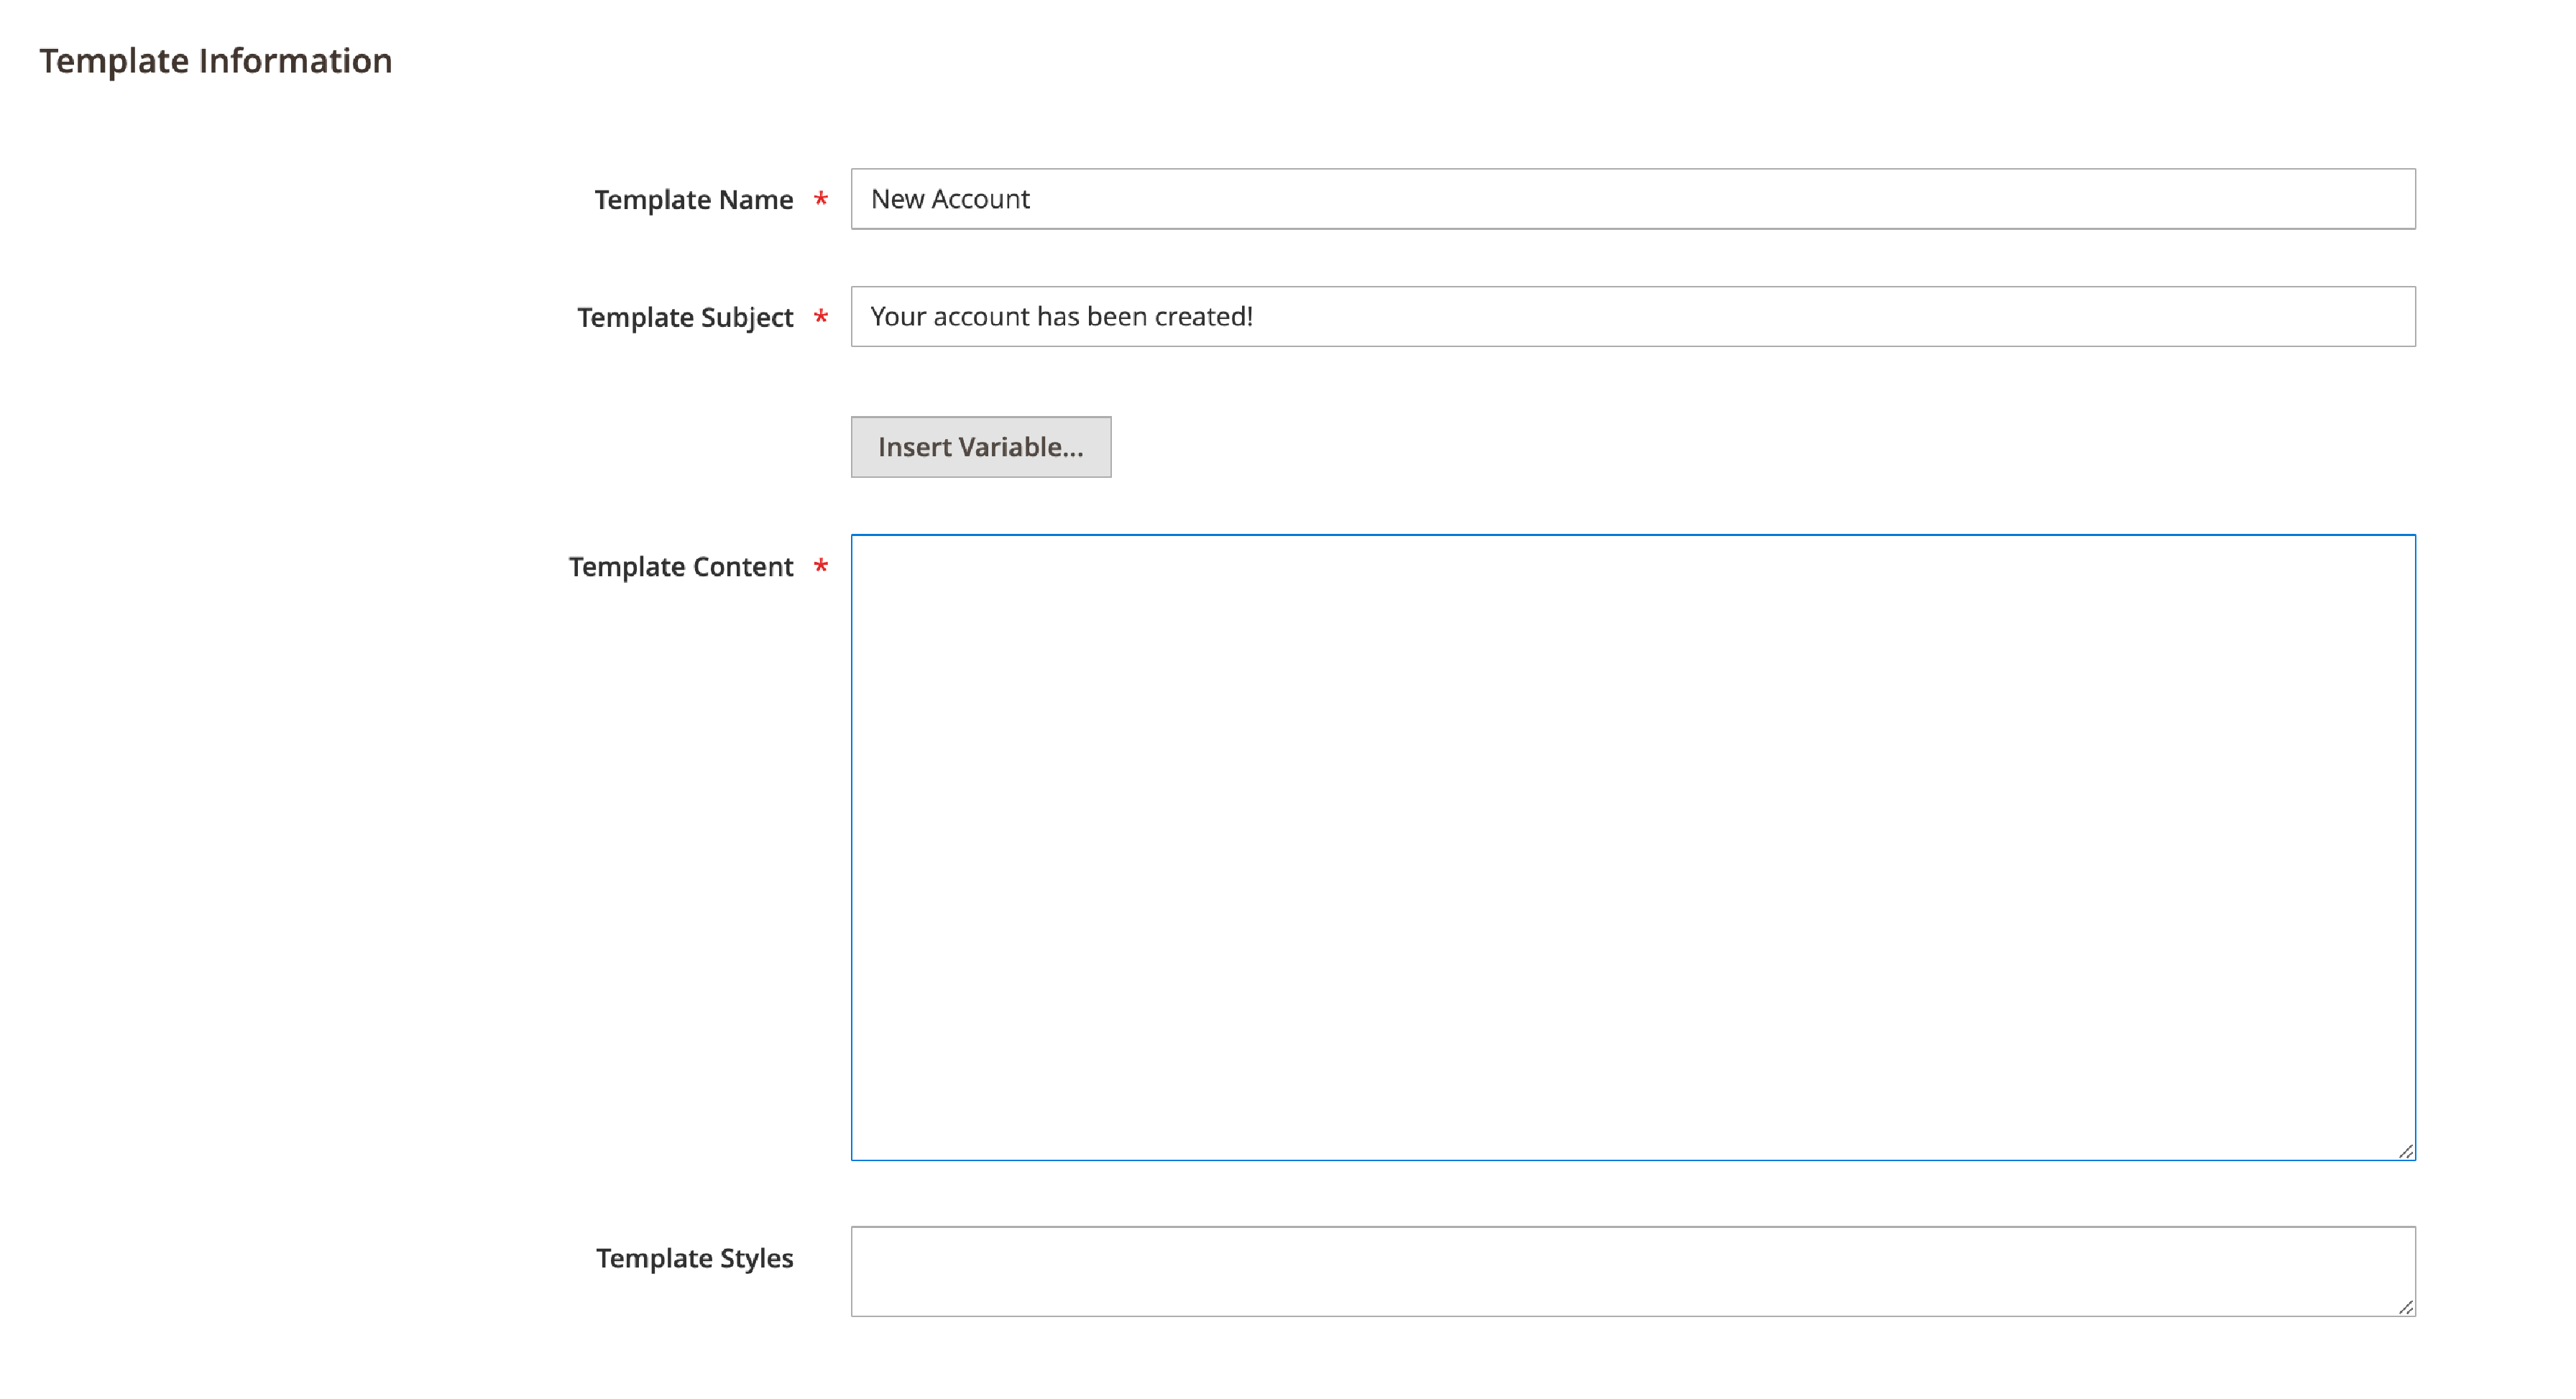
Enter a name for the new template in the 'Template Name' field.
-
Insert a subject for the template in the 'Template Subject' field. It will help you organize your templates and filter them easily.
-
Customize the HTML content in the 'Template Content' box according to your requirements.

-
Click 'Insert Variable' to insert a variable into the 'Template Content' box, which you can customize directly in the template.
-
Optionally, add any CSS styles in the 'Template Styles' box.
Step 3: Previewing and Saving the Template
- Click 'Preview Template' to ensure the template appears as expected.
- Make any necessary adjustments and click 'Save Template' to complete the process.
- The new template will be added to the list of available email templates in Magento 2.
Step 4: Assigning Email Templates
-
Navigate to Stores > Settings > Configuration > Sales > Sales Emails in the Magento Admin.
-
Open the relevant configuration section based on the template type (header, footer, or message).
-
Remove the checkmark from 'Use system value' in the "New Order Confirmation Template for Guest". Select your new template from the list.

- Click the 'Save Config' button to apply the new template.
Step 5: Customize Email Logos
-
Go to Content > Design > Configuration.
-
Select the configuration scope for which you want to customize the Magento email logo.

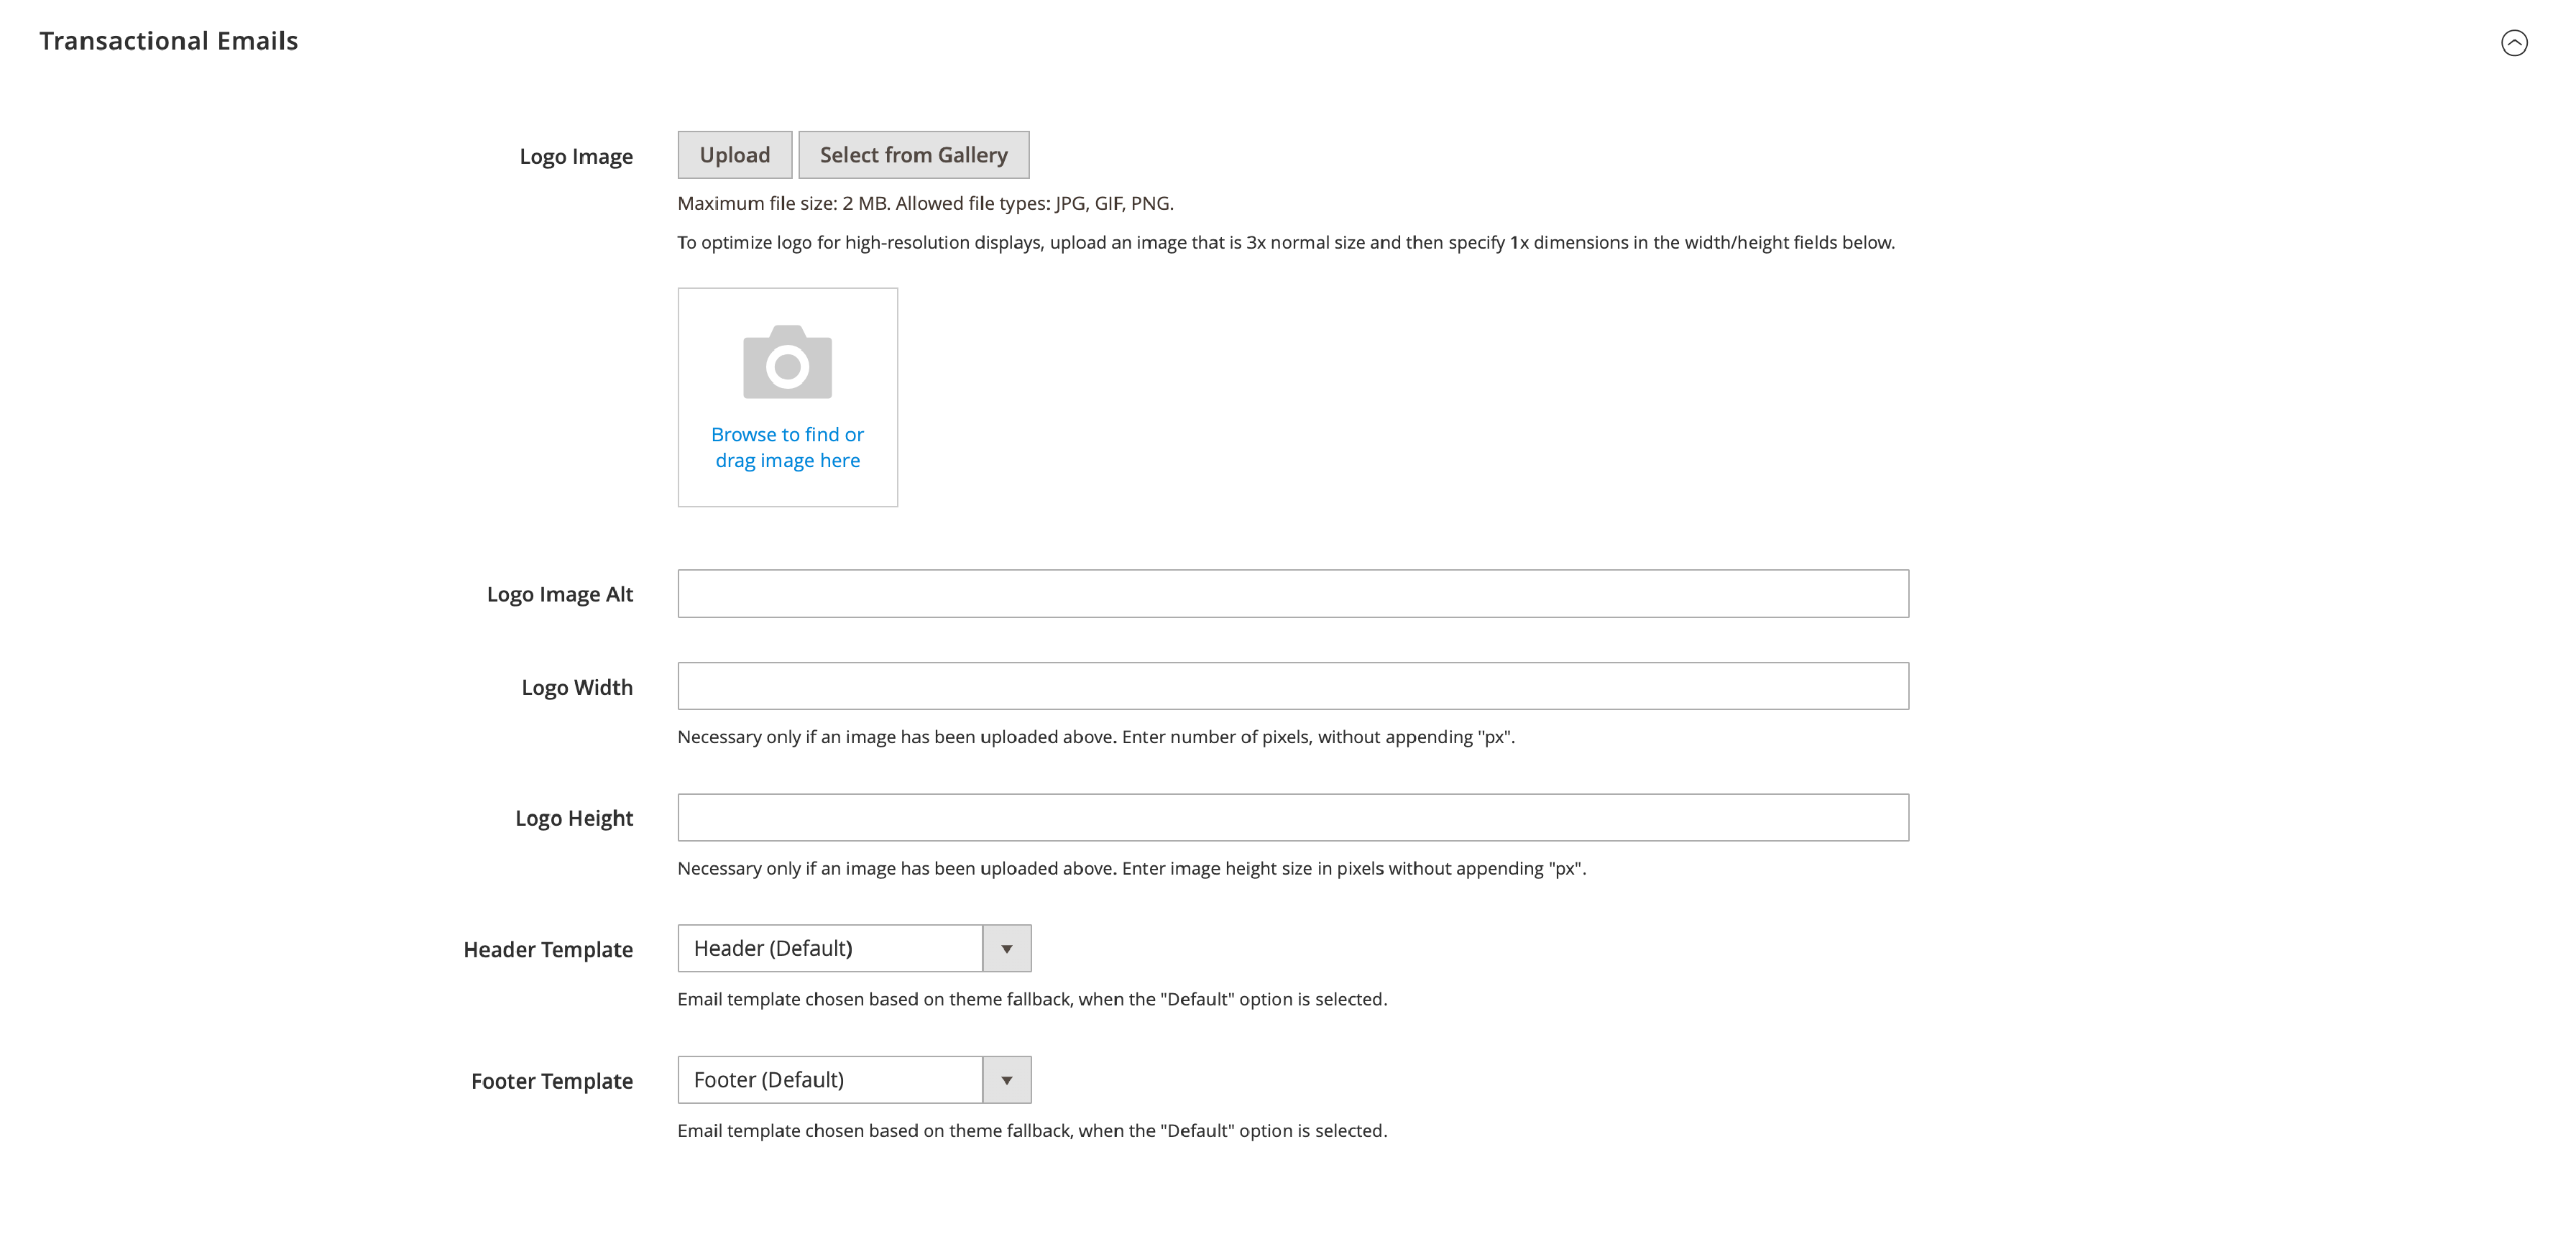
- Navigate to the 'Transactional Emails' section.
- Upload a new logo image or select one from the gallery.
- Set the logo image alt text, width, and height.
- Choose the header and footer templates.
- Click 'Save Configuration' to finalize the changes.
Monitoring and Analyzing Sales Emails
Monitoring transactional emails can help you optimize your communication strategy. To analyze your sales email performance, follow these steps:
- Log in to the Magento Admin Panel.
- Navigate to Reports > Sales > Sales Emails.
- Review the data and look for trends or areas that need improvement in your sales email performance.
Using Included Template Styles Variables
Magento 2 offers built-in template style variables. It creates a consistent look and feels across your transactional emails. To make use of these variables, follow these steps:
-
When customizing your email Magento templates, refer to the included template styles variables in the 'Template Styles' box.
-
Utilize these variables to ensure your email designs align with your store's brand.
Store Configuration and Multi-Store Management
Magento 2 allows you to manage multiple stores from a single admin panel, offering different email templates and settings for each store view. To configure your stores and manage different email templates, follow these steps:
- Log in to the Magento Admin Panel.
- Navigate to Stores > Settings > Configuration.
- Select the store view you want to configure from the 'Store View' dropdown menu at the top of the page.
- Configure the sales emails, email templates, and other settings. Add all details needed for the selected store view.
- Click 'Save Config' to apply the changes.
FAQ Section
1. How do I create email templates in Magento 2?
Go to Marketing > Communications > Email Templates in the Admin Panel to create email templates. Click 'Add New Template' and fill out the template information. Save the template when finished.
2. Where can I find email templates in Magento 2?
You can find email templates by navigating to Marketing > Communications > Email Templates in the Magento Admin Panel.
3. How do I style email templates in Magento 2?
To style email templates, edit the 'Template Content' and add CSS in the 'Template Styles' box when customizing a template.
4. Where is the email template file in Magento 2?
Email template files are in the 'app/design/frontend/{Vendor}/{Theme}/Magento_Email/email' directory of your Magento 2 installation.
5. How do I add a custom email logo in Magento 2?
Go to Content > Design > Configuration and choose the configuration scope for which you want to customize the email logo. Upload a new logo image or add a file named logo_email.png to your theme. Set the logo image alt text, width, and height.
6. How do I customize the email header and footer templates in Magento 2?
To customize the email header and footer templates, navigate to Stores > Settings > Configuration > General > Design, and open the 'Email' section. Set the custom header and footer templates for your emails.
7. How do I configure sales emails in Magento 2?
Go to Stores > Settings > Configuration > Sales > Sales Emails in the Admin Panel to configure sales emails.
You can adjust the settings for various sales email types, like order confirmations and shipment notifications.
8. What is the "if else" conditional statement in email templates, and how can I use it?
The "if else" conditional statement in email templates allows you to display different content based on certain conditions. For example, you can use it to show a specific message for a first-time customer and another message for a returning customer.
To use the "if else" statement, insert the appropriate code snippet in the 'Template Content' box while customizing the email template.
Tips to Effectively Customize Magento Email Templates
-
Brand consistency Ensure your email templates align with your store's overall branding, including colors, fonts, and logo.
-
Personalize Use variables to tailor the content for each recipient. It makes the emails more relevant and engaging.
-
Mobile-friendly Ensure your email templates are responsive and display well on various omnichannel devices. It includes smartphones, IoT devices, and tablets.
-
Test and preview Always preview your email templates before sending them to customers. Ensure they appear correctly, and the links are functional.
Summary
Customizing and managing email templates in Magento 2 is essential for your online store. It ensures that customers receive consistent and well-designed communication regarding their online shopping experience.
Following the steps outlined in this tutorial, you can create and customize email templates. It will help align with your brand identity and improve customer engagement.
Check out Magento tutorials for more helpful guides!


