
Magento 2 Adobe Stock Integration: Steps to Add Images
How can you enhance the shopping experience of your Magento 2 website? Magento 2 Adobe stock integration is a vast repository of assets for Magento users. This tutorial uncovers what Magento 2 Adobe stock integration is and its benefits.
Key Takeaways
-
Learn about Magento 2 Adobe stock integration, a feature that enhances the visual appeal of eCommerce websites.
-
Streamline content acquisition, saving time for website administrators.
-
Improve product presentations, leading to higher engagement and conversion rates.
-
Step-by-step instructions on configuring and utilizing Adobe stock integration within Magento 2.
What is Magento 2 Adobe Stock Integration?
Adobe stock Magento integration is a feature for the users of the Magento 2 eCommerce platform. It allows them to access Adobe Stock's vast library of high-quality assets directly within their Magento interface.
It is a stock photography service that offers millions of:
- Royalty-free images
- Graphics
- Videos
- Templates for various creative projects.
Magento 2 users can search for and select Adobe stock images to use in their online stores without leaving the Magento admin panel. This visual content can be integrated into:
- Product pages
- Blog posts
- Banners
- Other areas of the website.
It streamlines the entire process and enhances the overall aesthetic appeal and user experience.
Benefits of Magento 2 Adobe Stock Integration
1. Access to High-Quality Visual Content
Integrating Adobe stock with Magento 2 helps users gain access to an extensive collection of visually appealing content. These can be applied directly within the Magento admin panel. It enhances the website's design and product presentations.
2. Streamlined Content Acquisition
Users don’t have to browse Adobe stock separately and download images manually. This streamlines the content acquisition process and saves time for website administrators.
3. Enhanced Product Presentations
High-quality images play a crucial role in showcasing products effectively. Adobe Stock's library of professional-grade visuals allows Magento 2 users to improve the presentation of their products. This leads to higher engagement and conversion rates.
4. Improved User Experience
Visually appealing content enhances the overall user experience of an eCommerce website. Integrating Adobe Stock with Magento 2 helps website administrators create visually stunning pages and promotional materials. This enhances the browsing experience for customers.
5. Increased Brand Consistency
Adobe Stock offers a wide range of images that align with different brand aesthetics and styles. It helps Magento 2 users maintain brand consistency across their website's visuals. This can be done by selecting images that resonate with their brand identity and messaging.
6. Legal Compliance
Adobe Stock provides licensing options that ensure legal compliance when using images for commercial purposes. The integration with Magento 2 simplifies the licensing process. It allows users to purchase and manage licenses directly within the Magento admin panel.
This helps avoid potential legal issues related to copyright infringement.
7. Seamless Workflow
Adobe Stock streamlines the content management workflow for Magento 2 users. They can search for, license, and insert images into their website's content seamlessly.
It eliminates the need to switch between different platforms or applications.
How to Add Adobe Stock Images
Step 1: Configure the Adobe Stock integration
-
Log in to your Magento 2 admin panel.
-
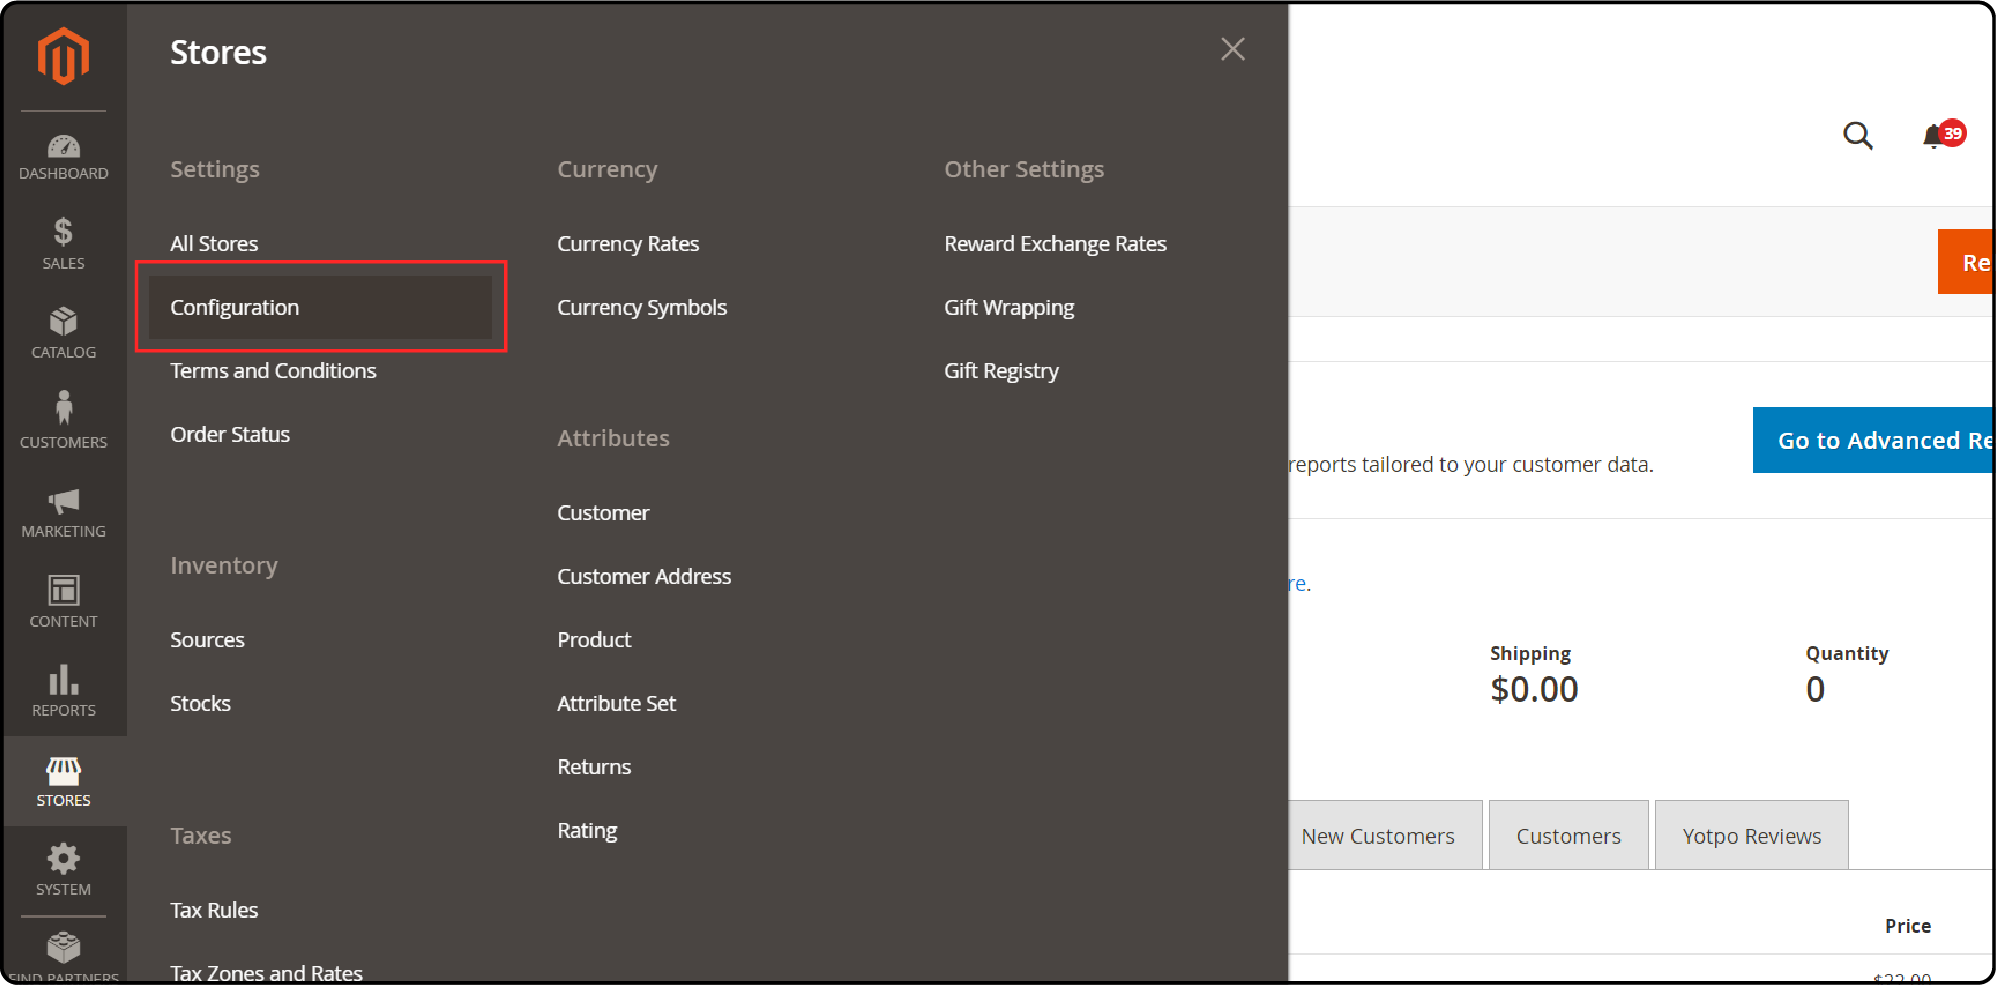
Navigate to Stores > Settings > Configuration.
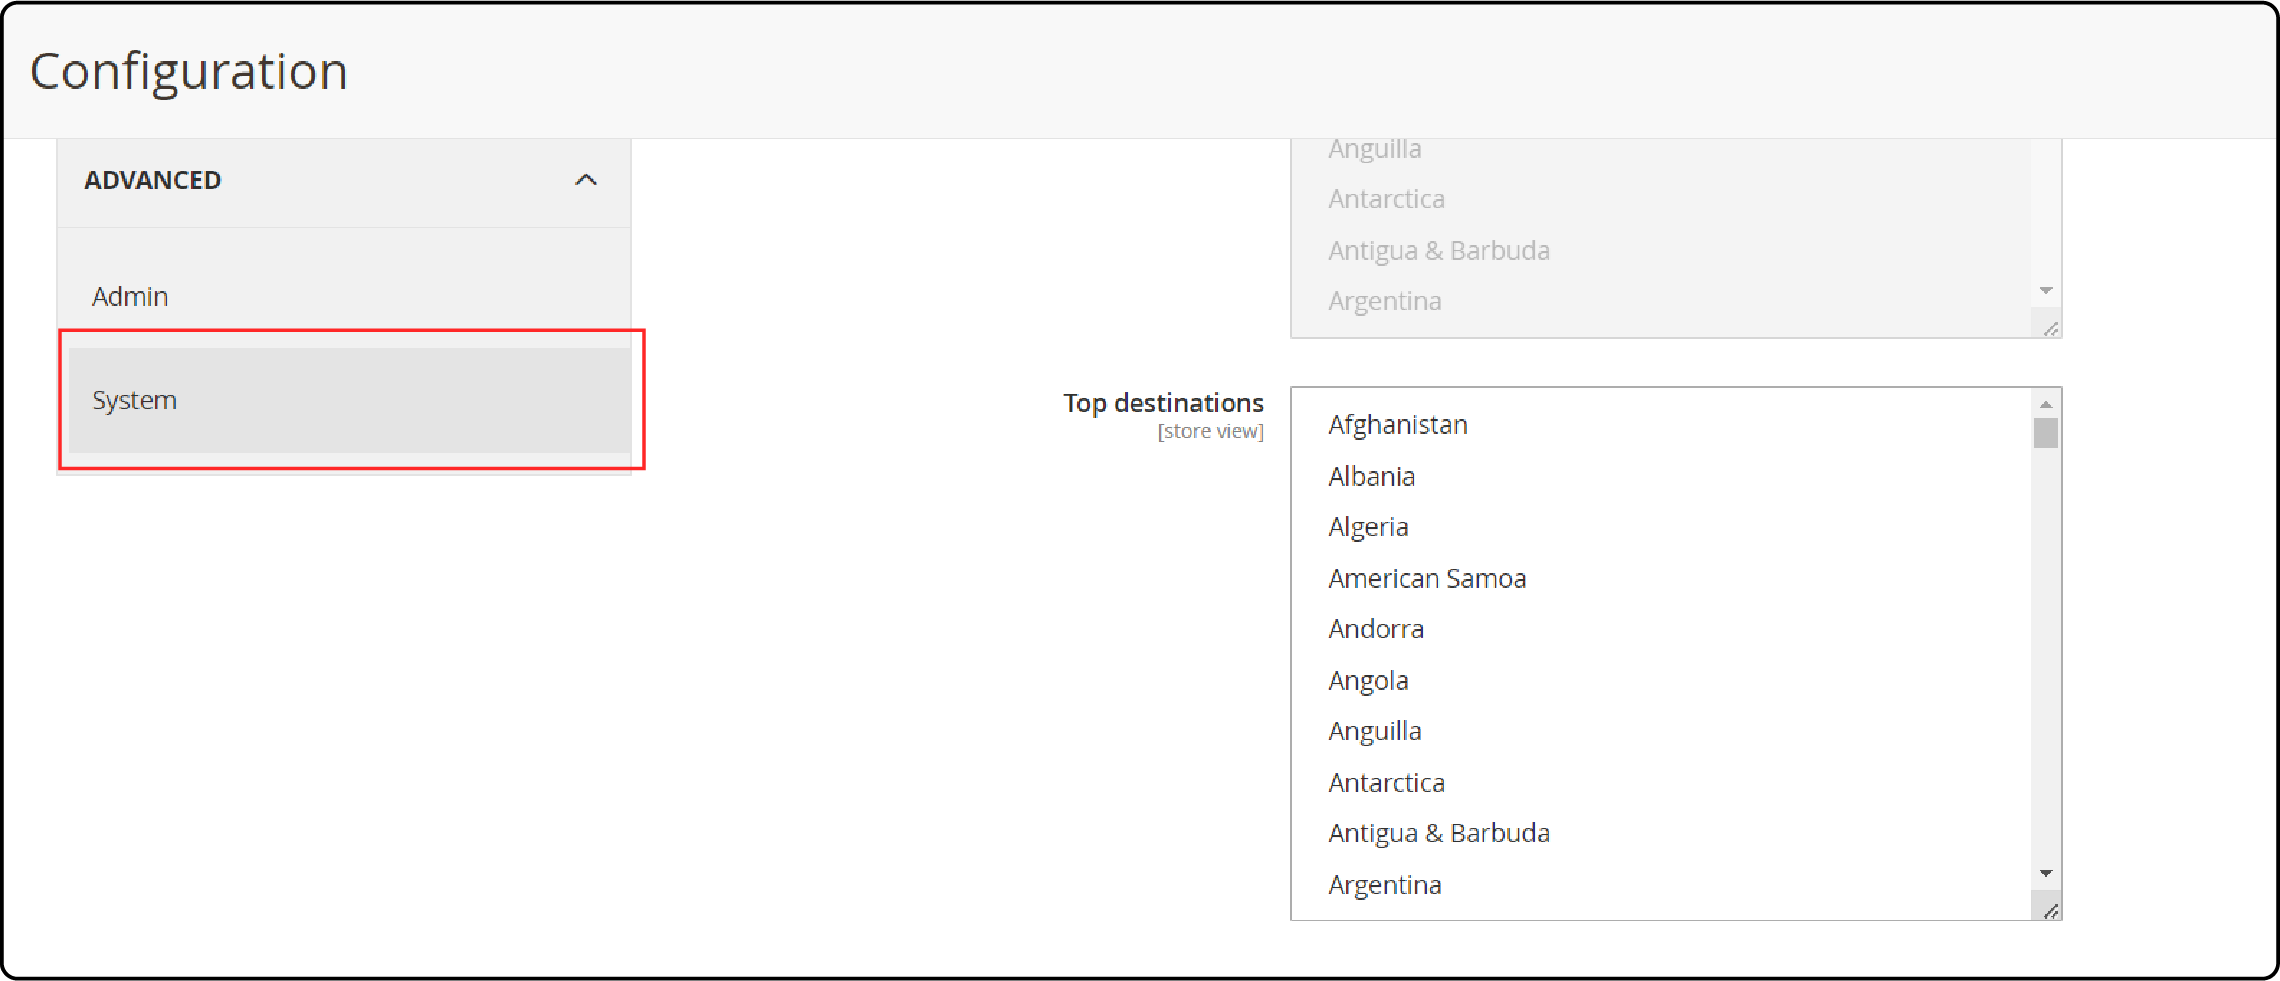
- In the left panel, expand the Advanced section and choose System.
-
Then, expand the Adobe Stock Integration section.
a. Set Enabled Adobe Stock to Yes.
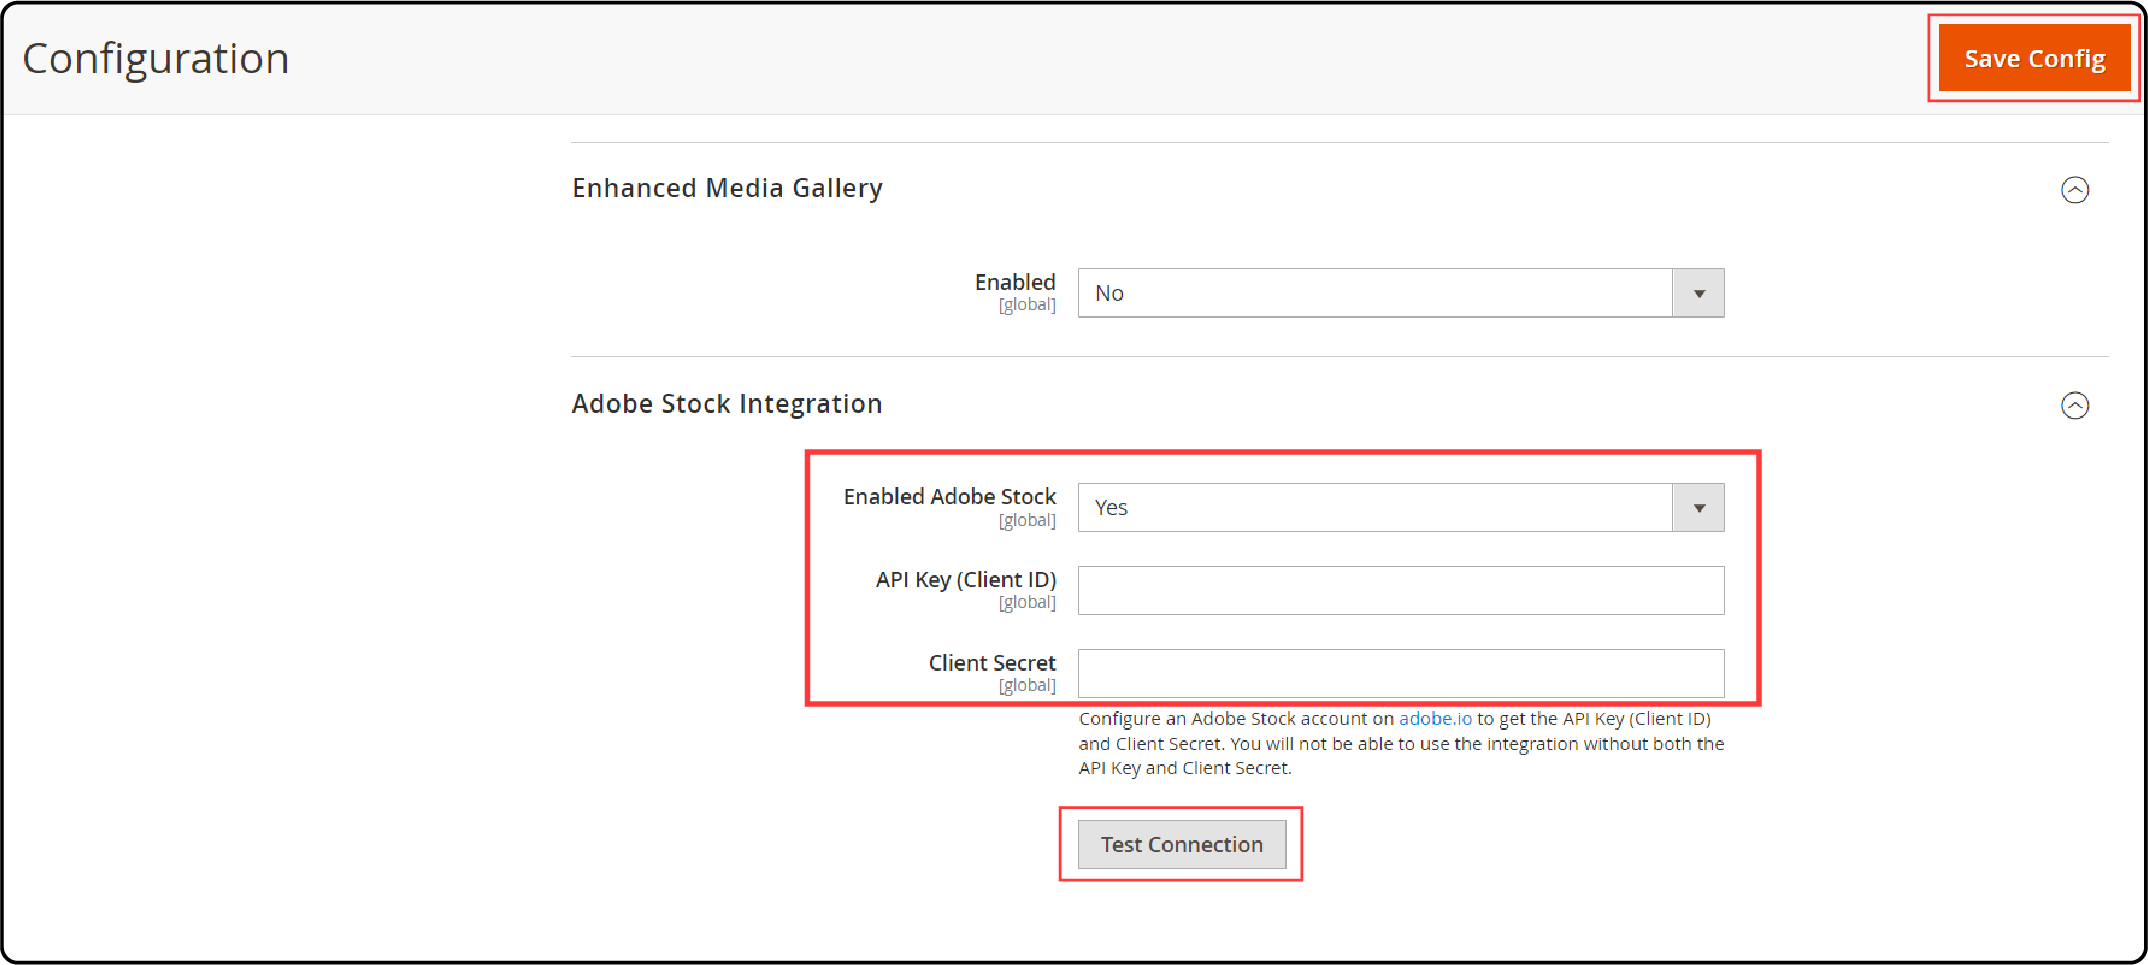
b. Enter your API Key (Client ID) provided by Adobe Stock.
c. Enter your Client's Secret.
d. Click on the Test Connection button to validate your keys.
If your credentials are valid, you should see a green Connection Successful message.
e. Click on the Save Config button to save your configuration settings.
Step 2: Access Adobe Stock Integration

Navigate to Content > Adobe Stock Integration in the Magento admin panel.
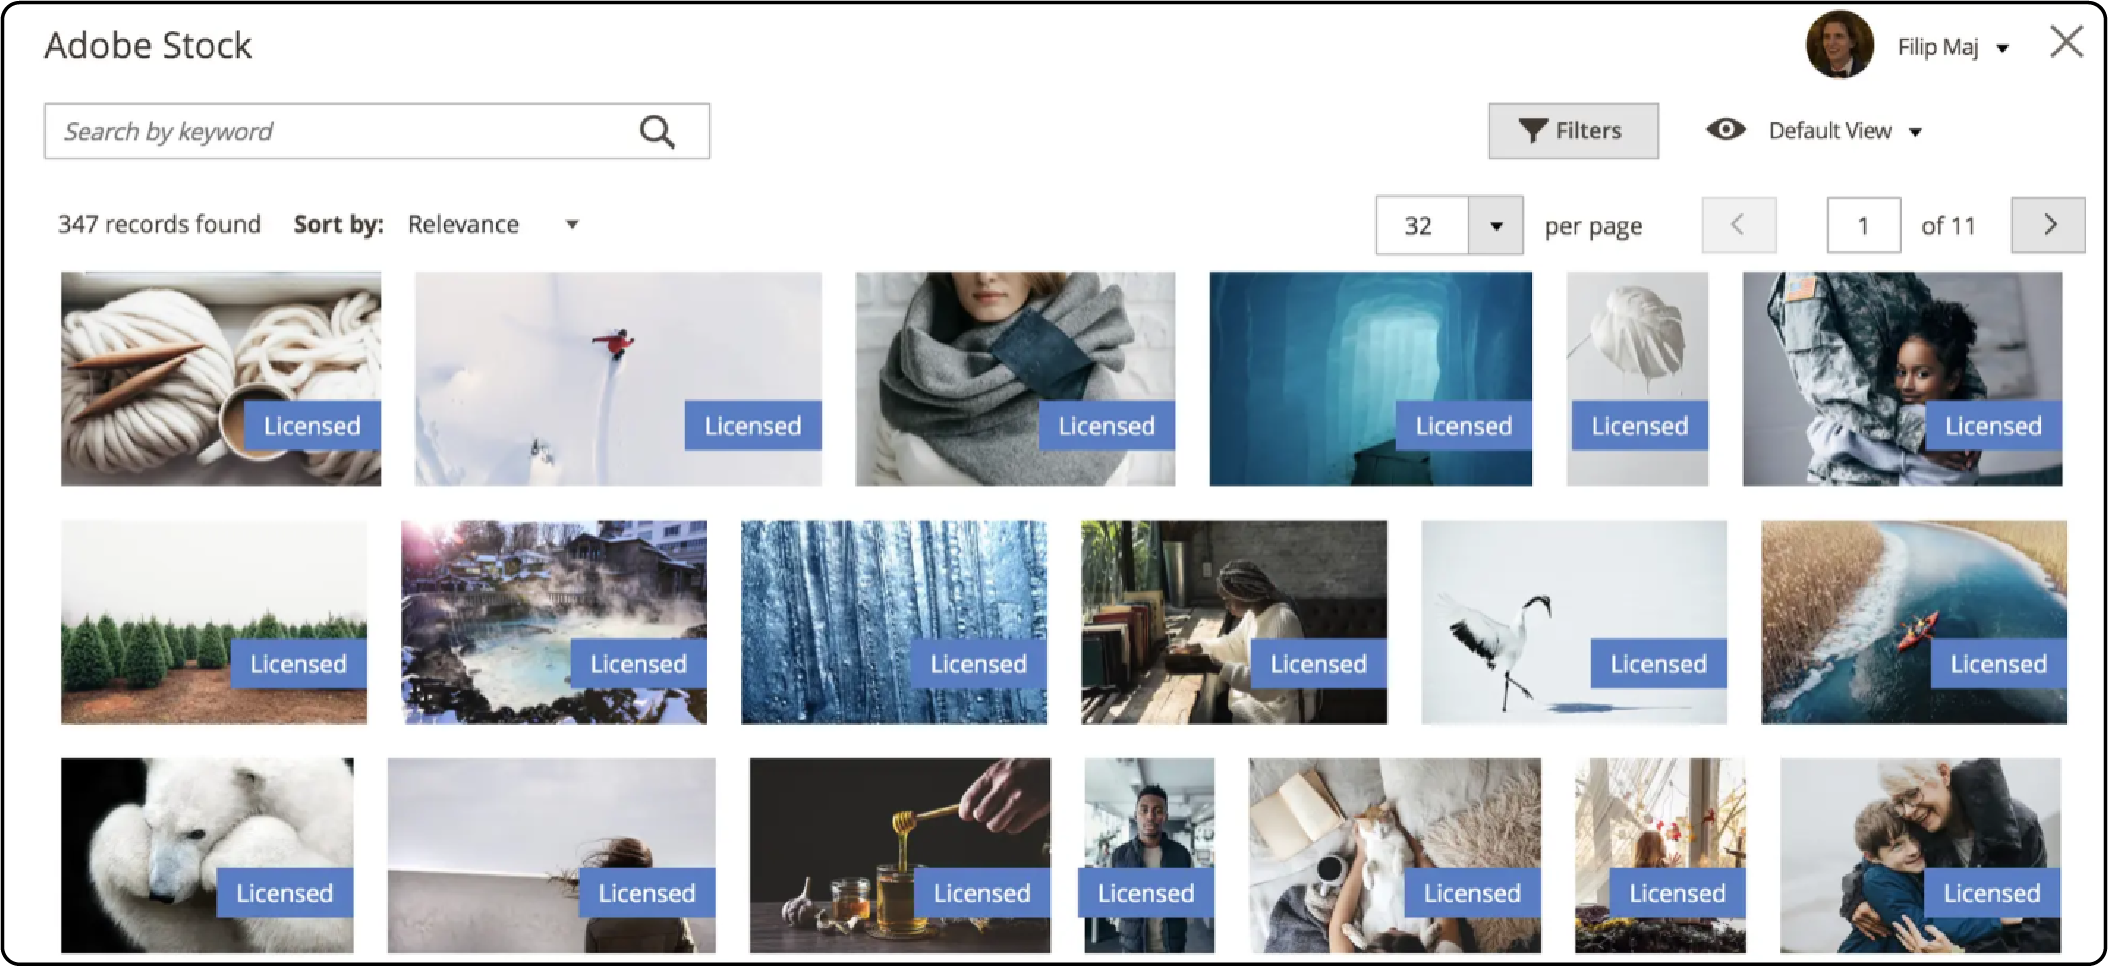
Step 3: Search for Images
-
Use the search bar to enter keywords or phrases related to the type of images you're looking for.
-
Refine your search using filters like categories, colors, orientations, etc., to find the most relevant images.
Step 4: Preview Images
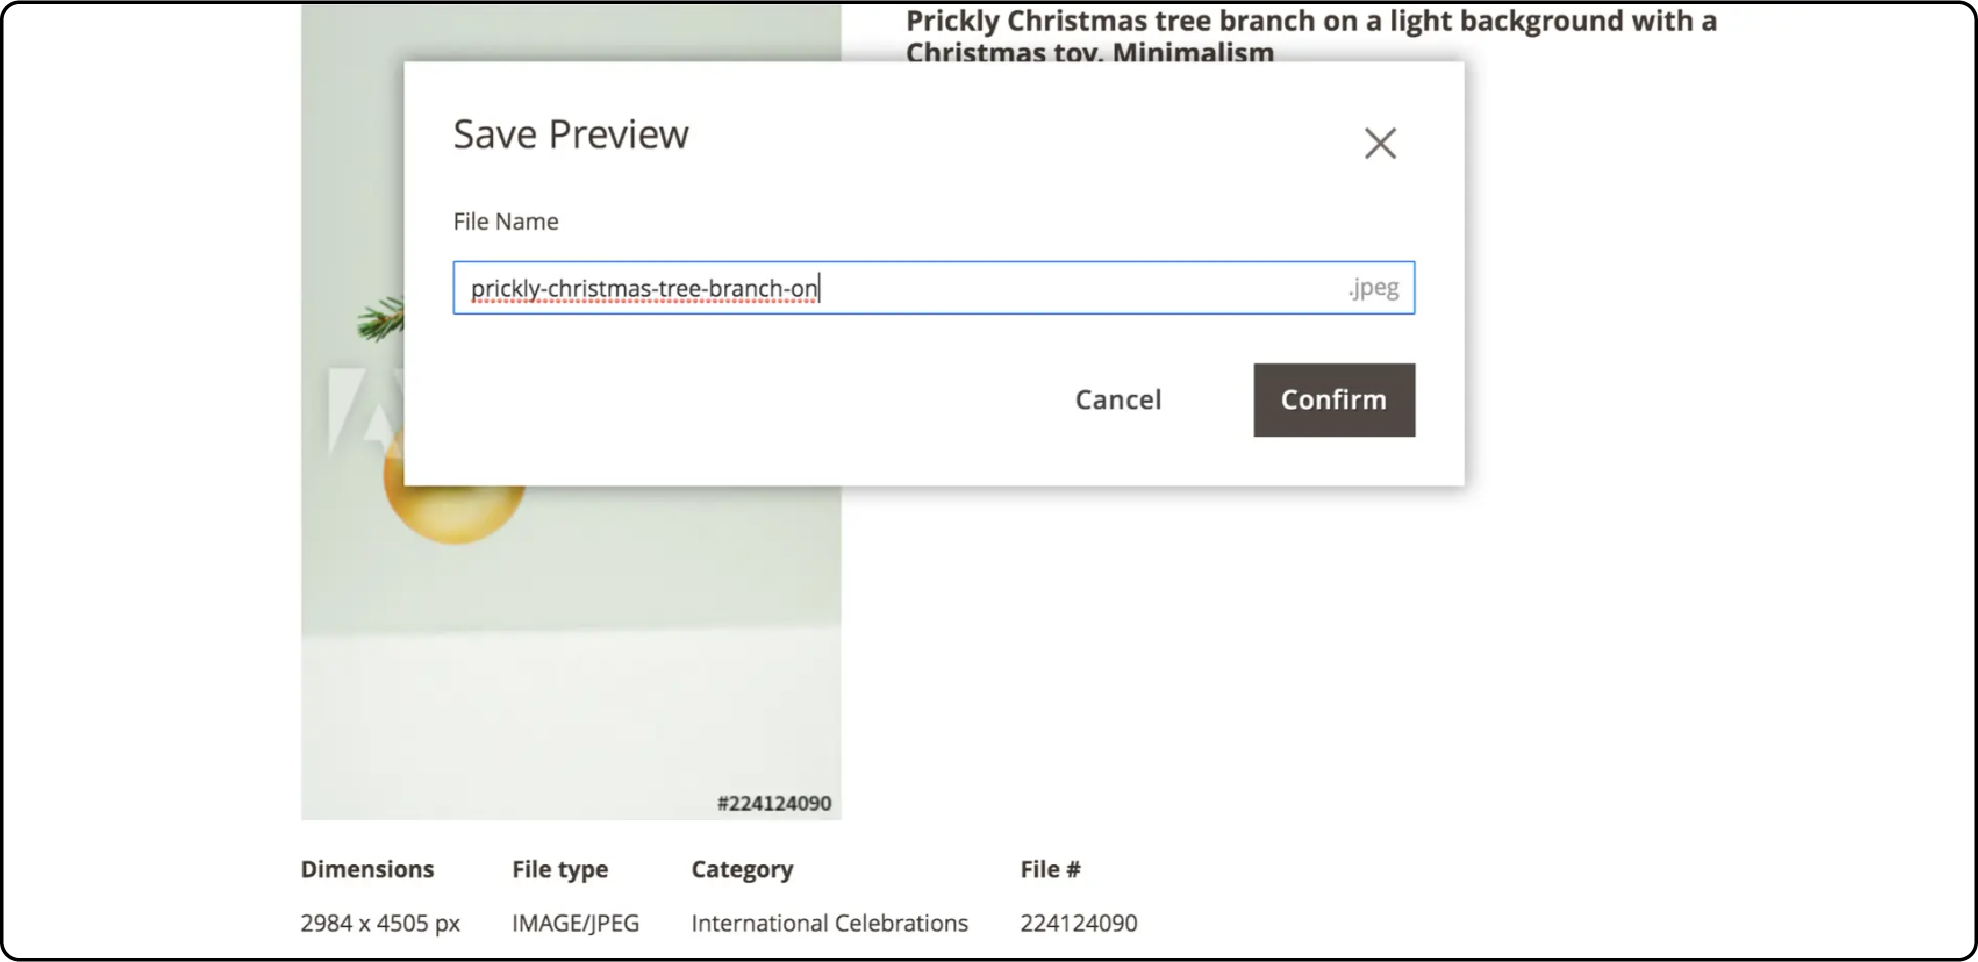
-
Click on the image thumbnails to preview them.
-
Ensure that the images meet your requirements in terms of quality, relevance, and suitability for your website.
Step 5: Select Licensing Options

-
Choose the appropriate licensing options for the selected images (e.g., standard or extended licenses).
-
Make sure to review the licensing terms and conditions provided by Adobe Stock.
Step 6: Add Images to the Cart
-
After selecting the licensing options, click on the Add to Cart button to add all the images to the cart.
-
Review the items in your cart to ensure they're correct before proceeding.
Step 7: Complete Purchase
-
Once all the desired images are added, click on the Checkout button to proceed with the purchase.
-
Then, complete the purchase process.
Step 8: Download Images
- Download the bought images to your local computer or server.
Adobe Stock typically provides options to download images in various resolutions and file formats.
Step 9: Upload Images to Magento 2
-
Log in to your Magento 2 admin panel.
-
Go to Content > Media > Images.
-
Click on Add New or Upload Files to upload the Adobe Stock images from your computer to the Magento media library.
Step 10: Insert Images into Content
-
Navigate to the content area where you want to insert the images (e.g., product pages, category pages, banners, blog posts).
-
Click on the Insert Image button and select the desired image from the media library.
-
Customize the appearance and placement of the images as needed using the editing tools provided within Magento.
FAQs
1. Where are Adobe Stock assets stored after integration with Magento 2?
Once Adobe Stock assets are integrated into Magento 2, they are stored within the default media storage of the Magento installation. This ensures that the assets are readily accessible within the Magento admin panel.
2. Can I change the default media storage location for Adobe Stock assets in Magento 2?
Magento 2 allows users to configure custom media storage locations if needed. Adobe Stock assets are generally stored in the default media storage. Advanced users or those with specific storage requirements can modify the configuration settings to designate a different storage location.
Summary
Magento 2 Adobe Stock integration enhances the visual appeal of websites with an extensive collection of appealing content. It also uncovers several other points, including:
-
Users can browse, license, and insert Adobe Stock assets directly within the Magento admin panel.
-
Professional-grade visuals lead to enhanced product presentations, user experience, and conversion rates.
-
Selecting images aligned with brand identity helps maintain brand consistency and ensure legal compliance.
-
Ensure brand consistency and legal compliance with licensing options provided by Adobe Stock.
Ready to optimize your Magento site? Consider managed Magento hosting for seamless integration and top-notch performance.


