4 Steps to Create Custom Widget in Magento 2
Wondering how to improve your Magento store navigation? Learn to create custom widget in Magento 2 to enhance Magento UX and site functionality. Creating custom widgets keeps your audience engaged and navigate your store with ease. This tutorial shows you the significance of widgets and how to create them in 4 steps.
Key Takeaways
-
Create unique custom widgets in Magento 2 to significantly enhance store appearance and user experience.
-
Explore the significance of Magento 2 widgets, go through the creation process, and reap the associated benefits.
-
Acquire valuable insights into the flexibility offered, leading to an improved UX and Magento SEO.
-
Follow just four simple steps to create and implement custom widgets tailored to your needs effortlessly.
-
Ready to boost your Magento store? Explore managed Magento hosting for optimized performance.
What is the Magento2 Widget?
A widget in Magento 2 is a reusable element used to display dynamic content on website sections. It enhances design, user experience, and functionality by adding static or dynamic elements to CMS pages and blocks.
Widgets can be added to any CMS block in Magento 2 to showcase various content or elements, such as:
-
Real-time product information
-
Recent product lists
-
Promotional banners
-
Live flash elements embedded in content pages for event announcements
-
Customized advertising content
-
Social media elements like Facebook plugins or Twitter buttons
Why are widgets important?
Widgets play a key role in enhancing the visual appeal of your website and providing dynamic functionality to engage visitors. They allow you to easily customize your store's design and layout without any coding knowledge.
Key reasons to use widgets in Magento 2 include:
-
Improved user experience: Widgets help create interactive, engaging Magento websites. They make navigation easier for visitors, aiding in finding desired content.
-
Enhanced design: With widgets, you can easily add eye-catching elements to your website without changing the overall design. It allows you to keep your store's branding consistent. You can add new elements to keep your design fresh.
-
Increased functionality: Widgets make it possible to add various features and functionalities to your website without any coding knowledge. You can easily add social media buttons, related product lists, or promotional banners with just a few clicks.
-
Time-saving: Instead of manually adding code for each element on your website, widgets enable you to create and add elements swiftly. It saves you time and effort. You can then focus on other essential aspects of your business.
-
Flexible customization: Widgets in Magento 2 offer a wide range of customizable options. You can adjust positioning, size, color, and more. This flexibility lets you tailor the appearance of each widget to align with your store's branding and design aesthetic.
How to Create Custom Widget in Magento 2
1. Widget declaration
etc/widget.xml
         xsi:noNamespaceSchemaLocation="urn:magento:module:Magento_Widget:etc/widget.xsd">
    <widget class="ExampleCorp\Learning\Block\Widget\Test" id="orange_test_widget">
        <label>My New Widget</label>
        <description>This is a test widget!!!</description>
        <parameters>
            ...
        </parameters>
        <containers>
            ...
        </containers>
    </widget>
</widgets>
Add a dependency to Magento_Widget in the module.xml file as well.
etc/module.xml
<sequence>
    <module name="Magento_Widget" />
</sequence>
...
2. Widget parameters addition
You can use any of these field types as a parameter:
-
text
-
select
-
multiselect
-
block
Include a text and a select field.
<widgets xmlns:xsi="http://www.w3.org/2001/XMLSchema-instance"
         xsi:noNamespaceSchemaLocation="urn:magento:module:Magento_Widget:etc/widget.xsd">
    <widget class="ExampleCorp\Learning\Block\Widget\Test" id="orange_test_widget">
        ...
        <parameters>
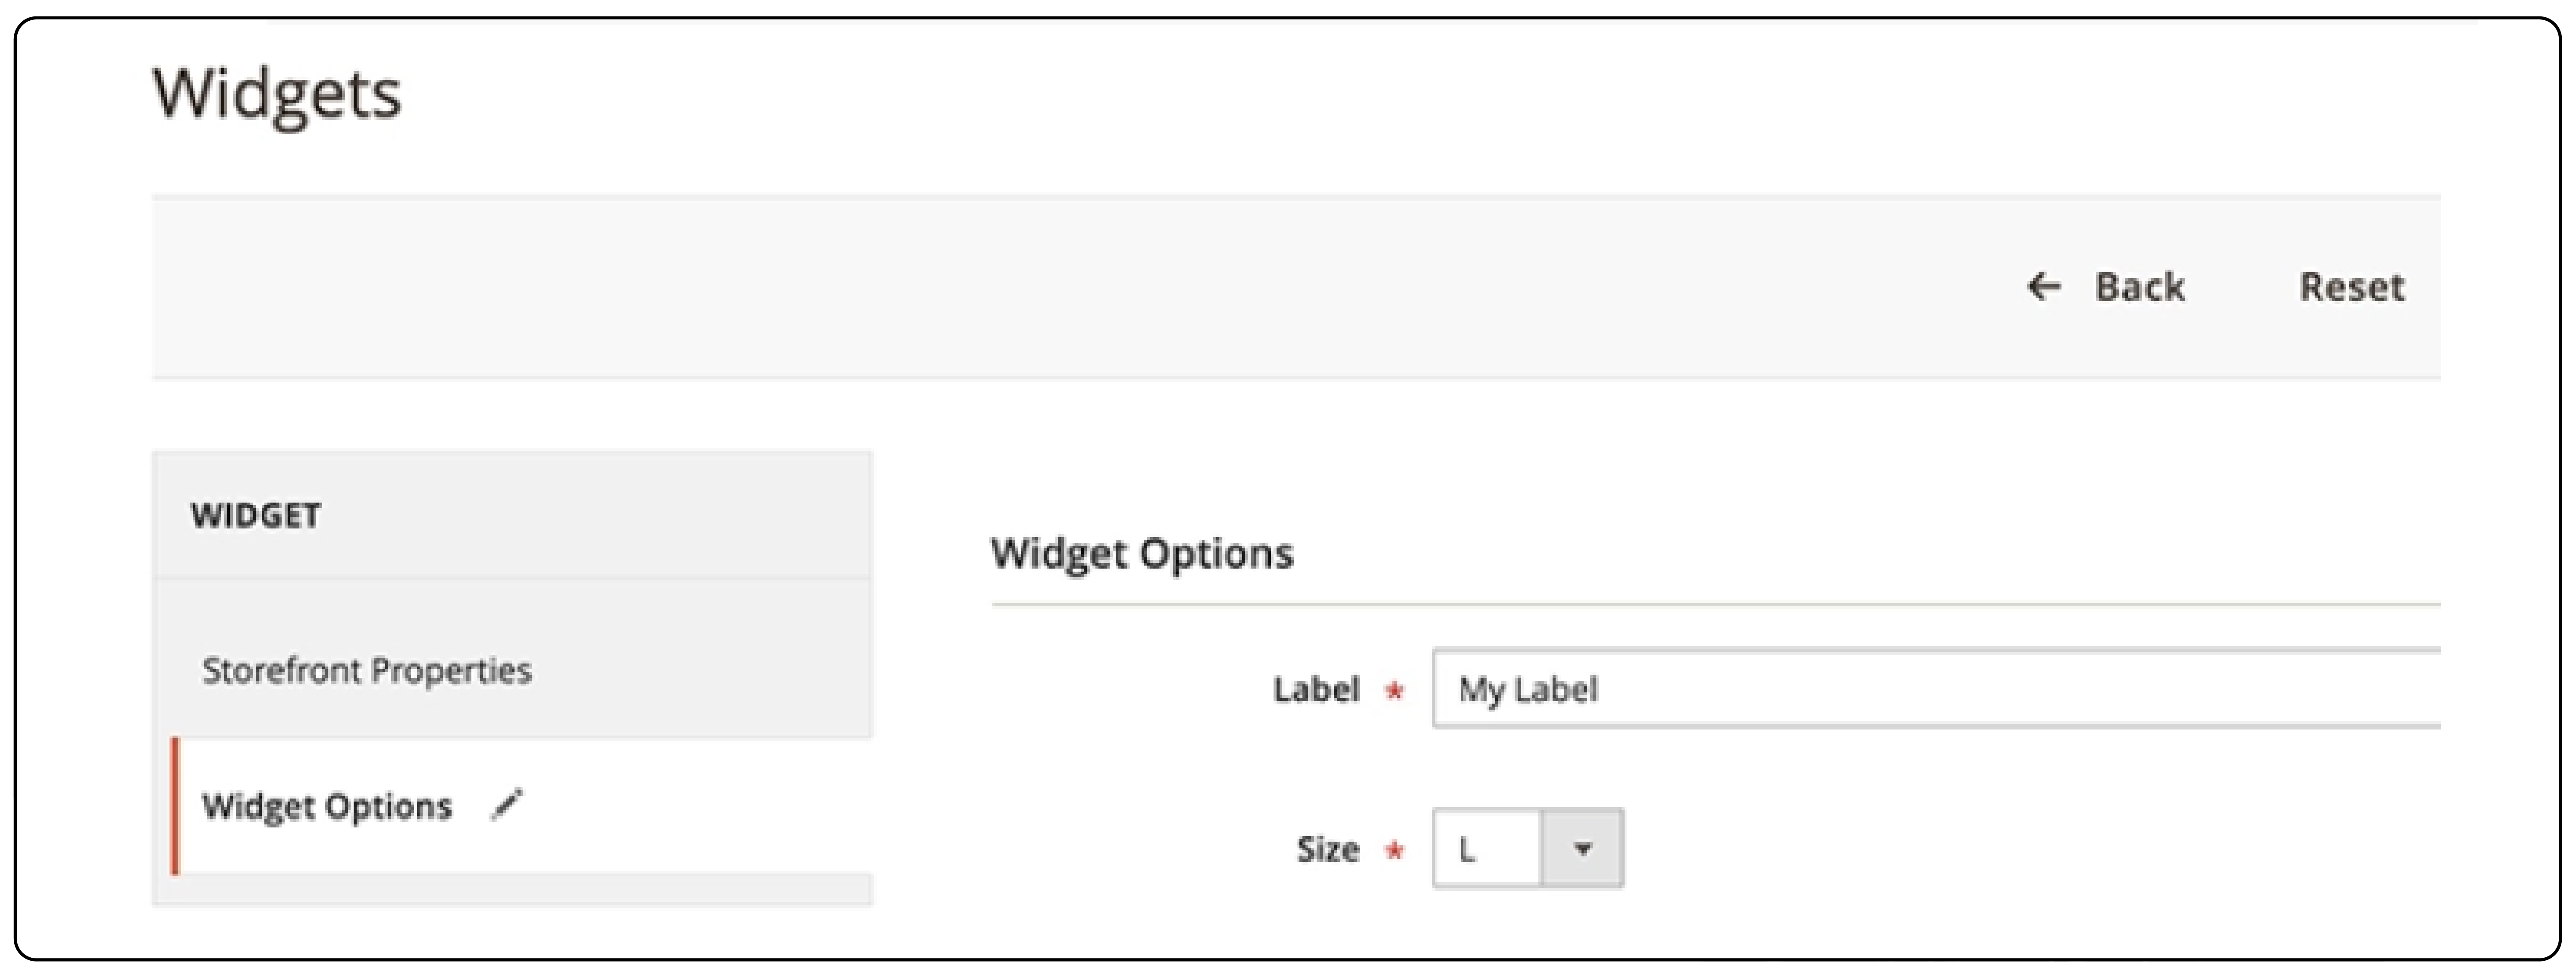
            <parameter name="title" xsi:type="text" required="true" visible="true" sort_order="10">
                <label>Label</label>
            </parameter>
            <parameter name="size" xsi:type="select" visible="true" required="true" sort_order="20">
                <label translate="true">Size</label>
                <options>
                    <option name="s" value="S">
                        <label>S</label>
                    </option>
                    <option name="m" value="M" selected="true">
                        <label>M</label>
                    </option>
                    <option name="l" value="L">
                        <label>L</label>
                    </option>
                </options>
            </parameter>
        </parameters>
    </widget>
</widgets>
3. Check the widget
Run the commands to apply the module dependency in module.xml.
bin/magento module:disable Vendor_Module
bin/magento module:enable Vendor_Module
Here Vendor_Module should replaced with module name.
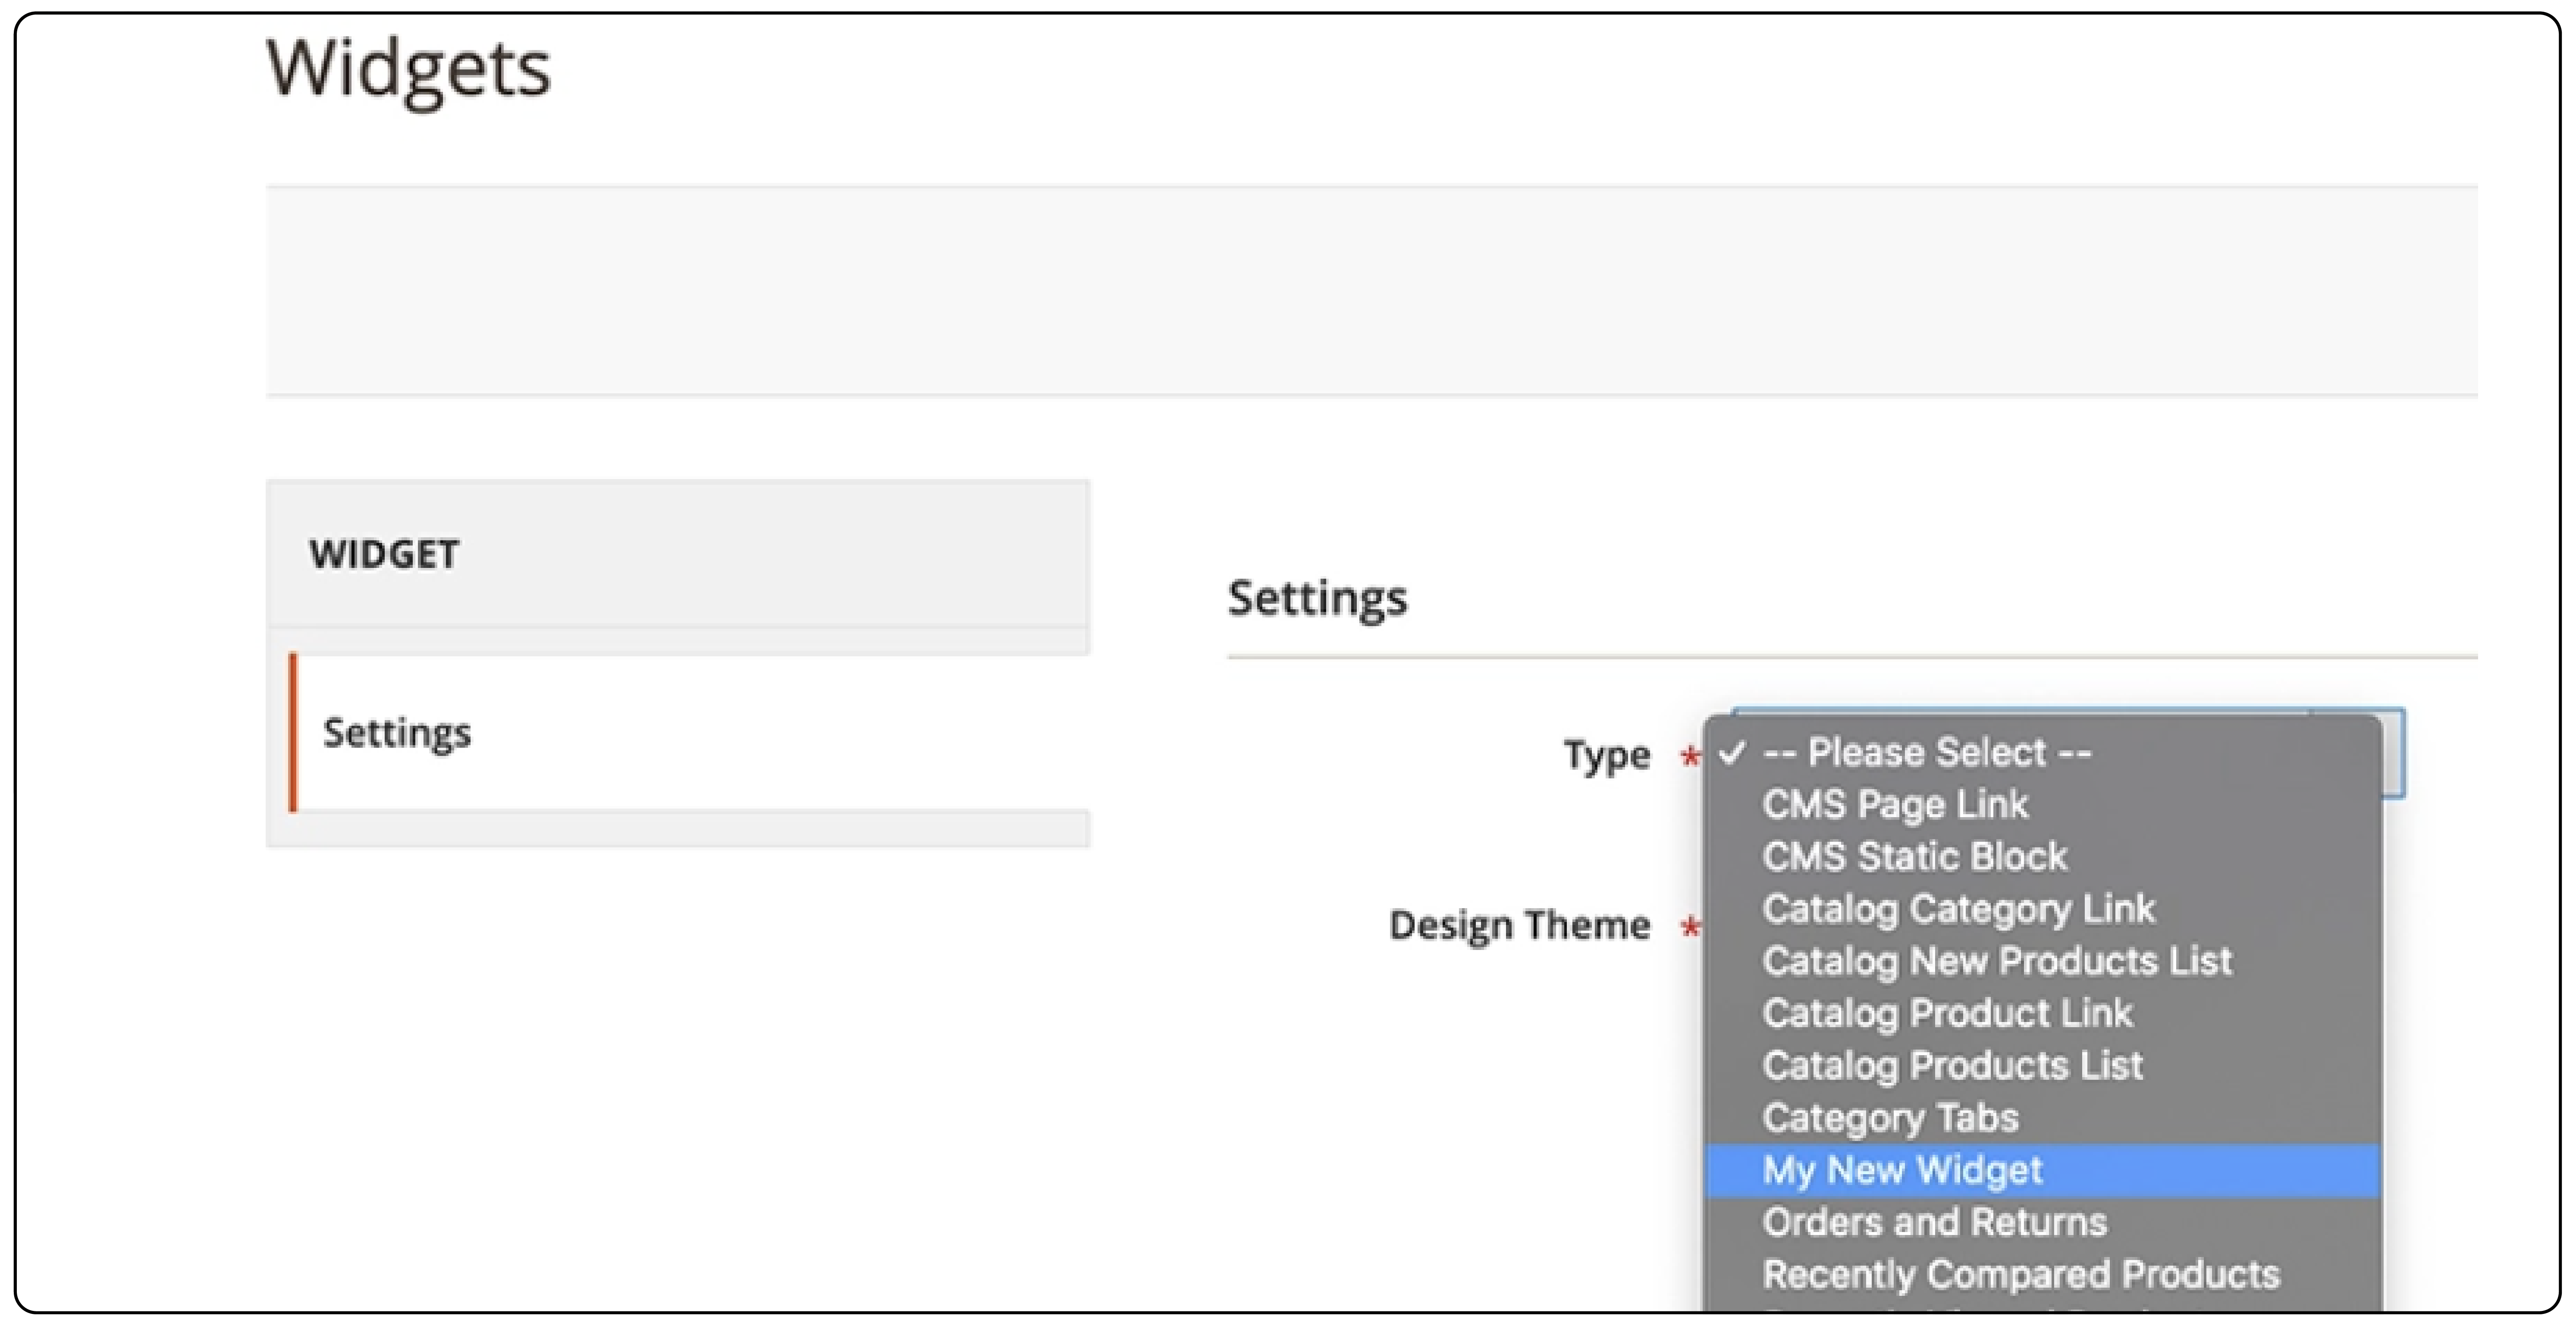
After clearing the cache, the new widget "My New Widget" will be accessible.

To display the widget on the homepage, choose the type and layout location, then access the widget's settings.

4. Create the block
Create the block class for rendering the widget on the frontend as provided during initialization.
namespace ExampleCorp\Learning\Block\Widget;

use Magento\Framework\View\Element\Template;
use Magento\Widget\Block\BlockInterface;

class Test extends Template implements BlockInterface
{
    protected $_template = "widget/test.phtml";
}
5. Create the template
Create the frontend widget data display template.
<?php
/** @var \Magento\Framework\View\TemplateEngineInterface $this */
/** @var \ExampleCorp\Learning\Block\Widget\Test $block */
/** @var \Magento\Csp\Api\InlineUtilInterface $csp */
/** @var \Magento\Framework\Escaper $escaper */
/** @var \Magento\Framework\View\Helper\SecureHtmlRenderer $secureRenderer */
?>
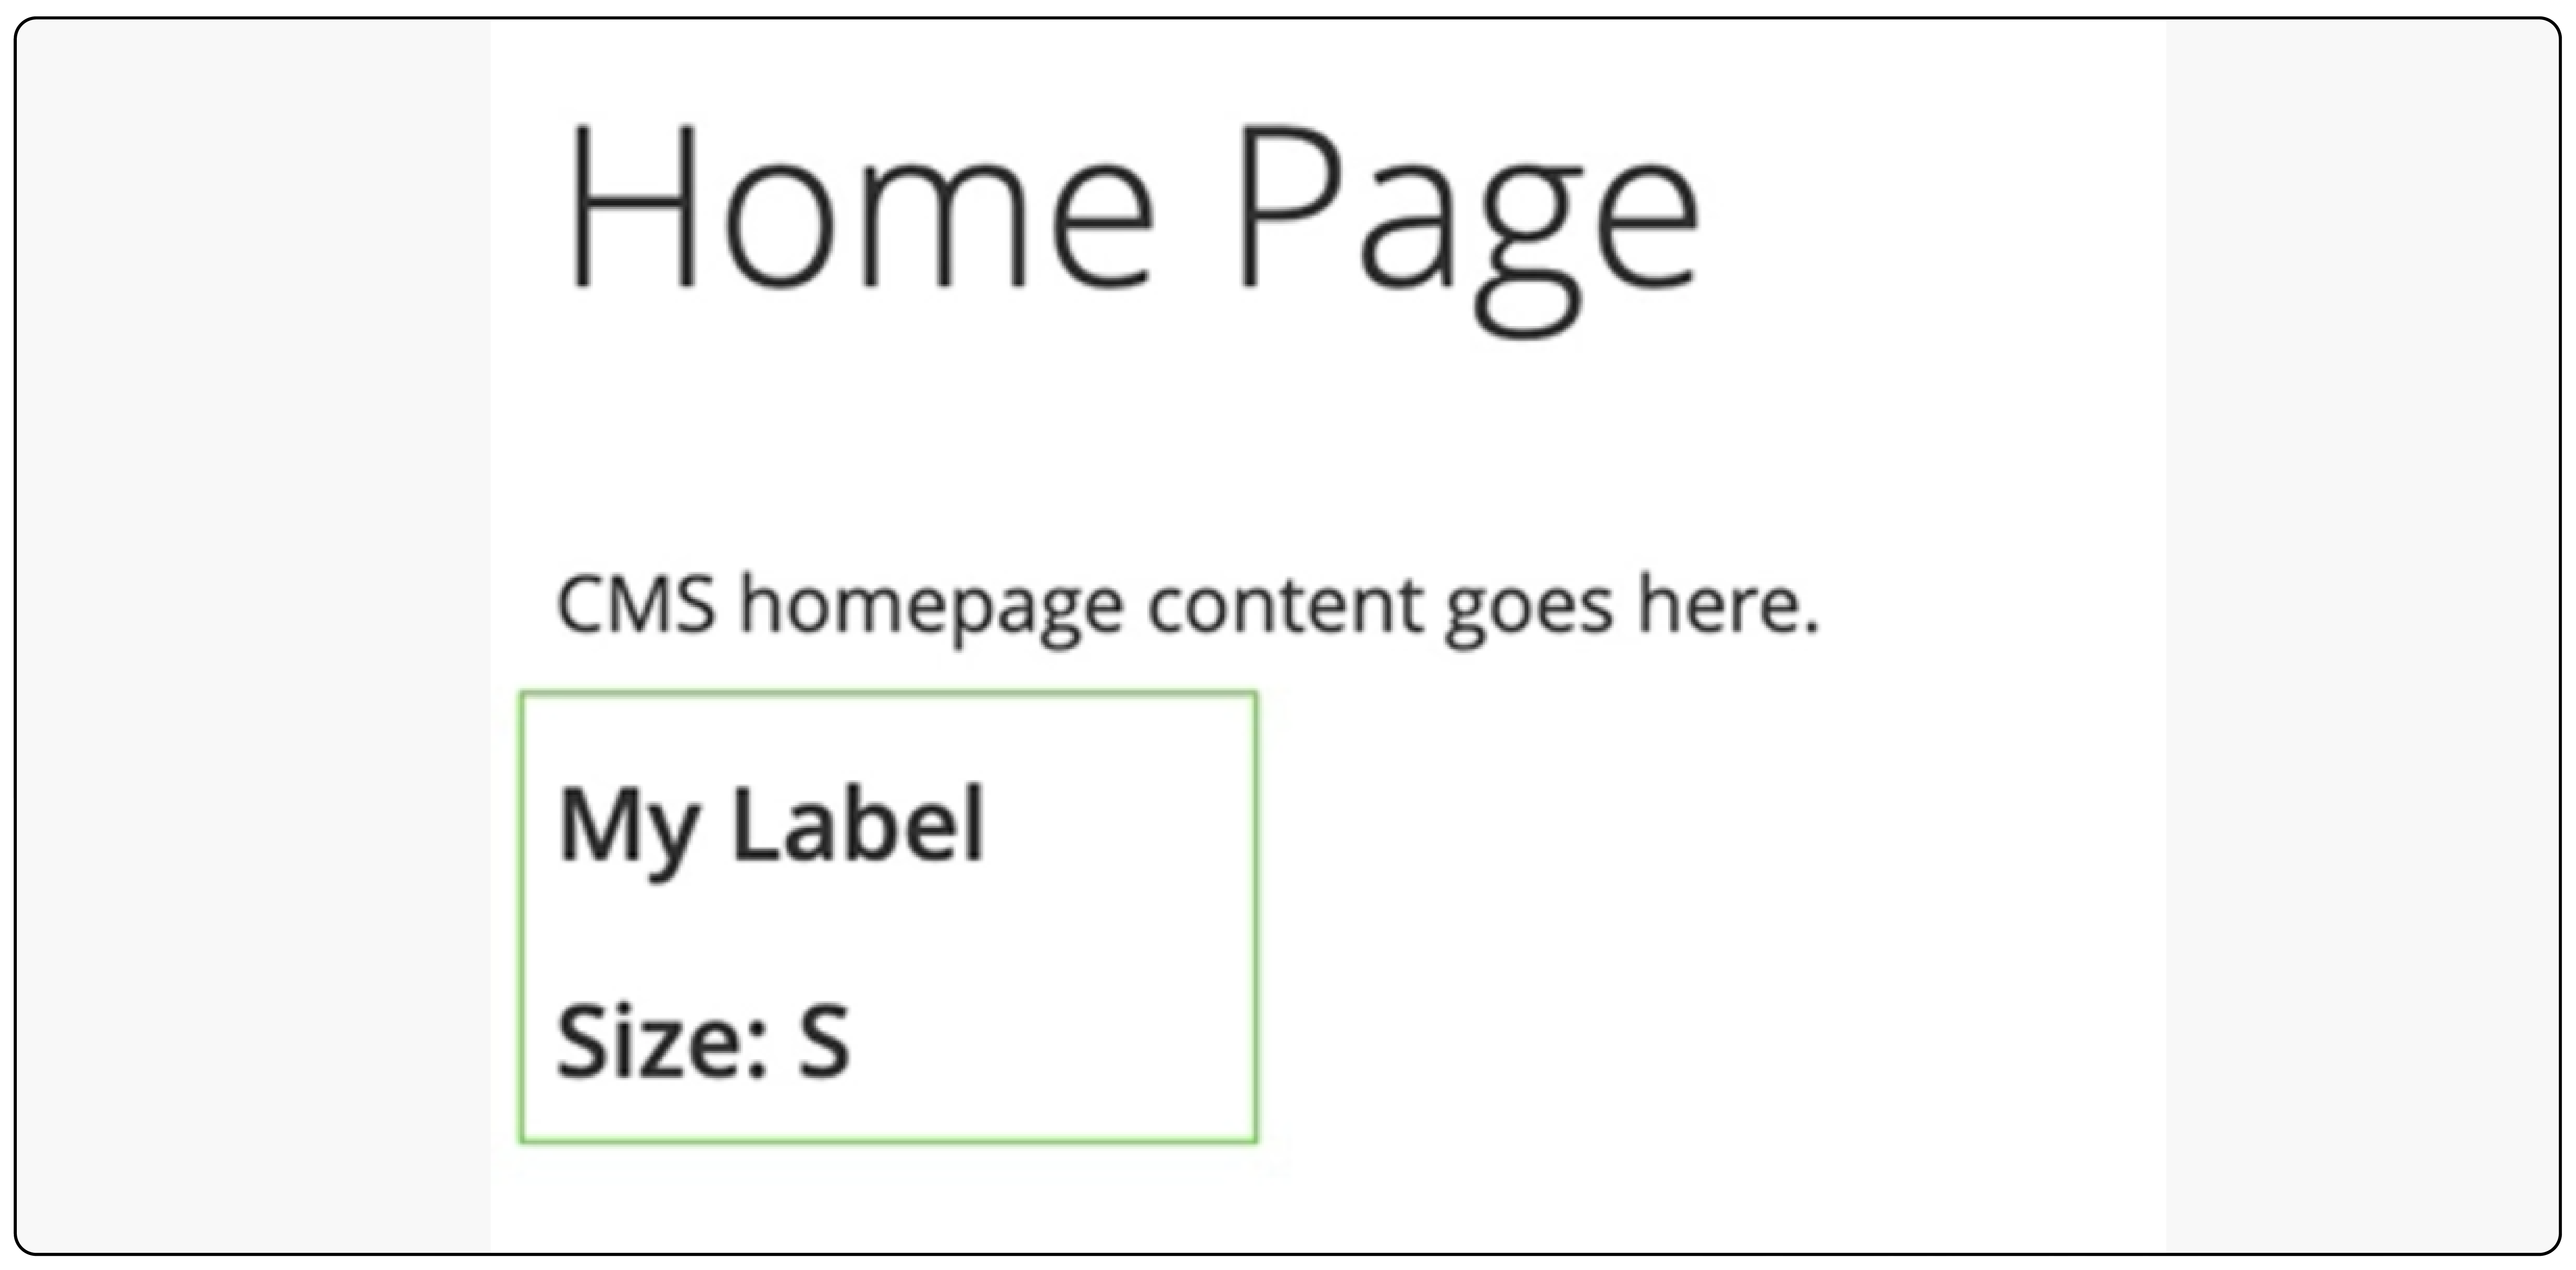
<h3><?= $escaper->escapeHtml($block->getData('title')) ?></h3>
<h3><?= $escaper->escapeHtml(__('Size:')) ?> <?= $escaper->escapeHtml($block->getData('size')) ?></h3>
6. Clean Cache
Clean the cache using this command:
bin/magento cache:clean
Result: The widget is now displayed on the frontend.

Benefits of Using Custom Widget in Magento 2
-
Flexibility in Content Presentation: Custom widgets in Magento 2 provide e-commerce sites with flexibility. They can display various content types like images, text, and videos. These widgets are tailored to match business needs and aesthetic preferences.
-
Improved User Experience: By integrating custom widgets, Magento 2 stores can enhance the Magento user experience. It leads to dynamic, interactive content, increasing customer engagement and satisfaction.
-
Easy Content Update: Widgets offer a user-friendly interface for updating content without coding. It simplifies content maintenance and refreshes for store owners.
-
Personalized Customer Interaction: Custom widgets can be configured to display personalized content. This content is based on user behavior or preferences. It creates a more personalized shopping experience.
-
Boosted SEO Performance: The addition of unique and relevant content through widgets can contribute to a website's SEO performance. It helps attract more organic traffic by improving search engine rankings.
Downsides of Not Using Magento Custom Widget
-
Limited Content Presentation: Failure to use custom widgets limits options for presenting content on the website. It can result in a static and unengaging shopping experience for customers.
-
Increased Coding Needs: Without the use of custom widgets, store owners need to rely on manual coding to update and maintain content. It can be time-consuming and requires technical expertise, which may only be available to some store owners.
-
Lack of Personalization: Not utilizing custom widgets means missing out on the opportunity to display personalized content splay.for customers. It can hinder customer engagement and make it difficult to stand out from competitors.
-
Negative Impact on SEO: With regularly updated and unique content, websites can improve in terms of SEO performance. It can lead to lower search engine rankings and decreased organic traffic.
-
Risk of Outdated Content: With the ease of updating content through widgets, store owners may be able to keep up with changing trends and customer preferences. It can result in outdated content that fails to engage customers.
FAQs
1. How can I create a widget in my Magento 2 store?
To create a widget in your Magento 2 store, you first need to define the widget in an XML configuration file within your module. It can be done in the 'etc' directory, as shown above.
Then, create a template file for the widget's frontend display. Create a Block class to manage the widget's backend logic. Lastly, add the widget to your CMS pages or static blocks via the admin panel.
2. What is a static block, and how can it be used with Magento 2 widgets?
A static block in Magento 2 is a content block. It can be inserted into CMS pages or used independently throughout the store. You can integrate Magento 2 widgets into static blocks. It allows you to display dynamic content, such as posts from your widget. It enhances the functionality and interactivity of your static content.
3. Can I add parameters to Magento 2 widgets? If so, how?
Yes, you can add parameters to Magento 2 widgets to make them more dynamic and customizable. When defining your widget in XML (as shown in the document), include <parameter> tags within the <parameters> section.
Specify attributes such as name, type, and label for each parameter. These parameters can then be managed from the Magento admin panel when adding the widget to a page or static block.
4. Where can I find resources or help for creating widgets in Magento 2?
A great place to start is the Magento stack exchange. It's a Magento community driven Q&A site for developers. Here, you can find discussions, insights, and troubleshooting tips related to creating widgets in Magento 2. Magento's official documentation offers comprehensive guides on widget development.
5. What are the essential commerce PHP extensions for developing a widget in Magento 2?
Developing widgets in Magento 2 requires a standard set of Magento PHP extensions typically used in Magento development. These include but are not limited to PDO_MySQL, mbstring, into, and libxml.
Ensuring these extensions are installed and enabled on your server is important for the development and operation of Magento 2 widgets. It is also essential for the overall functionality of your Magento 2 store.
Summary
Creating custom widgets in Magento 2 optimizes UX, SEO, and functionality for e-commerce sites. Neglecting them risks a dull store and lowered engagement.
Here's an overview of all the steps involved:
-
Declare Your Widget: Define it in XML; add module dependencies.
-
Add Custom Parameters: Tailor widgets with specific parameters.
-
Implement and Test: Activate your widget; clear the cache to test.
-
Design and Display: Craft a block and template for the front end.
Ready to enhance your store-appearance? Explore managed Magento hosting for fast and reliable store performance.


