
Import and Export Order in Magento 2
To export orders in Magento, it is important to understand the process within Magento ecommerce. It enables businesses to gather and organize essential transaction data efficiently. Importing data enables businesses to facilitate order management and analysis.
We will cover the steps and strategies for exporting/importing orders in Magento. It will help you generate insights and make informed decisions. It will also increase customer experience and overall ecommerce performance.
Key Takeaways
-
Discover the two primary formats, CSV and XML, for exporting orders to Magento 2.
-
Explore three different methods to export orders from Magento to suit your business requirements.
-
Learn how to configure export order profiles in Magento 2 and understand the importance of export functionality.
-
Understand the significance of
entity_idandincrement_idattributes when importing orders to Magento 2. -
Explore importing orders using Magento 2 extensions to streamline your data transfer.
-
Consider the flexibility of transferring order data between Magento 2 Community and Enterprise editions, enhancing your ERP and CRM integration capabilities.
Understanding the Export Structure in Magento 2
Magento 2 offers various export options, with CSV and XML files being the primary formats, each having its unique file structure.
1. CSV
CSV, or Comma-Separated Values, represents data as plain text with commas defining each value. It is suitable for handling smaller data sets and is widely supported by most software. You can use any basic text editor to access and view CSV files. The CSV format is simpler and more user-friendly and helps facilitate the transfer of order information.
2. XML
XML files can be opened and read using a text editor, web browser, Excel, or an XML Viewer. It allows you to store more information, including images and graphs. XML relies on tags to define content blocks, making handling extensive or complex data sets preferable here. When exporting orders, it is important to establish a clear and standardized naming convention for your files. This practice streamlines file organization and retrieval processes.
Note- Both formats serve the purpose of transferring order information. Choose the one that aligns with your particular requirements.
Export Orders in Magento 2
You can export orders in Magento using three different methods:
Method 1: Export Orders from the Magento Backend
-
Access your Magento backend.
-
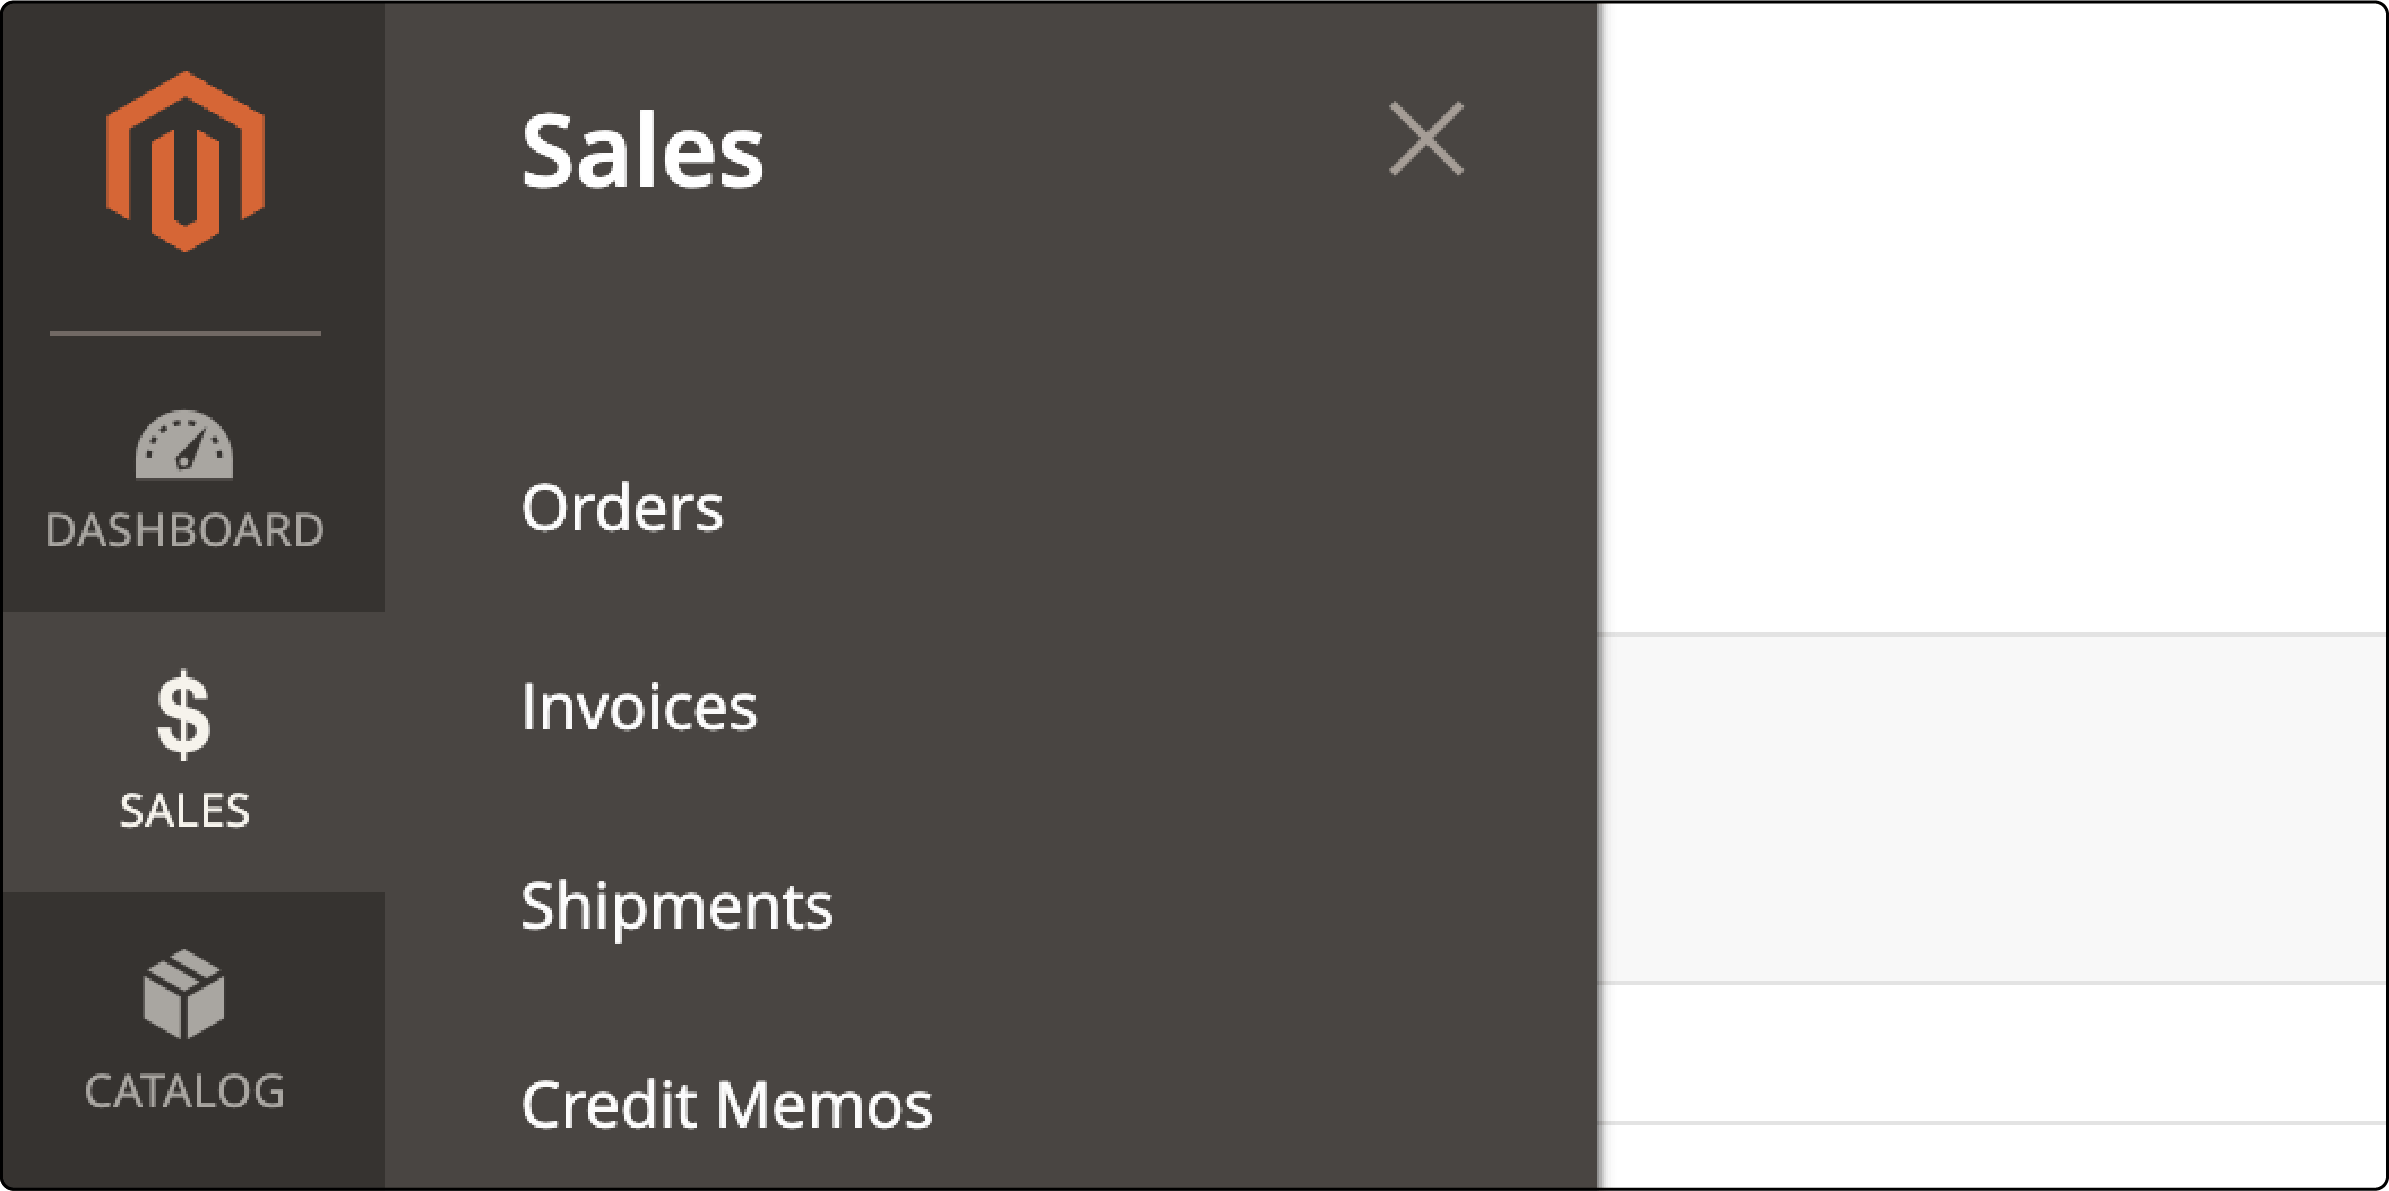
Navigate to Sales > Orders.
- In the Orders panel within this section, you will find several default columns, including:
- ID
- Purchase Point
- Purchase Date
- Bill-to Name
- Ship-to Name
- Grand Total (Base)
- Grand Total (Purchased)
- Status
- Action
- Allocated sources
- Braintree Transaction Source
- Click on the Export dropdown menu.
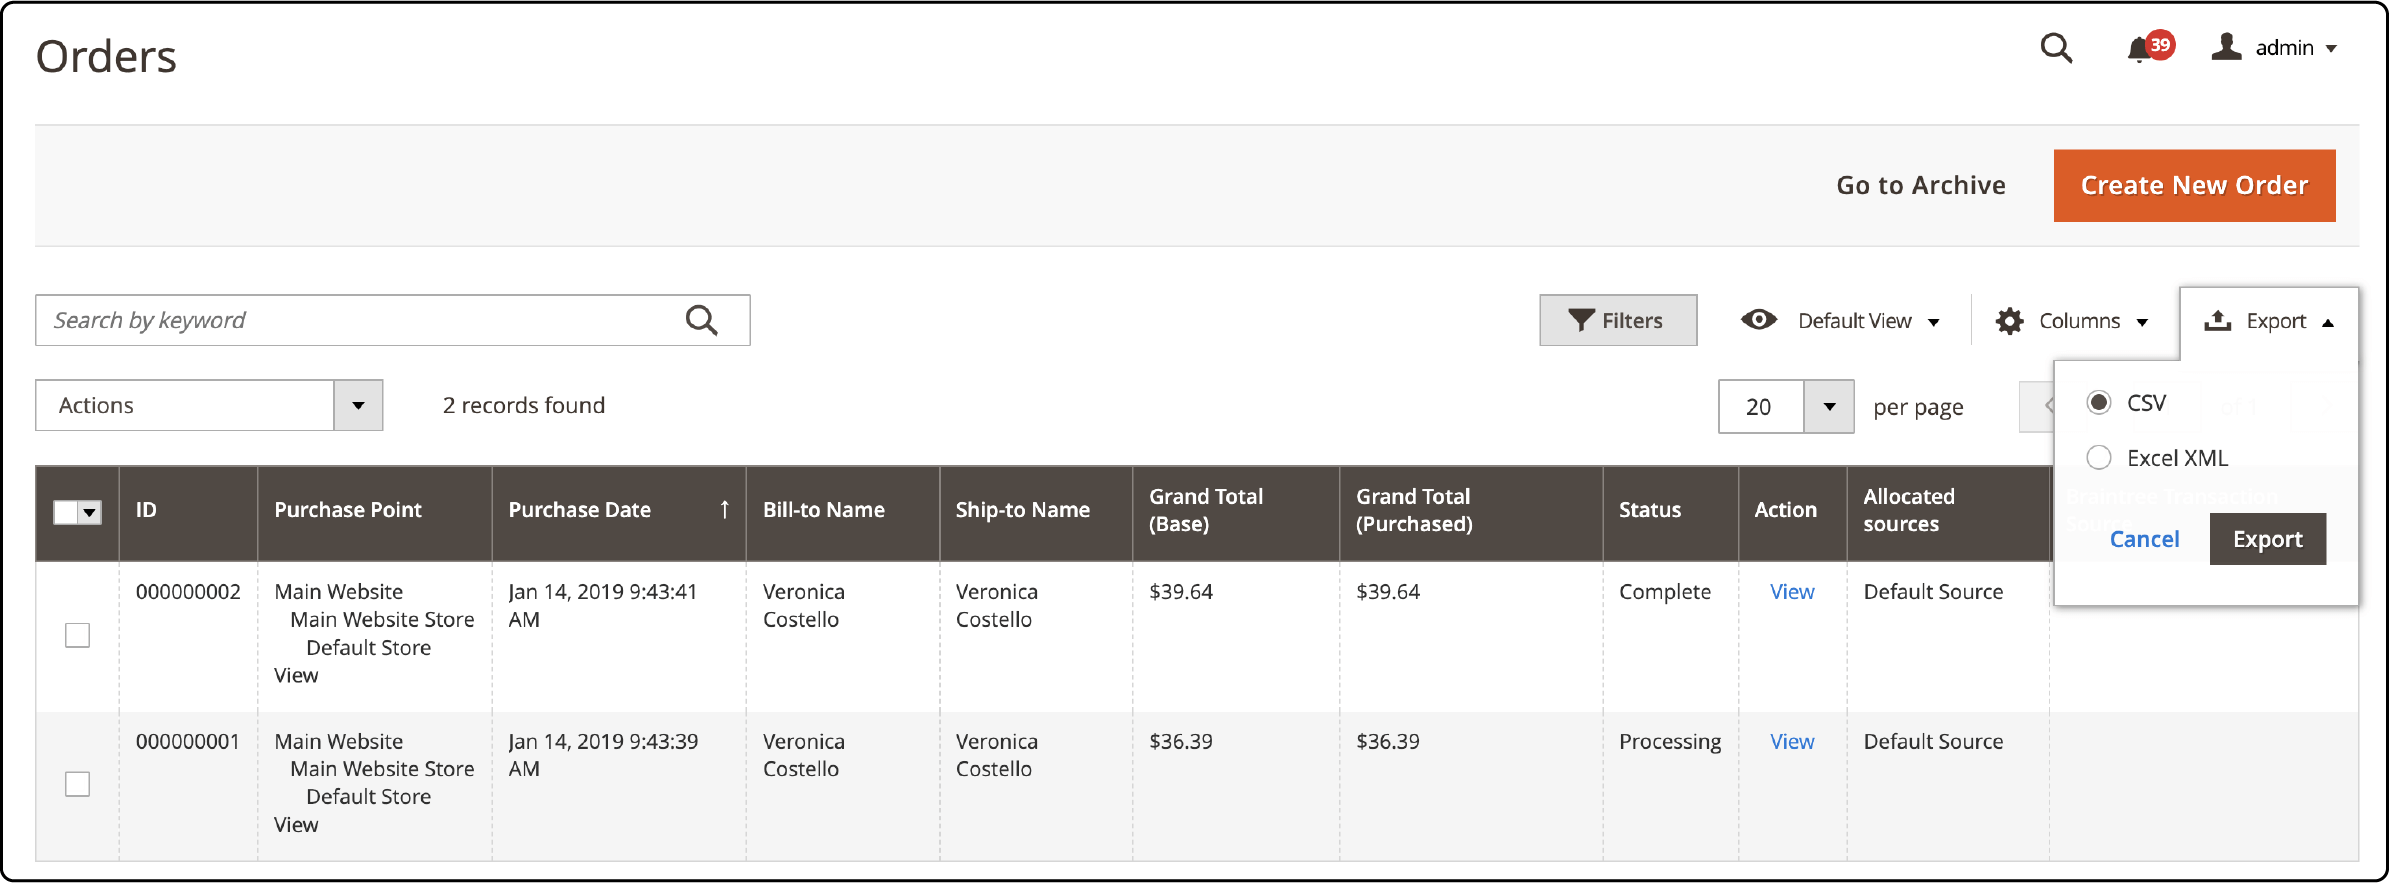
- Select the option for CSV.
- Finally, click the Export button. The resulting CSV file will contain your order data in the default view.
Method 2: Export Orders Using Custom Data
To add new columns in your Orders grid and run Observer to export Orders CSV, follow these steps:
- Create a new column in
vendor/magento/module-sales/view/adminhtml/ui_component/sales_order_grid.xml.
Run the following command:
<column name="custom_product_name" class="Magento\Sales\Ui\Component\Listing\Column\Price">
    <argument name="data" xsi:type="array">
        <item name="config" xsi:type="array">
            <item name="filter" xsi:type="string">textRange</item>
            <item name="visible" xsi:type="boolean">false</item>
            <item name="label" xsi:type="string" translate="true">Custom Product Name</item>
        </item>
    </argument>
</column>
- Make changes to the
sales_order_grid tableby running the following upgrade schema command:
ALTER TABLE `sales_order_grid` ADD `custom_product_name` VARCHAR( 255 ) NOT NULL ;
- Next, run Observer when an order is submitted.
- In events.xml:
<config xmlns:xsi="http://www.w3.org/2001/XMLSchema-instance" xsi:noNamespaceSchemaLocation="urn:magento:framework:Event/etc/events.xsd">

    <event name="checkout_submit_all_after">
        <observer name="yourcompany_yourmodule_checkout_submit_all_after" instance="YourCompany\YourModule\Observer\ProcessOrder" />
    </event>

</config>
- In the observer:
public function execute(\Magento\Framework\Event\Observer $observer)
{
    $order = $observer->getOrder();
    $quote = $observer->getQuote();

    // Do whatever you want here

    return $this;
}
- Finally, click Export.
Method 3: Export orders from Magento extension
Follow these steps to export orders using the Mageplaza Import / Export Categories extension. You have the flexibility to choose any extension that suits your needs.
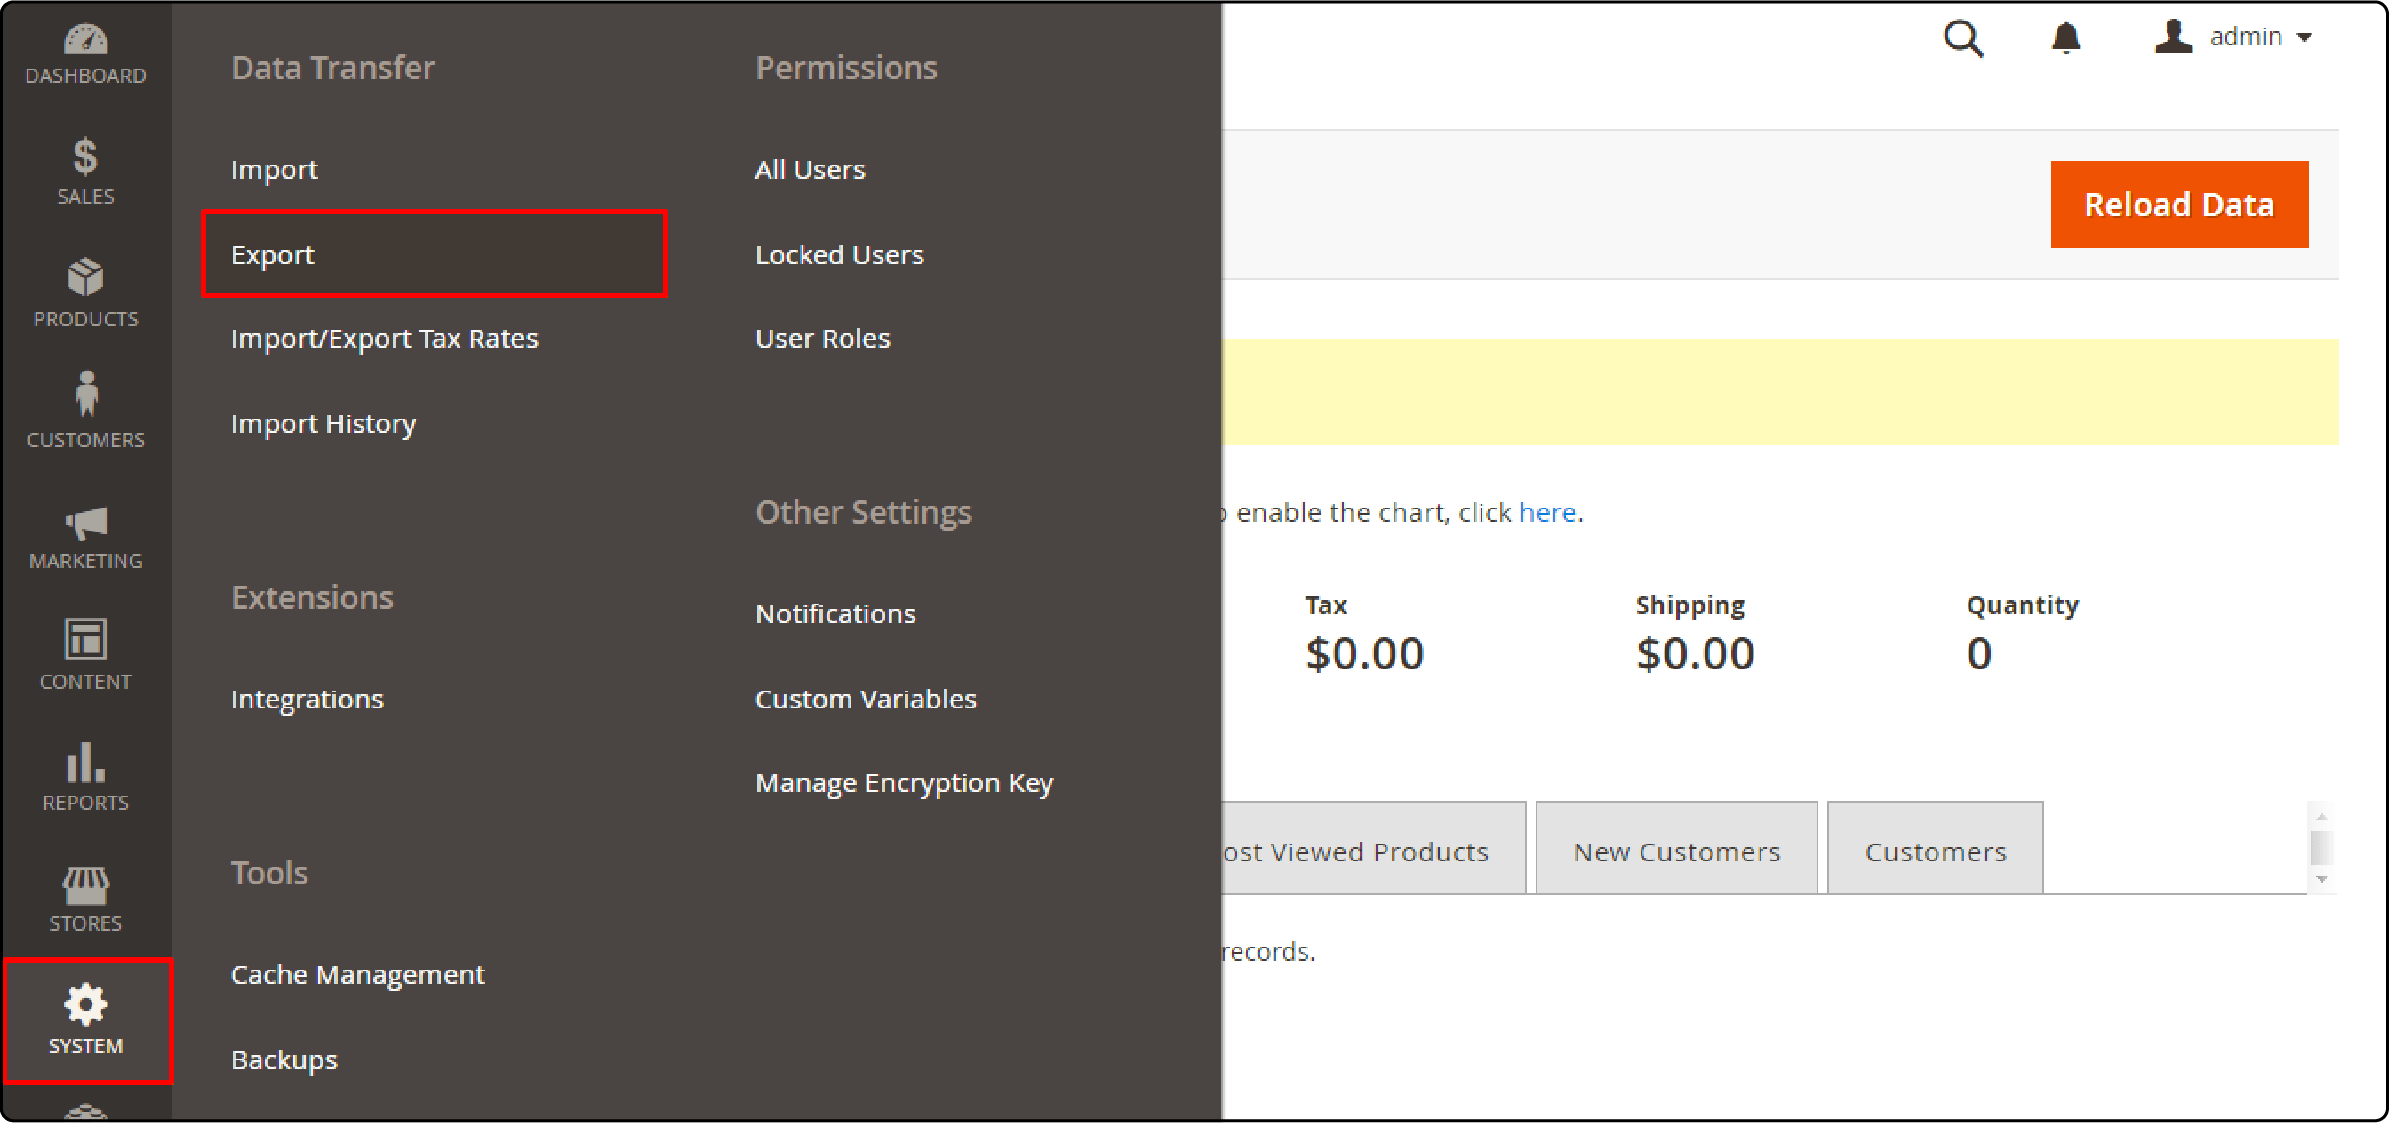
- Go to Magento Admin panel> System >Export.
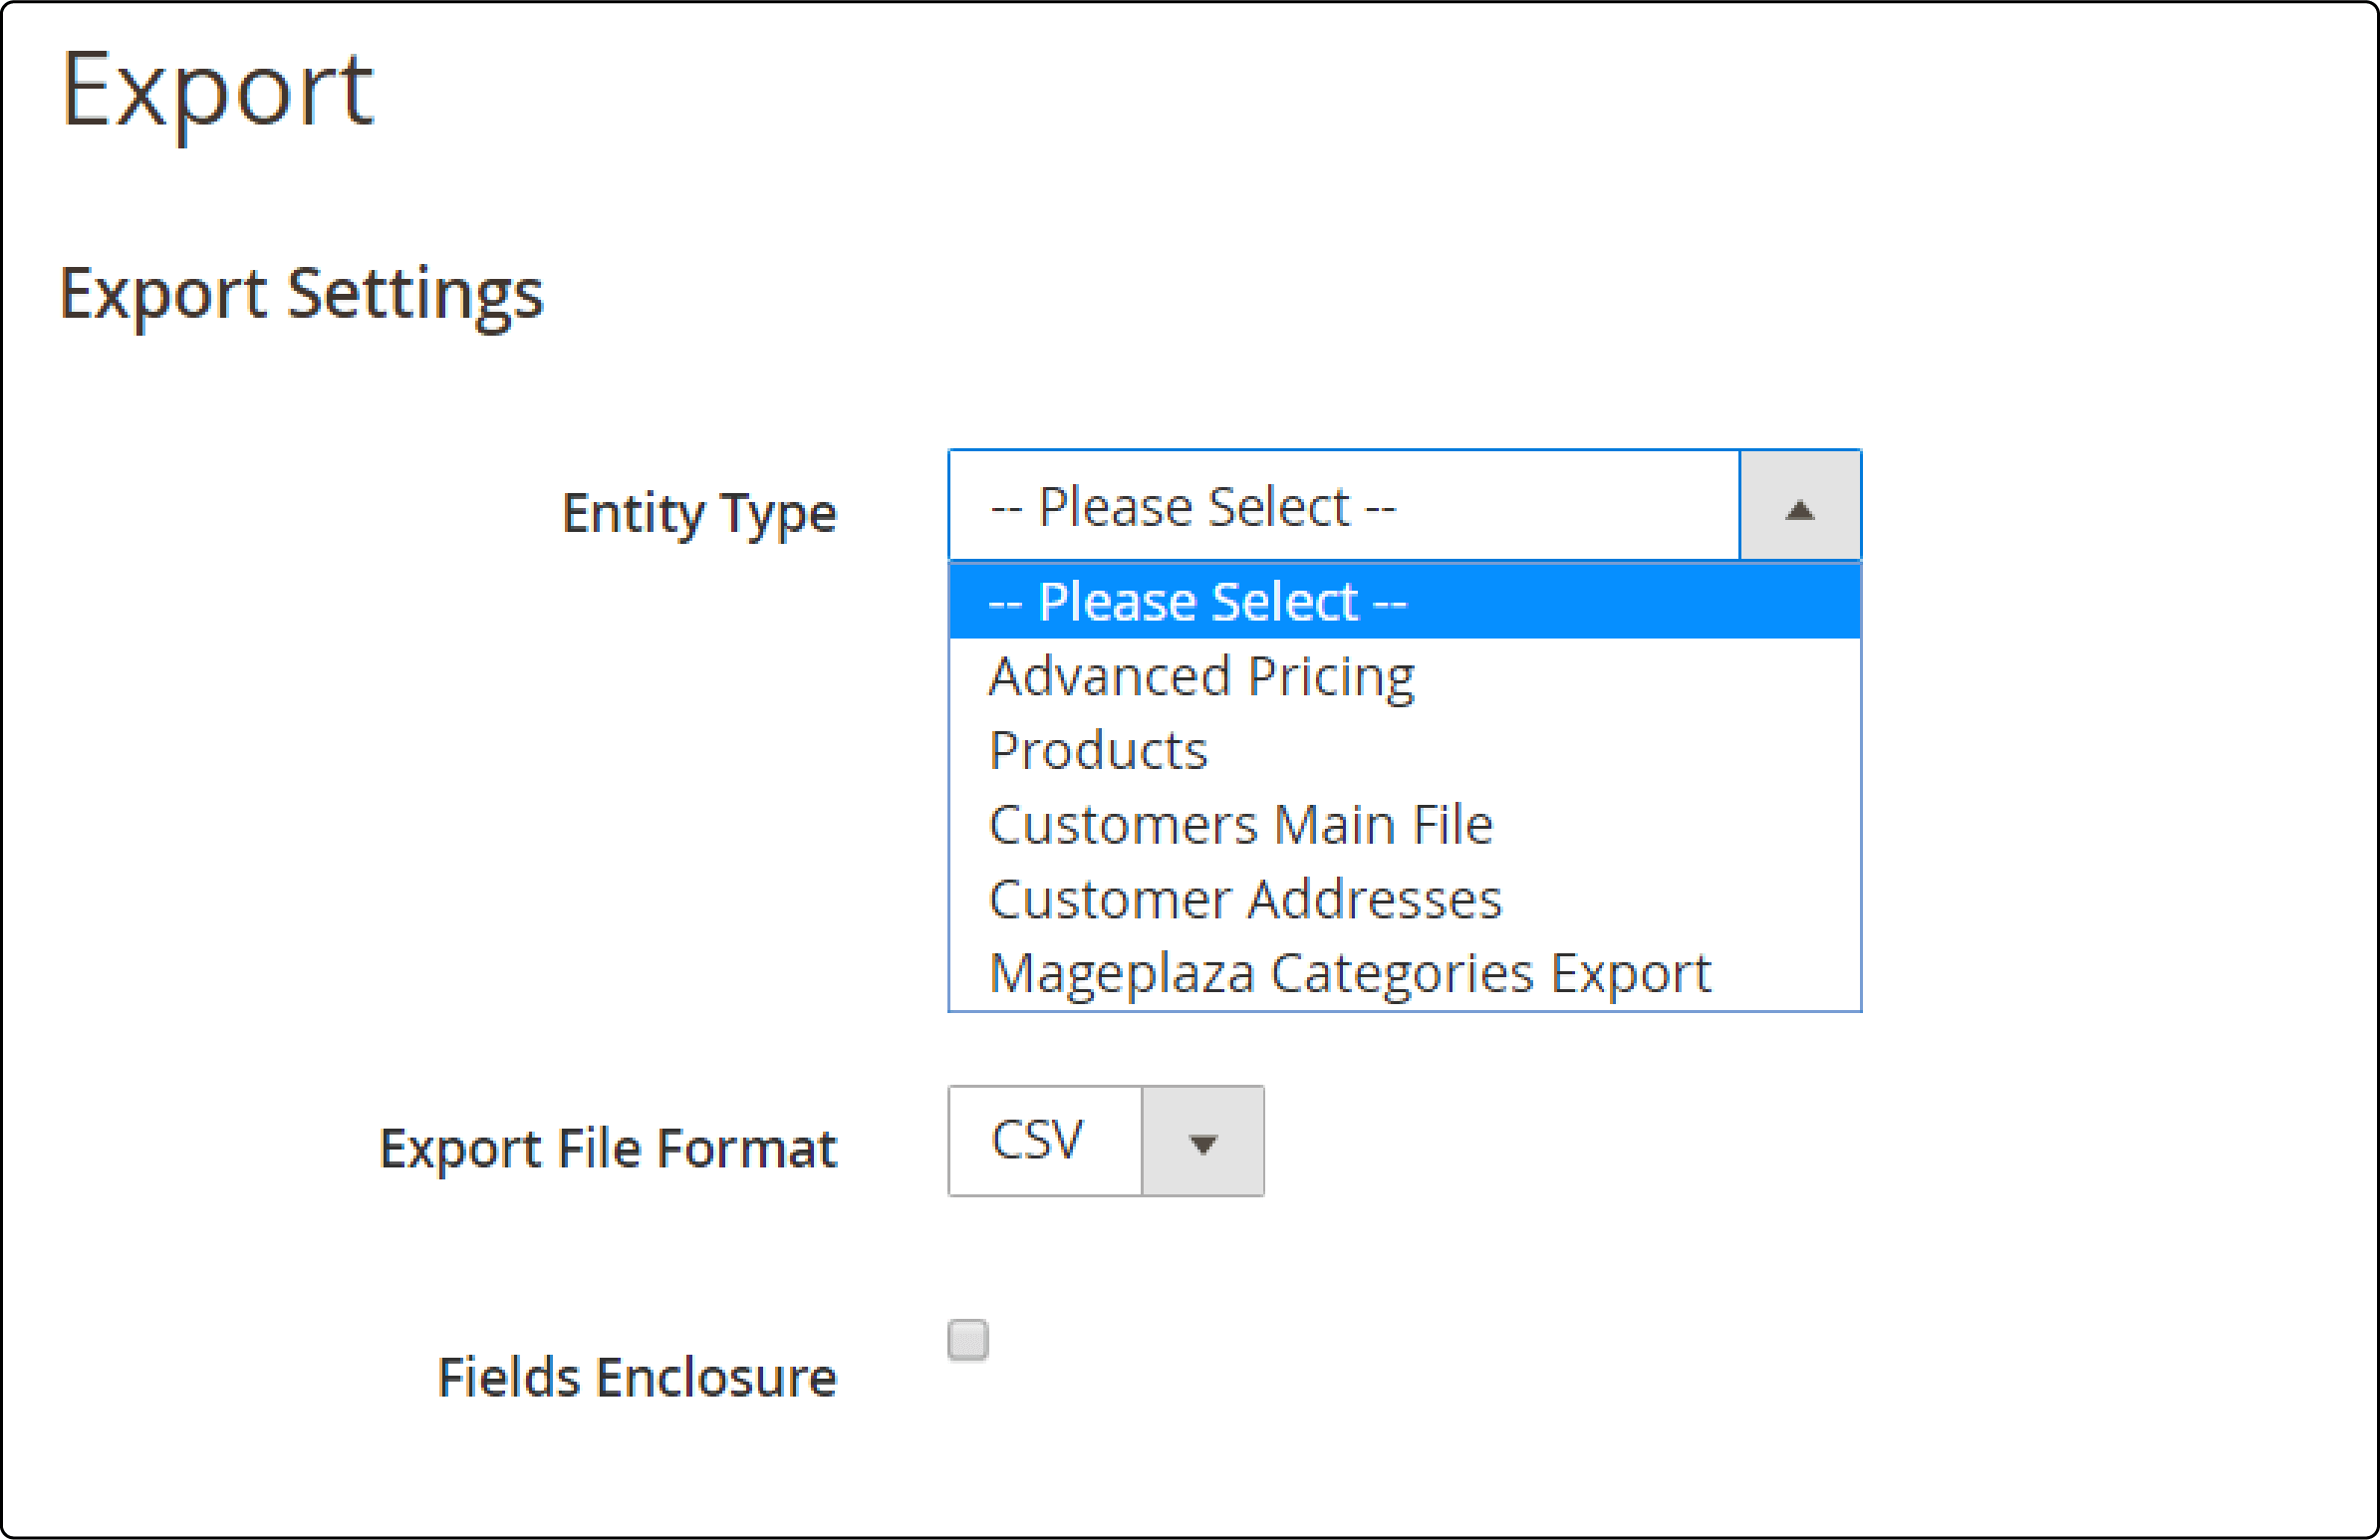
- In the Export Settings section, locate the Entity Type option and set it to Mageplaza Categories Export. It is crucial for initiating the export process of your categories.
-
Specify the file format for your export by selecting CSV in the Export File Format field.
-
In the Fields Enclosure option, enclose the values in the columns with a character. It is set to an apostrophe (" ' ") by default.
-
In the Entity Attributes section, you will find a list of all available properties alphabetically. Configure it as per your requirements.
-
Click Continue to proceed with the file export action.
-
Choose the Save option to save the exported file to your preferred location.
-
Open the CSV file to verify or adjust the exported data.

Configuring Export Order Profiles
1. General Settings
In Magento 2, you can configure general settings for exporting orders. Here are the steps for Export Orders for Magento 2 by Amasty. These settings encompass several key aspects:
-
Entity Selection: You can choose the entity to export, which, in this case, is Orders.
-
File Format: Decide the format you prefer for exporting orders, whether CSV or XML.
-
Naming Conventions: Customize the naming conventions for the exported files to align with your specific requirements.
-
Defining Product Attributes: You can define which product attributes should be included in the export.
To configure the General Settings of your extension, follow these steps:
-
Navigate to Stores.
-
Select Configuration.
-
Go to your extension and choose Efficient Order Export.
-
Finally, click on General Settings.
-
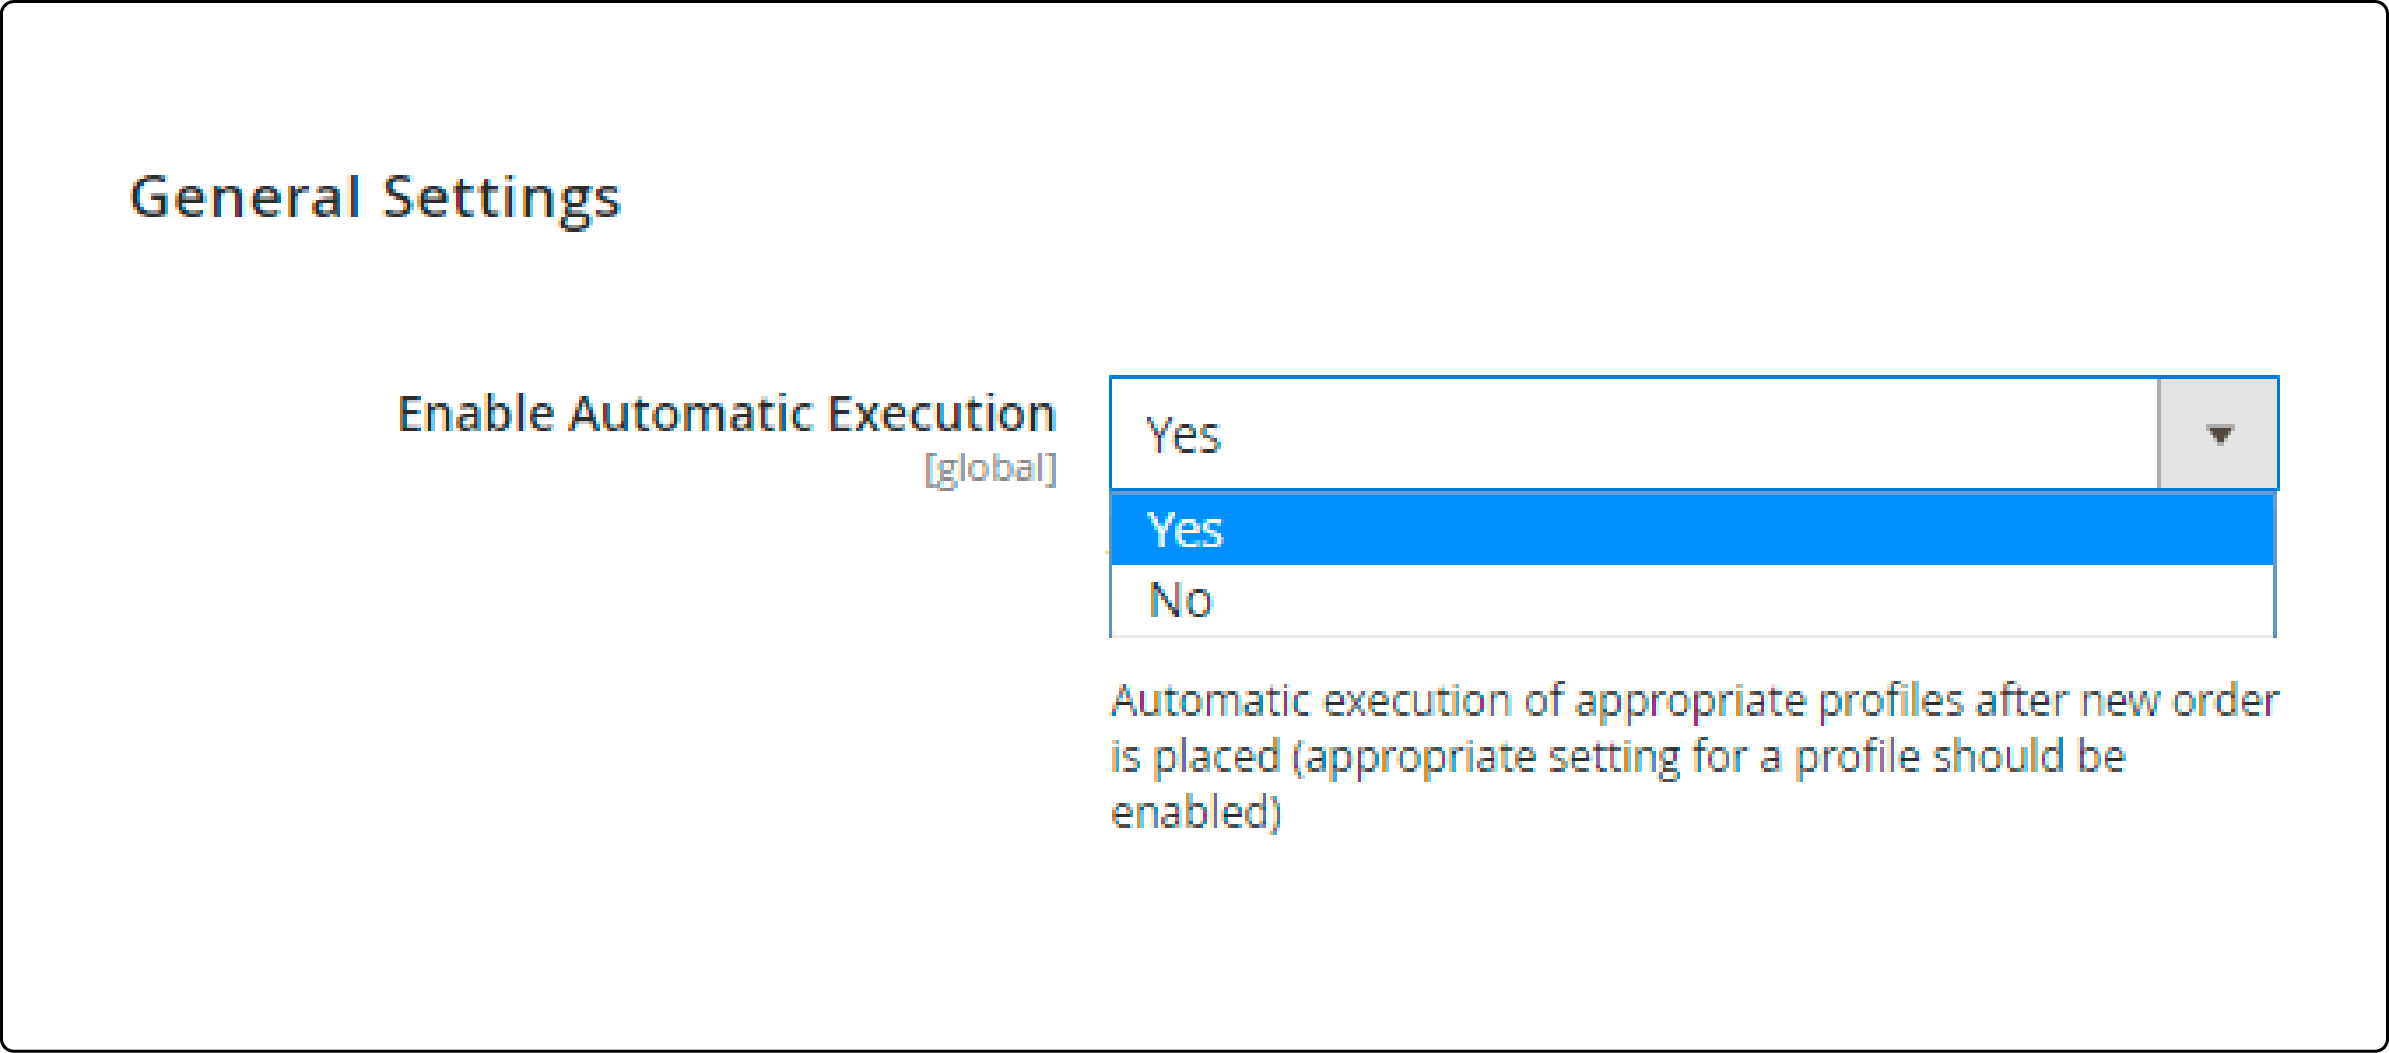
Turn the Enable Automatic Execution setting to Yes to automatically start the order export process after each new order is placed.
1. Exporting Profiles
To manage and create export profiles in general settings, proceed as follows:
- Go to the Efficient Order Export section.
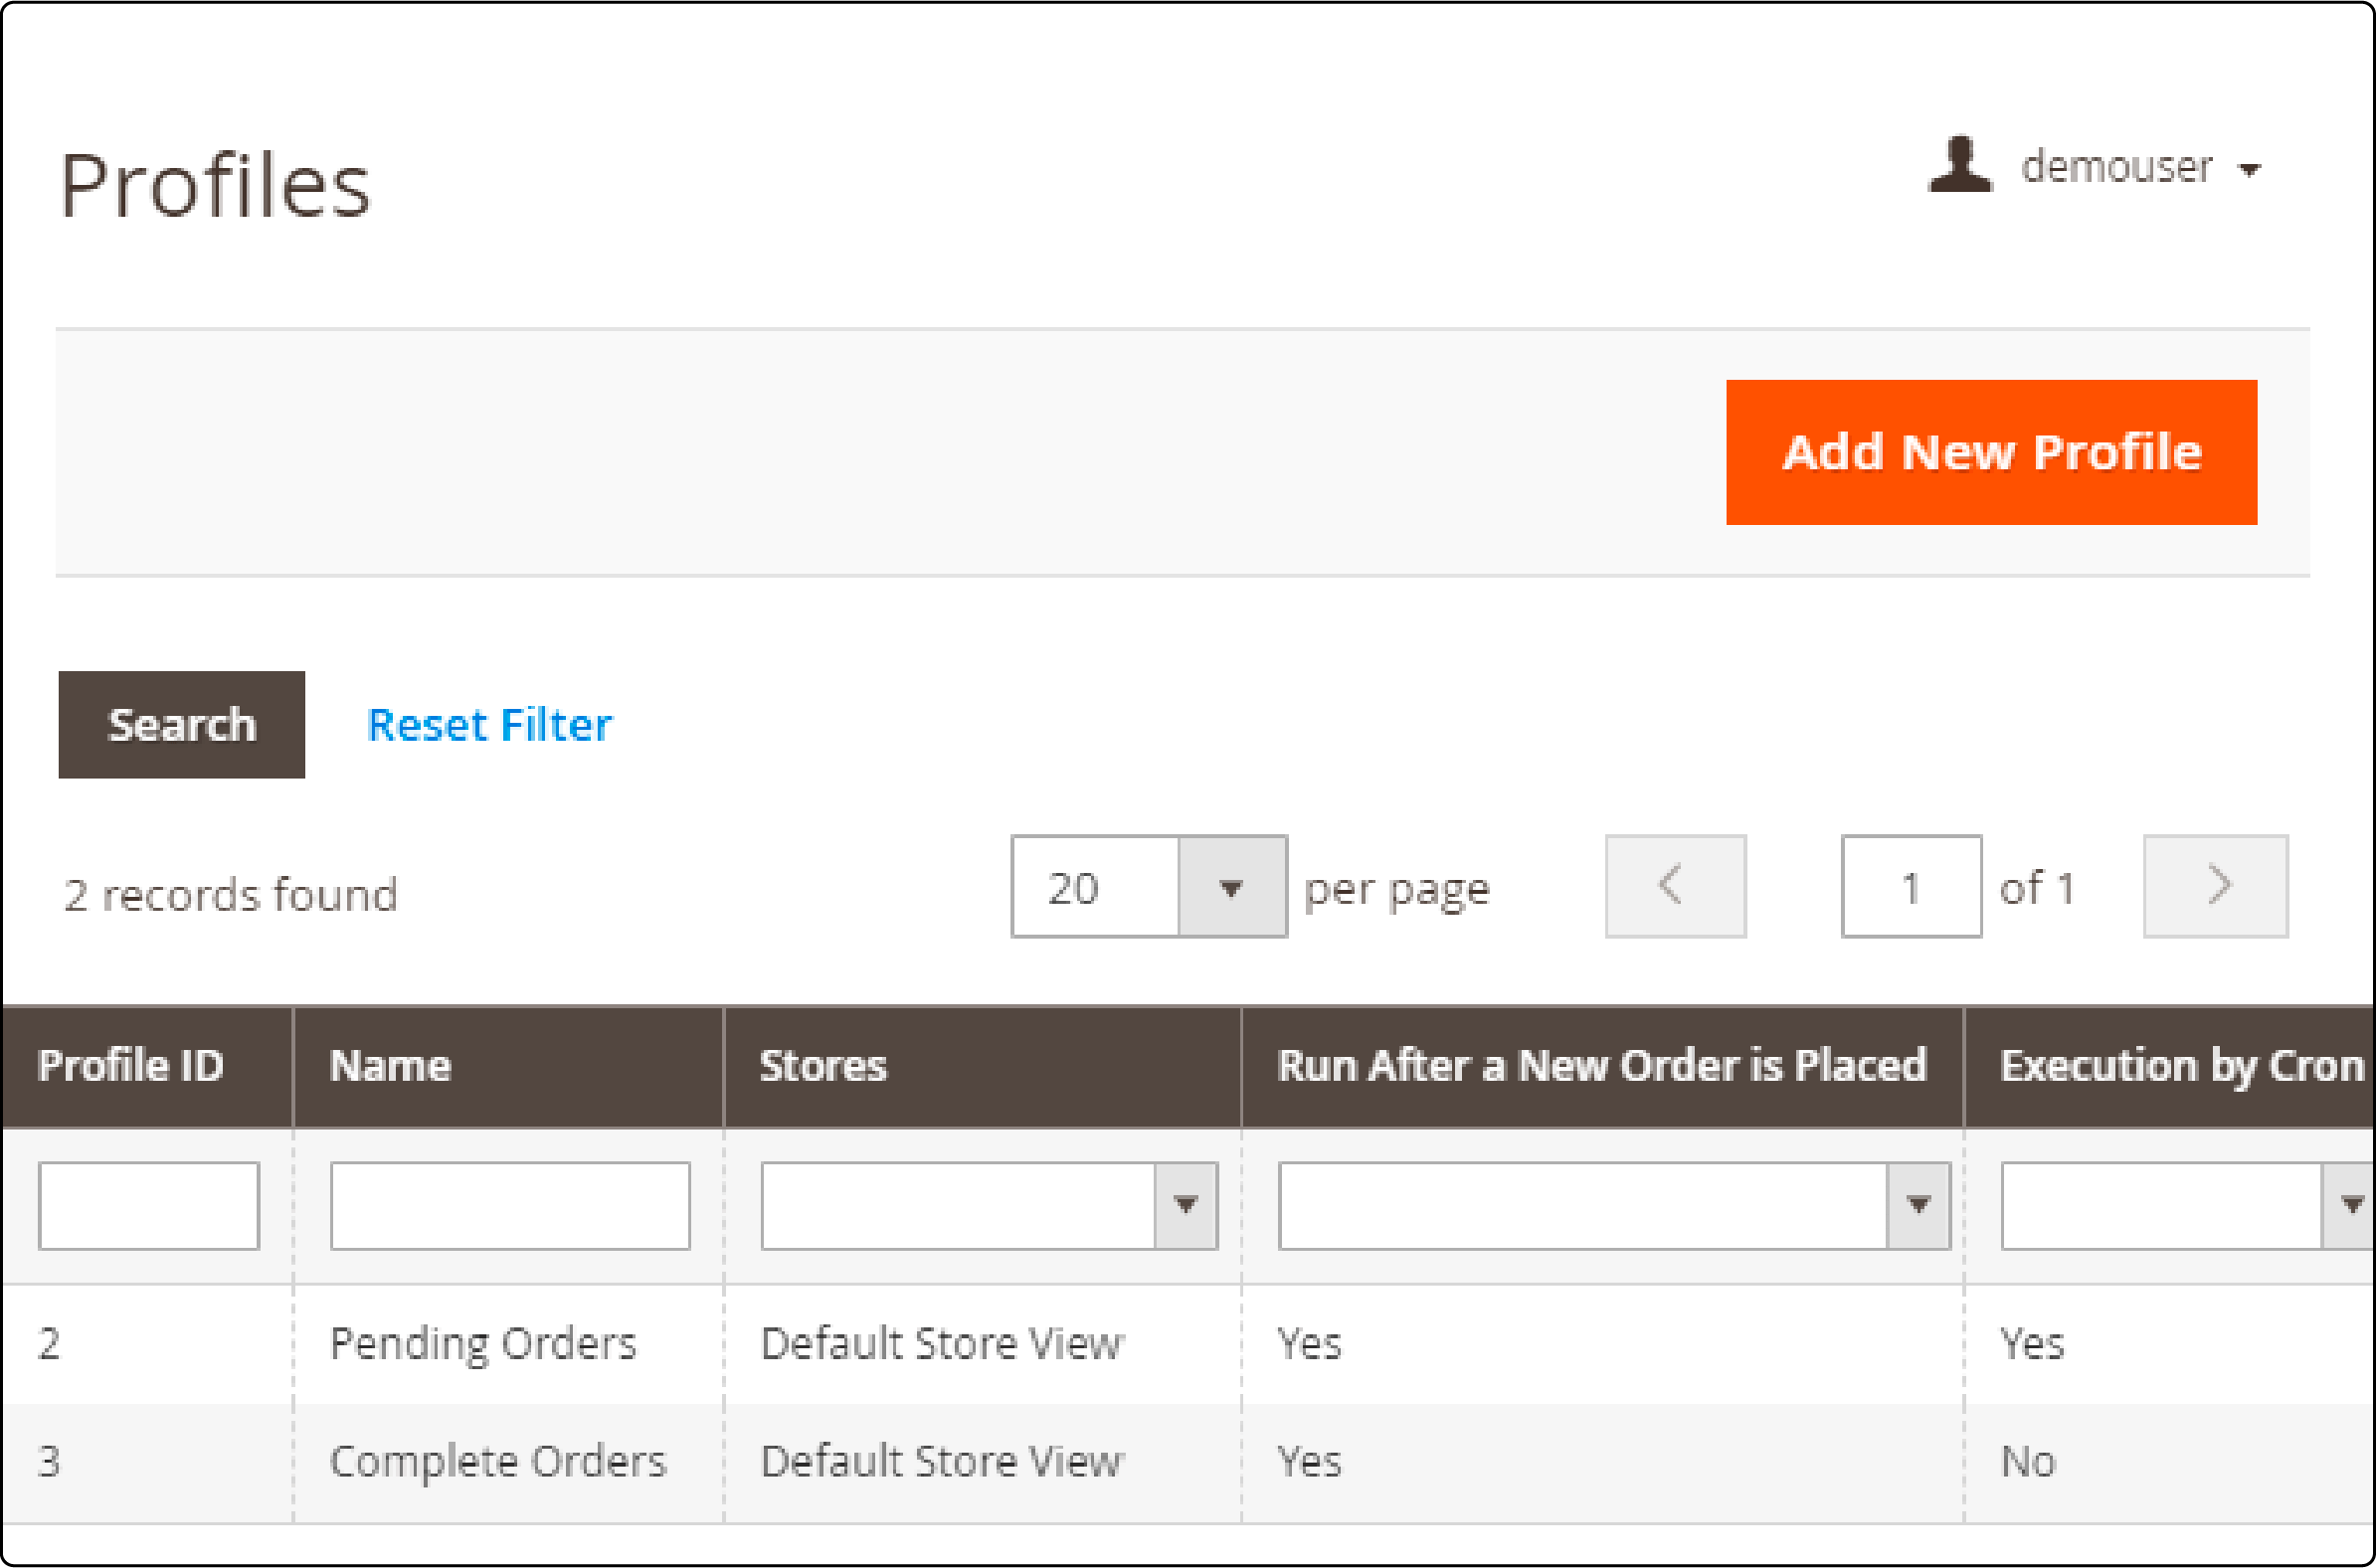
- Click on Profiles to view the list of available export profiles and to create new ones.
2. Profile Configuration
To modify profile information within the general settings, follow these steps:
-
Select the profile you want to configure within the grid of export profiles.
-
Here, you will find the following options:
- Skip Child Products: Enable this option to exclude child products from the export, for example, to export only the main configurable products.
- Skip Parent Products: If this option is set to 'Yes,' the module will disregard parent products, including bundle and configurable products, during the export process.
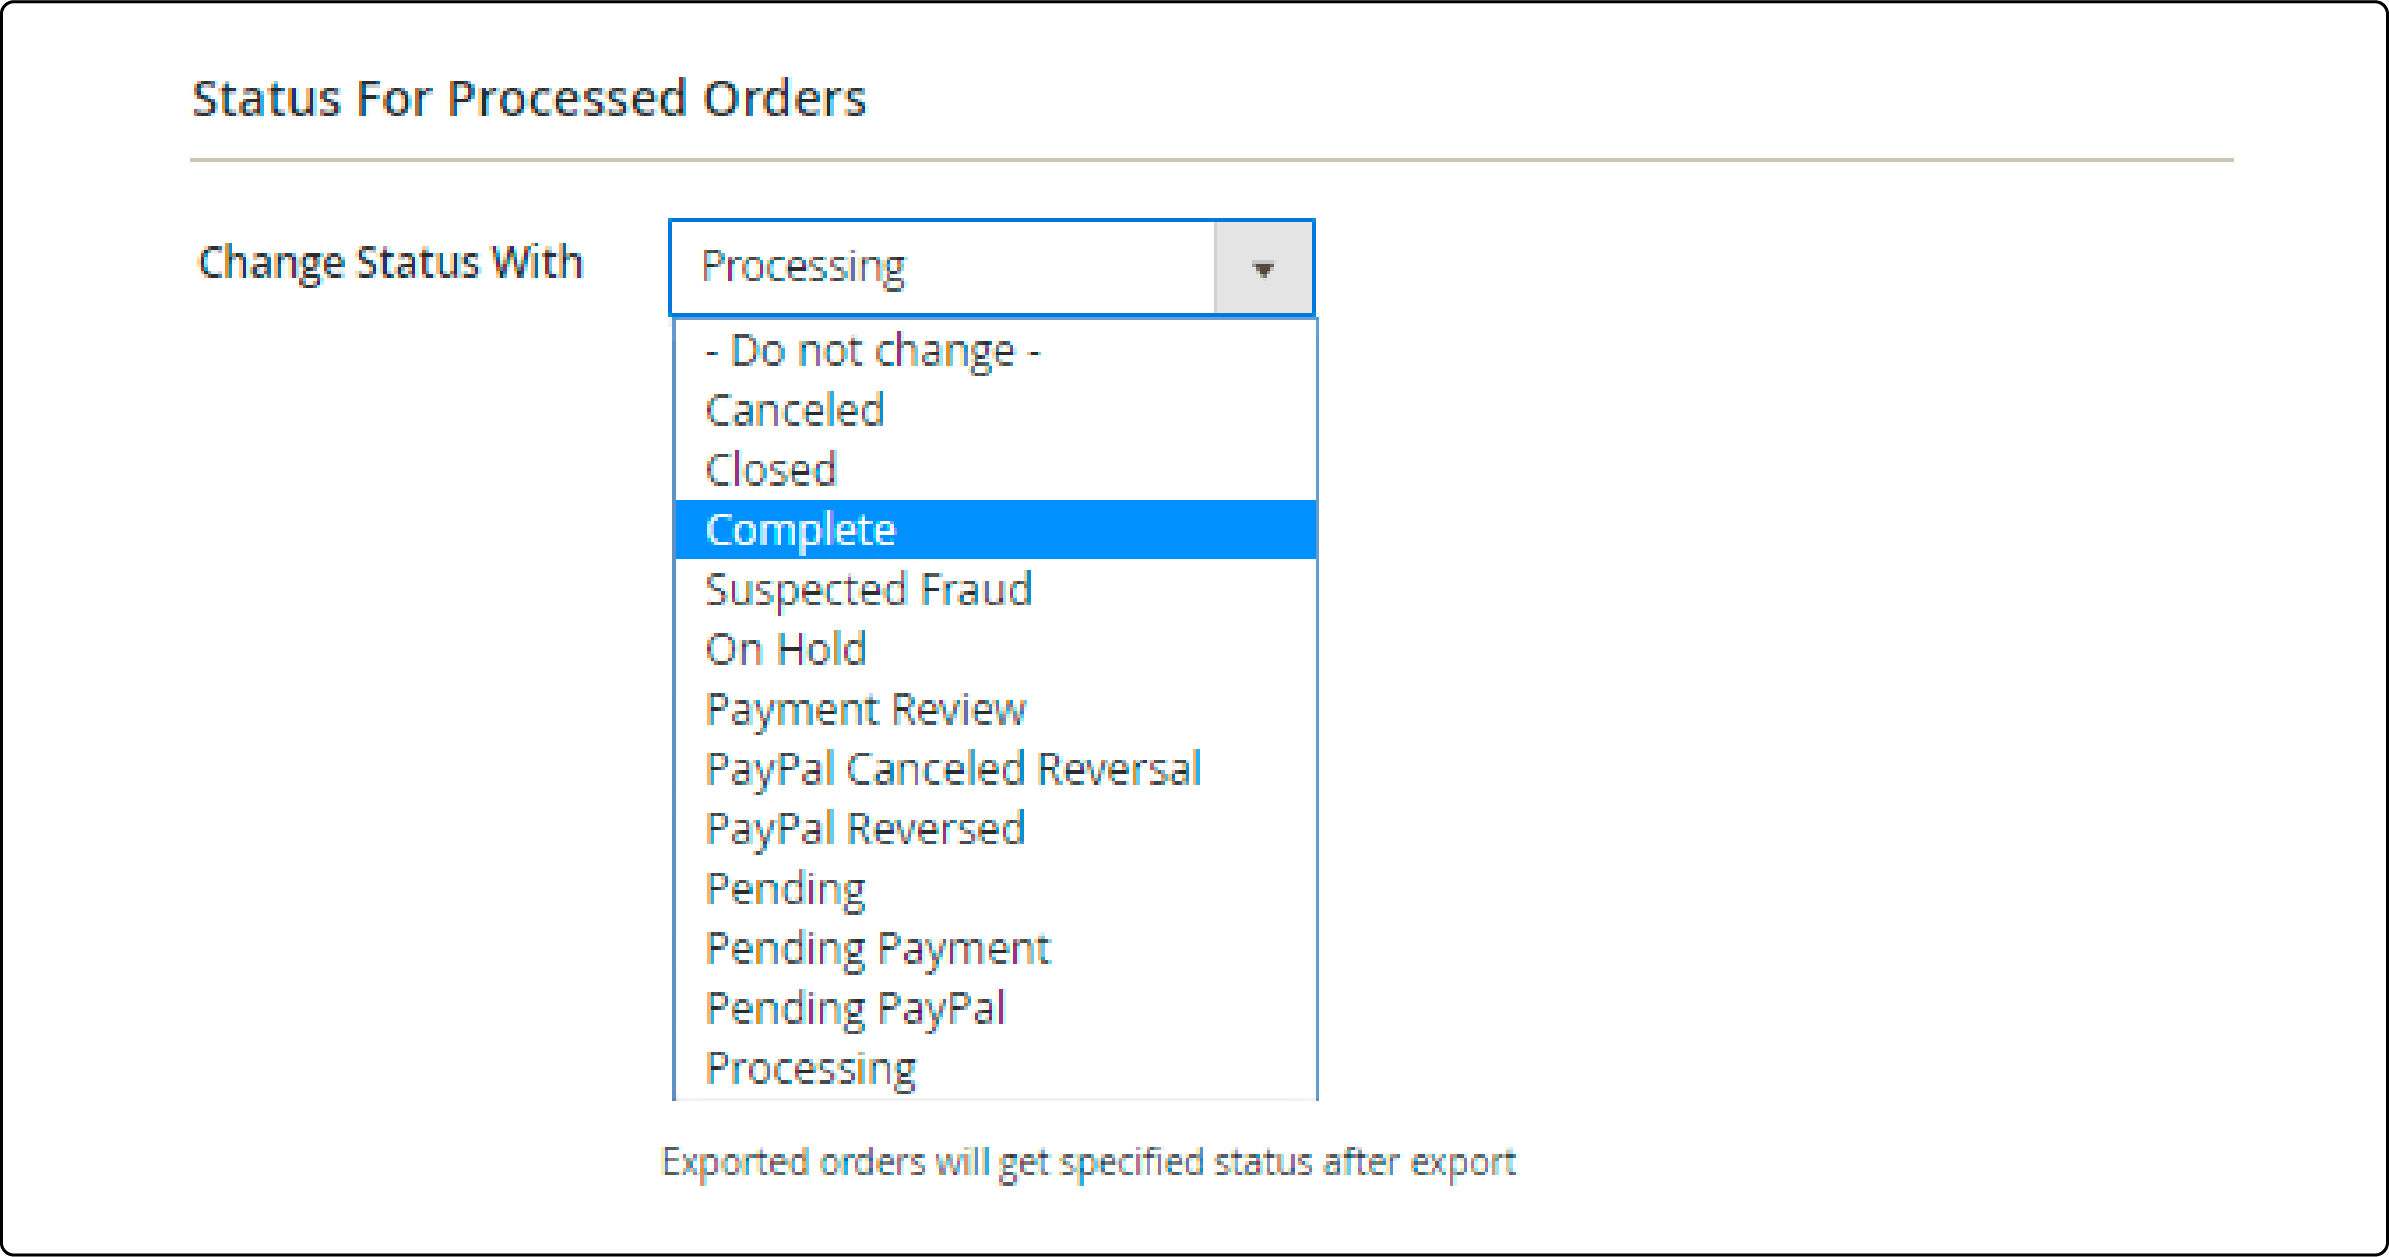
- Change Status of Processed Orders: Specify the status that orders will receive after being exported.
- Select Store View: Choose the store view from which the data should be exported.

- For automatic execution of the export process, set the Run After Each New Order is Placed option to Yes for the specific export profile.

2. Order Filters
1. Order Number Filters
To configure order number filters, follow these steps:
-
Navigate to System > Profiles.
-
Choose the desired profile.
-
Under Order Filters, enable the Use Order Number Filters setting to Yes if you want to specify starting and ending order numbers.
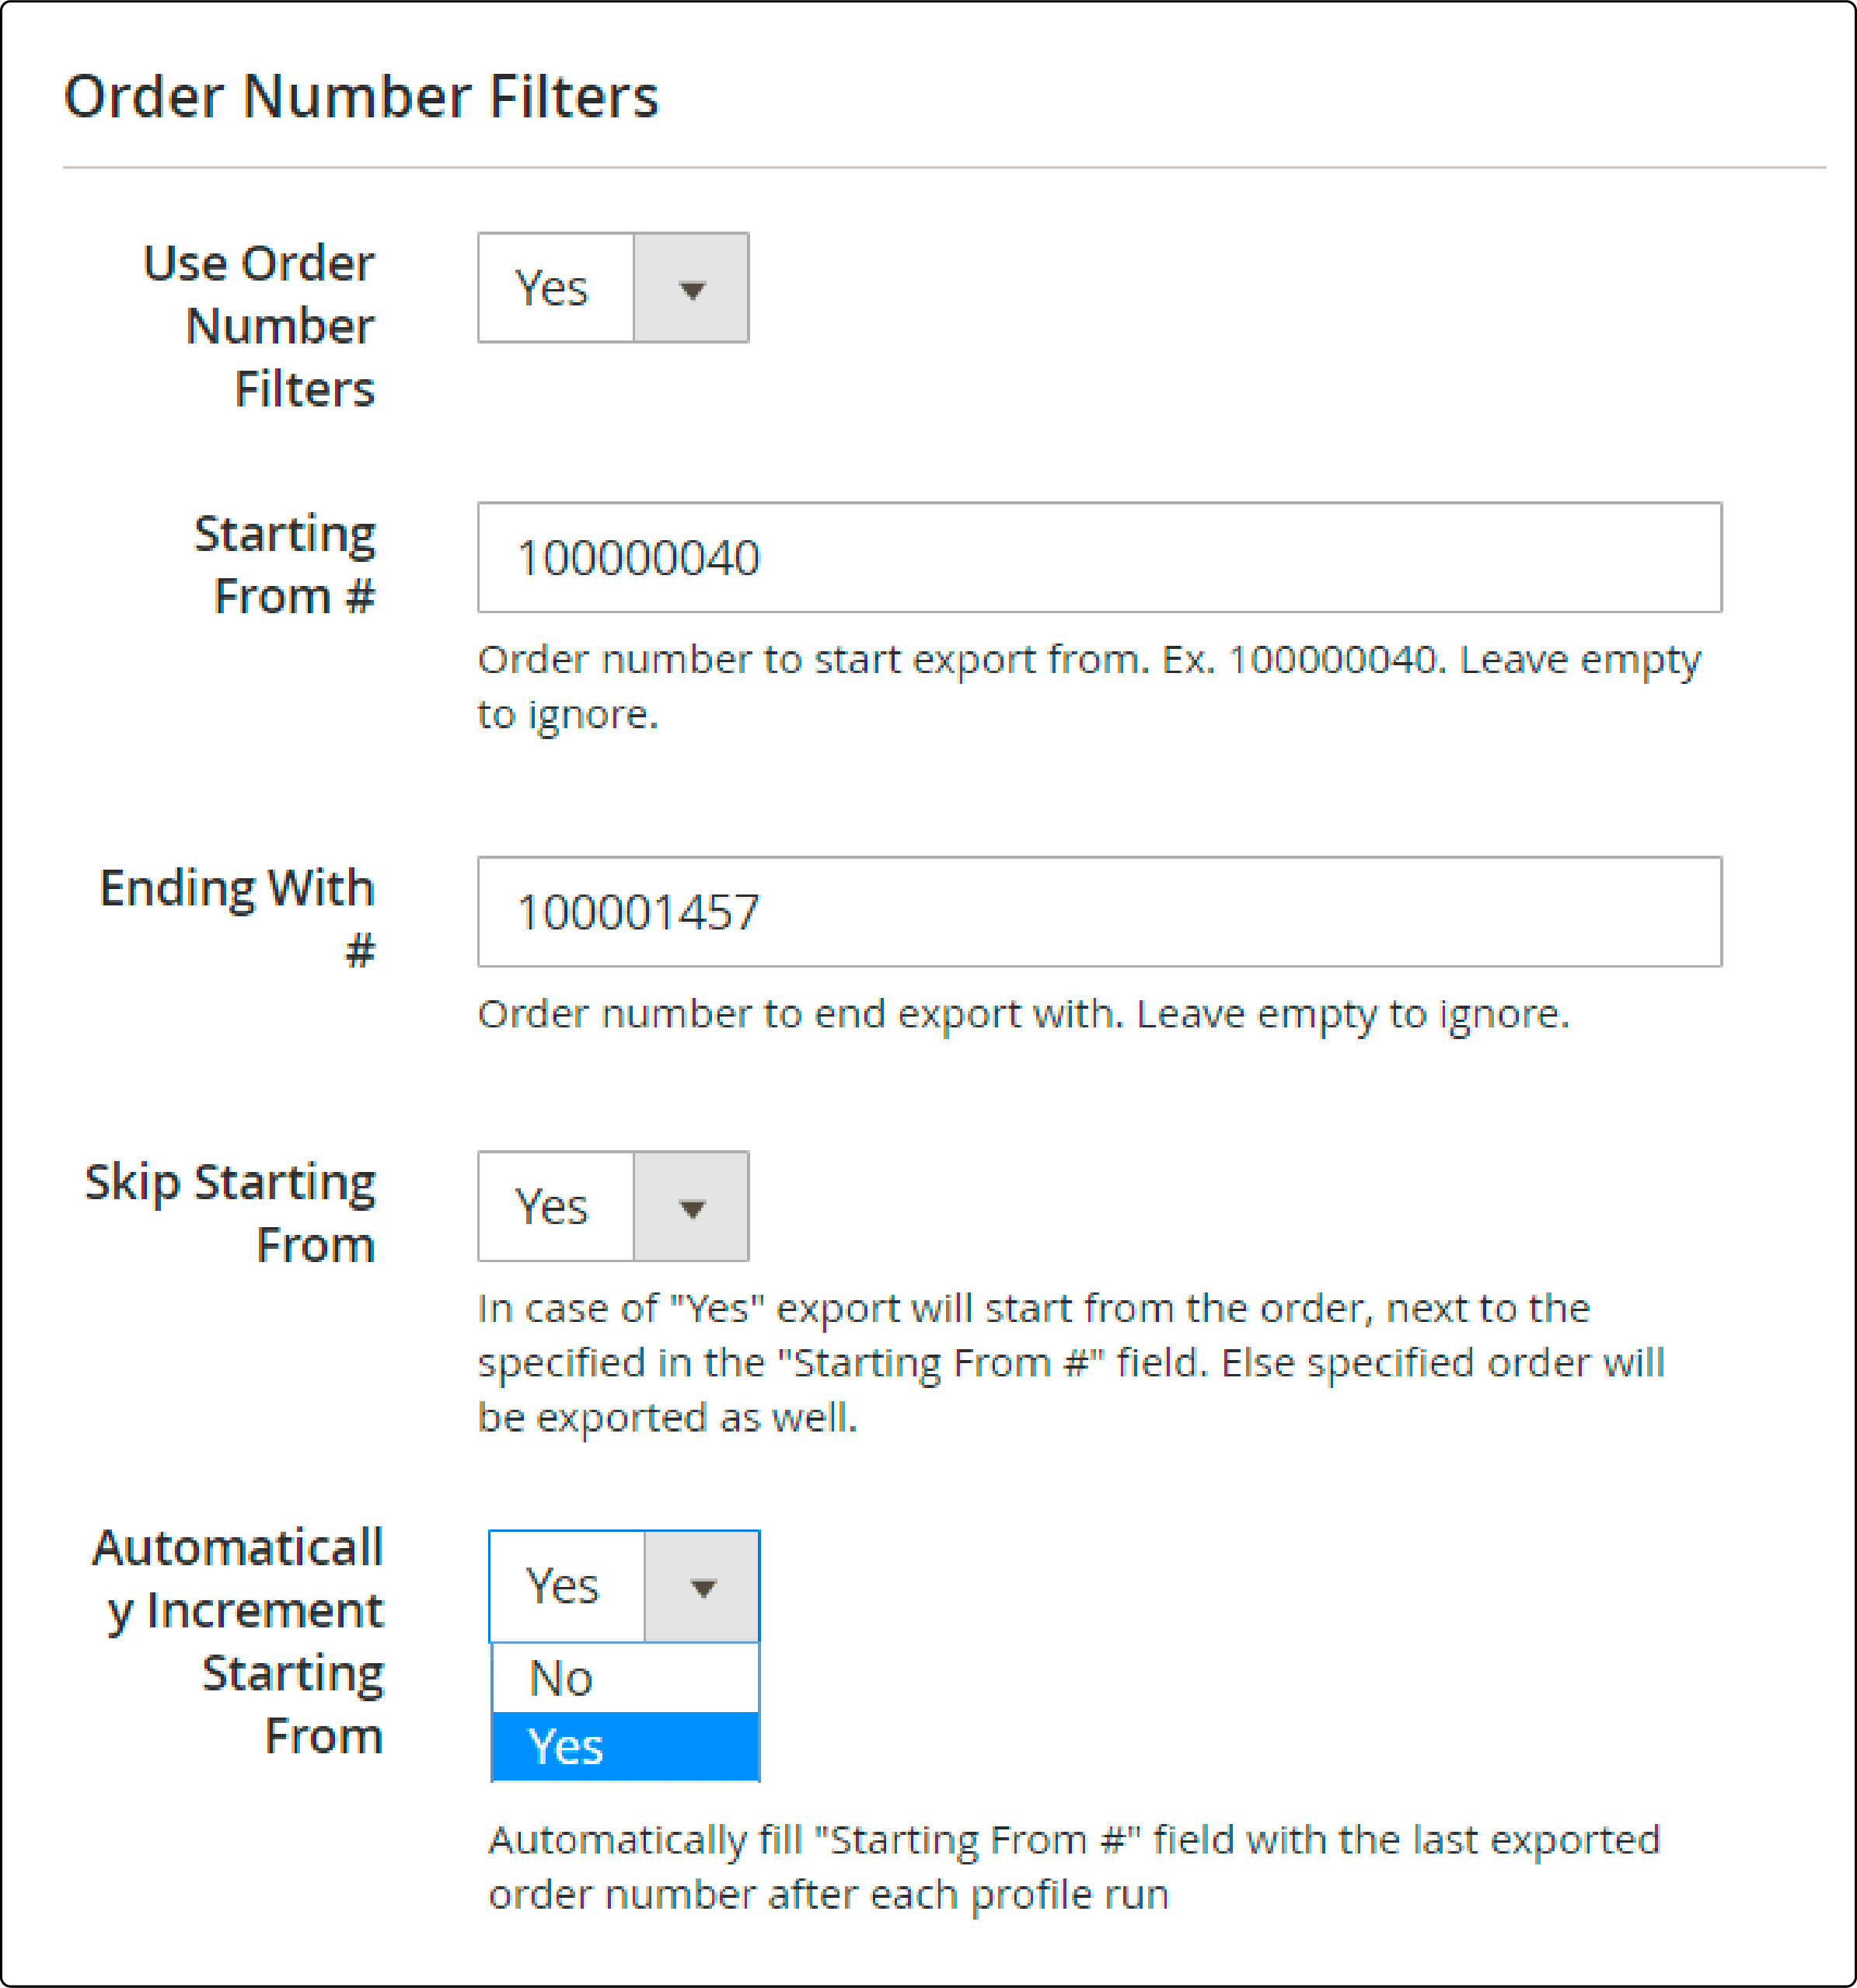
You can limit the export file by specifying:
-
Starting From # and Ending with # to export orders within a specific range. Leave these fields blank to export all order numbers.
-
To skip the starting order number and start exporting from the next order, set Skip Starting from to Yes. It ensures the export of only new orders with each profile run.
-
Optionally, you can enable Automatically Increment Starting From to automatically populate the Starting From # field with the last exported order.
2. Invoice Number Filters
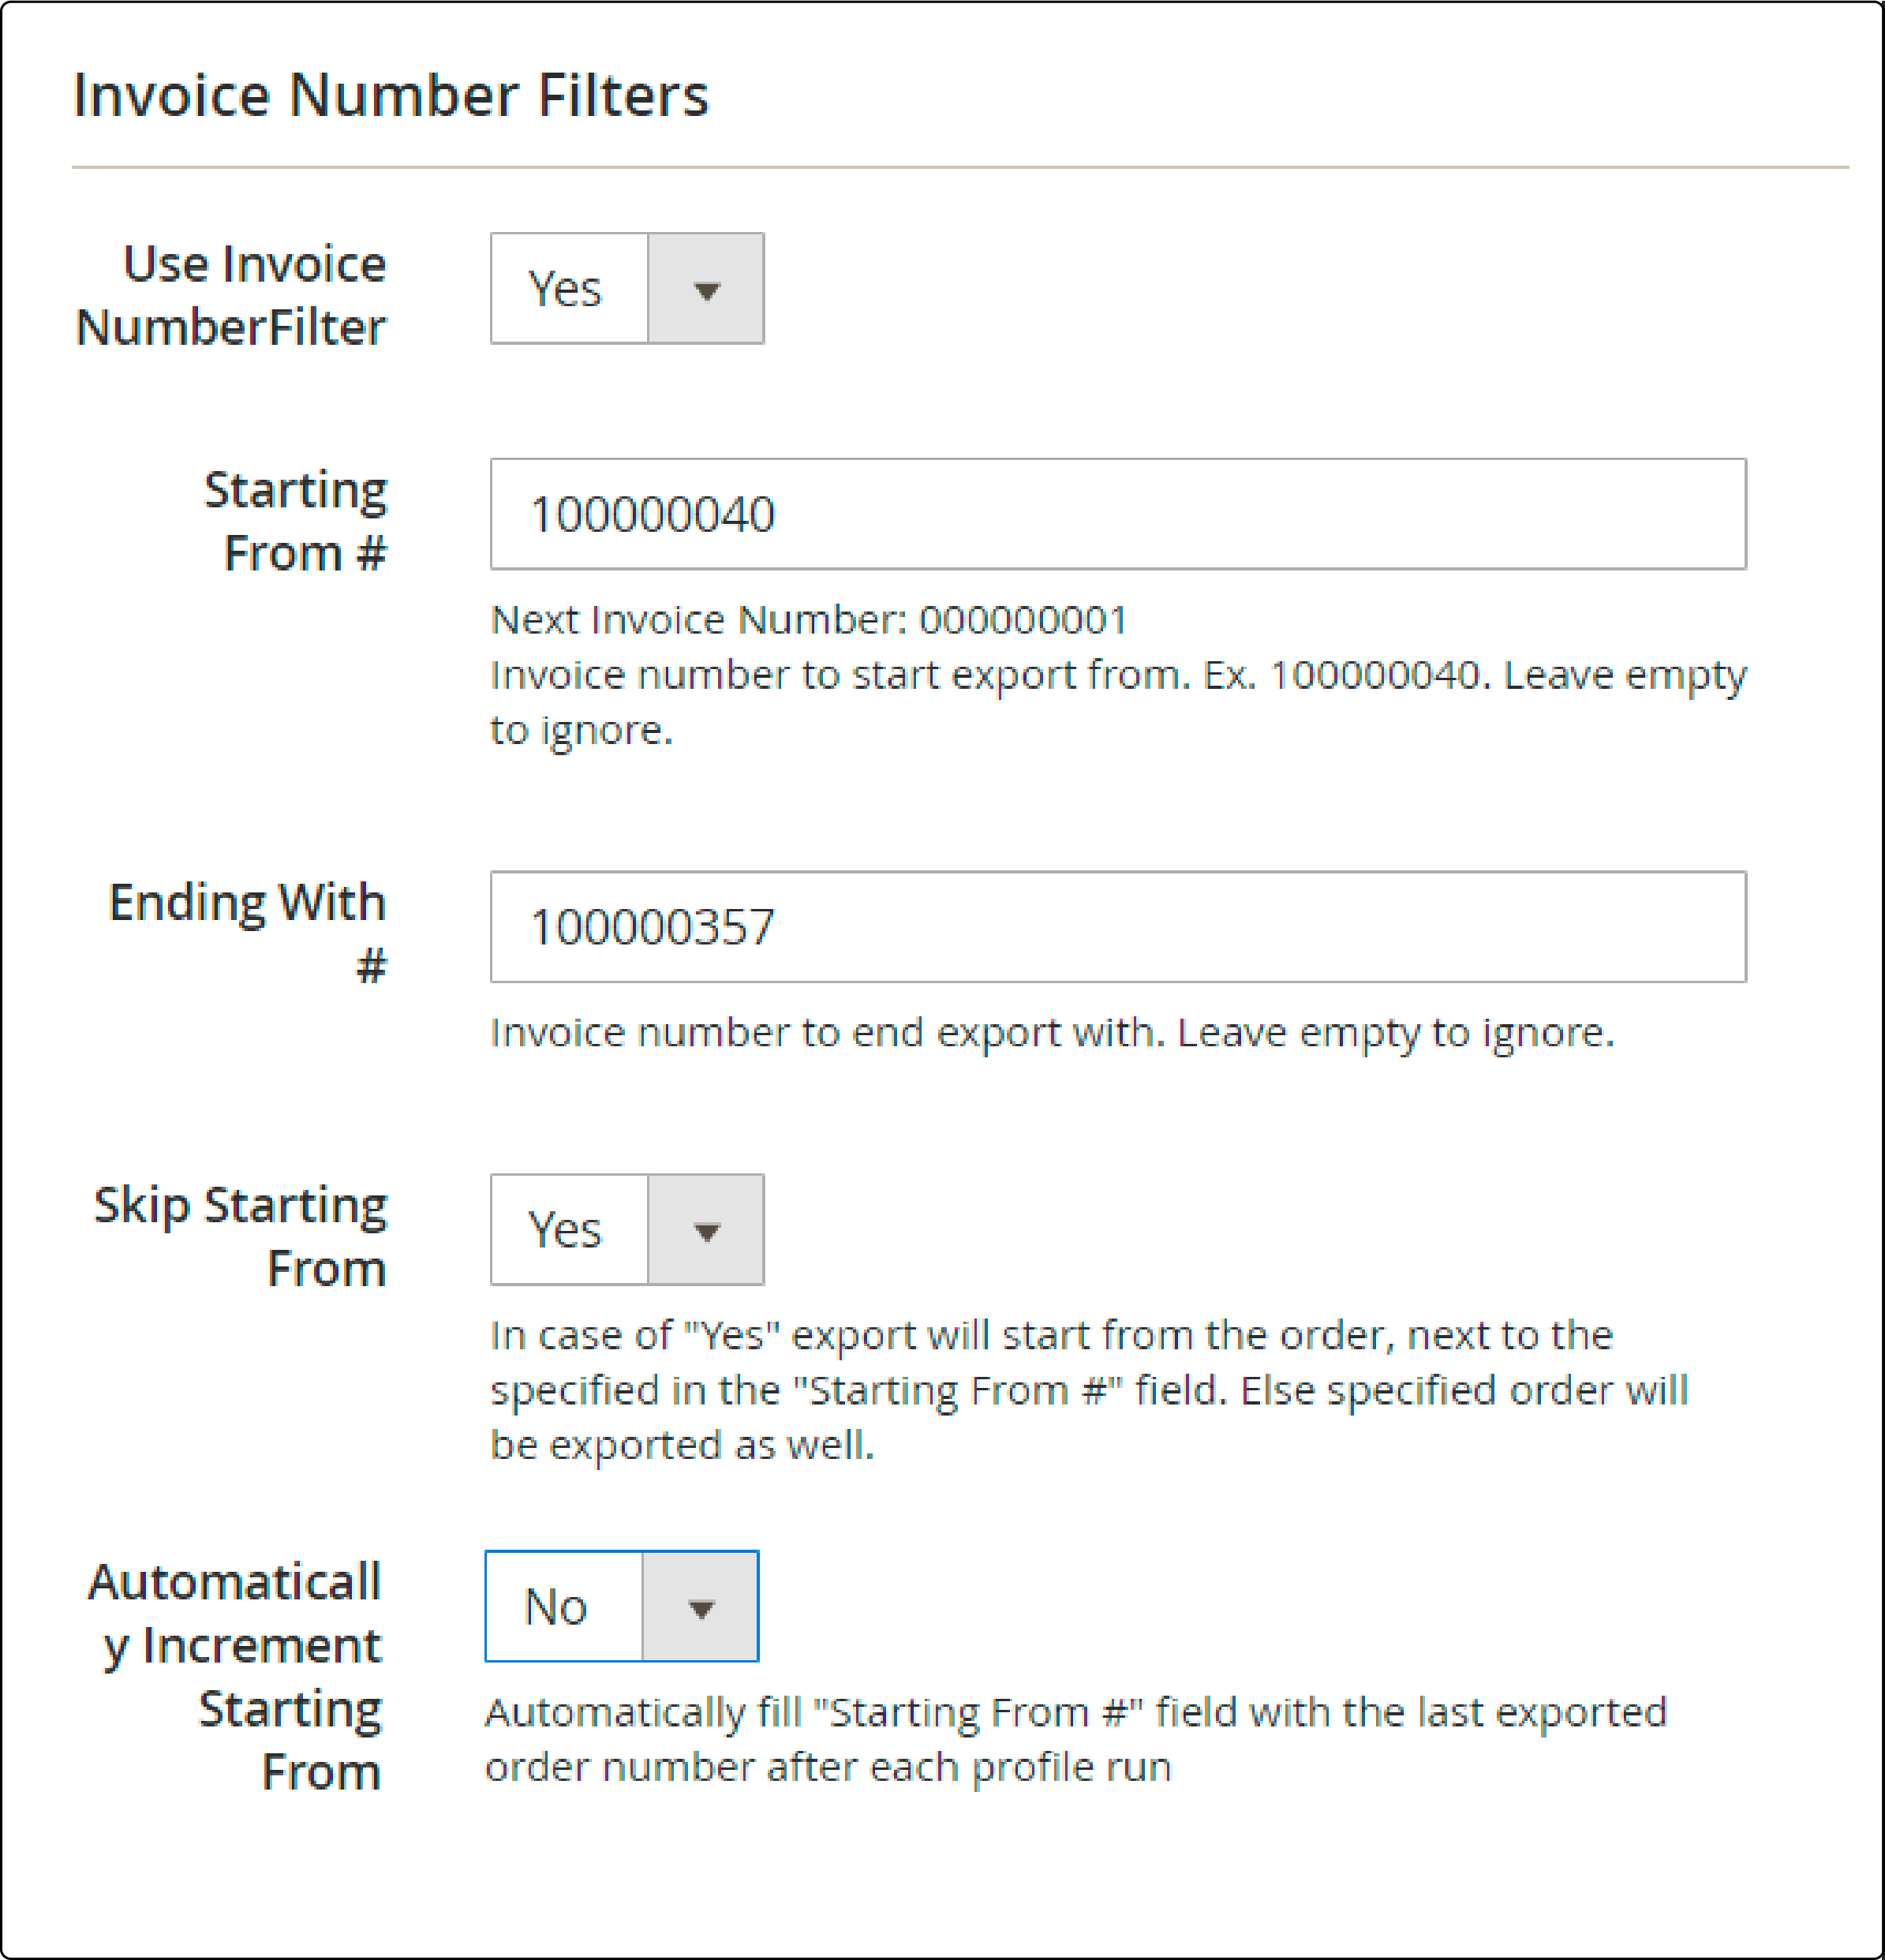
Turn on the Invoice numbers setting to Yes if you want to specify starting and ending invoice numbers. The configuration process is similar to order number filters.
3. Shipment Number Filters
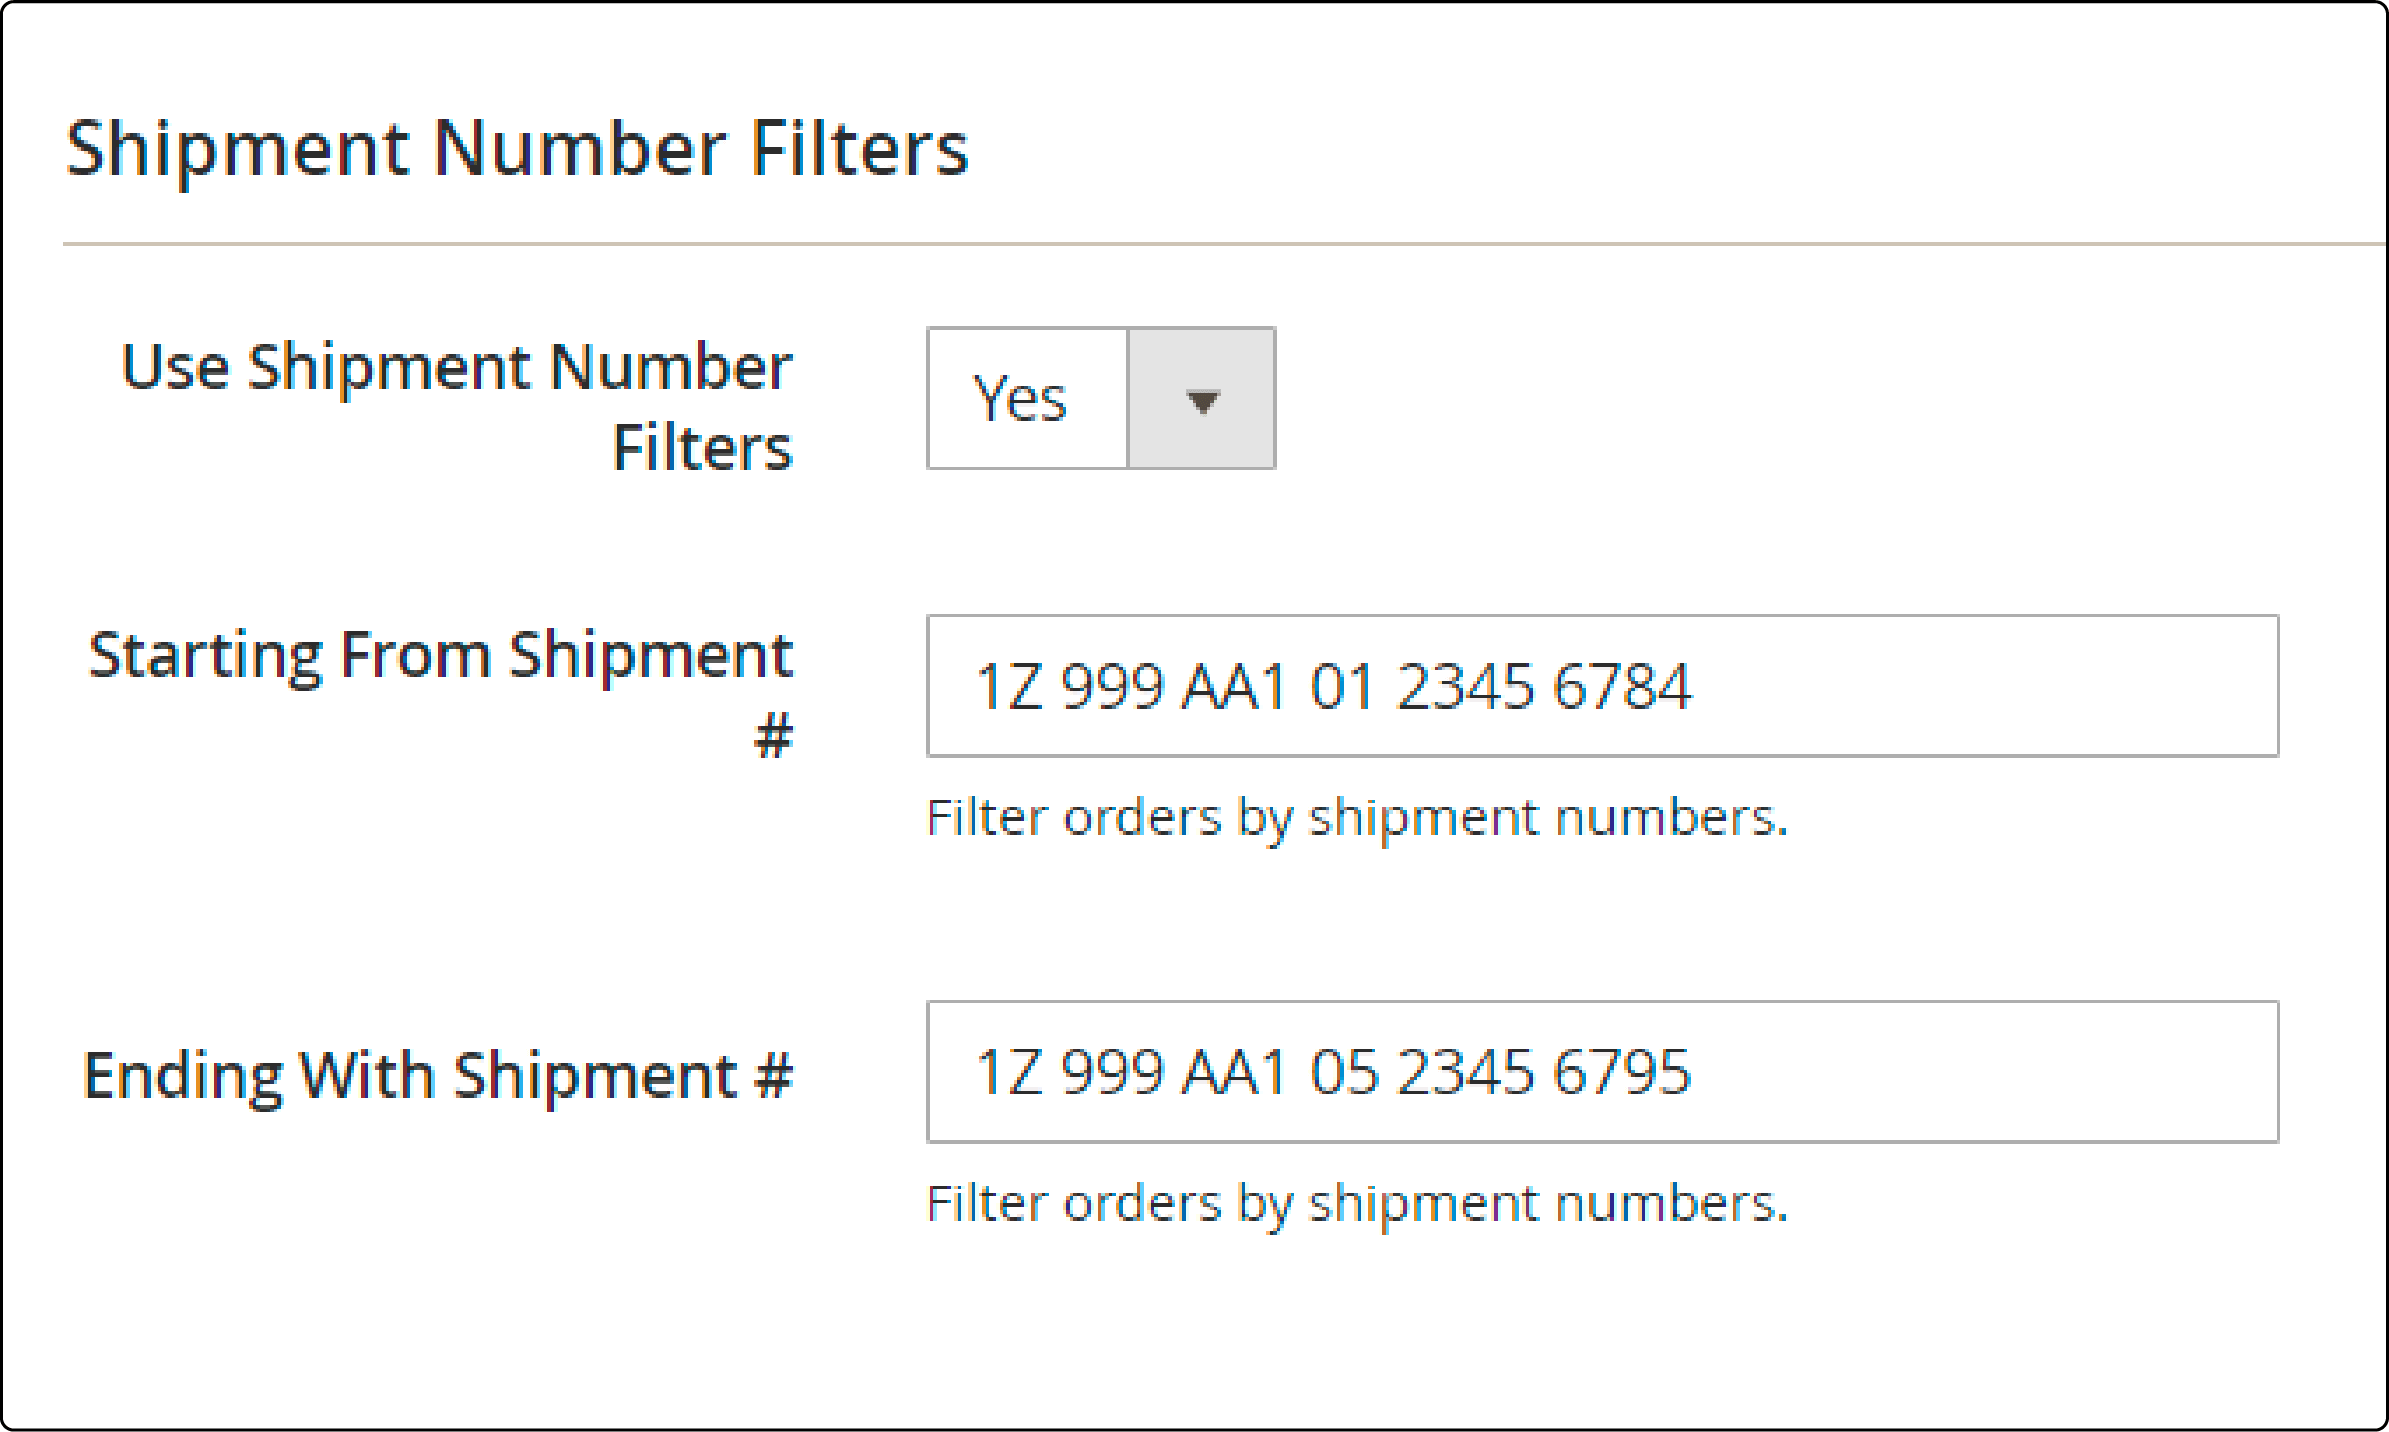
Enable the Shipping numbers setting to Yes if you want to specify starting and ending shipment numbers.
4. Date Range
For specifying a date range for exporting orders:
-
Enable the Date Range option.
-
Specify the desired date range for which you want to export orders.
5. Customer Groups
To filter orders by customer groups:
-
Turn on the Filter by Customer Group setting to Yes.
-
Select the specific customer groups for which you'd like to export orders.
6. Other Export Filters
Under Other Export Filters, specify the Order Statuses for which you want to export orders.
3. File Options
1. File Properties
The options include:
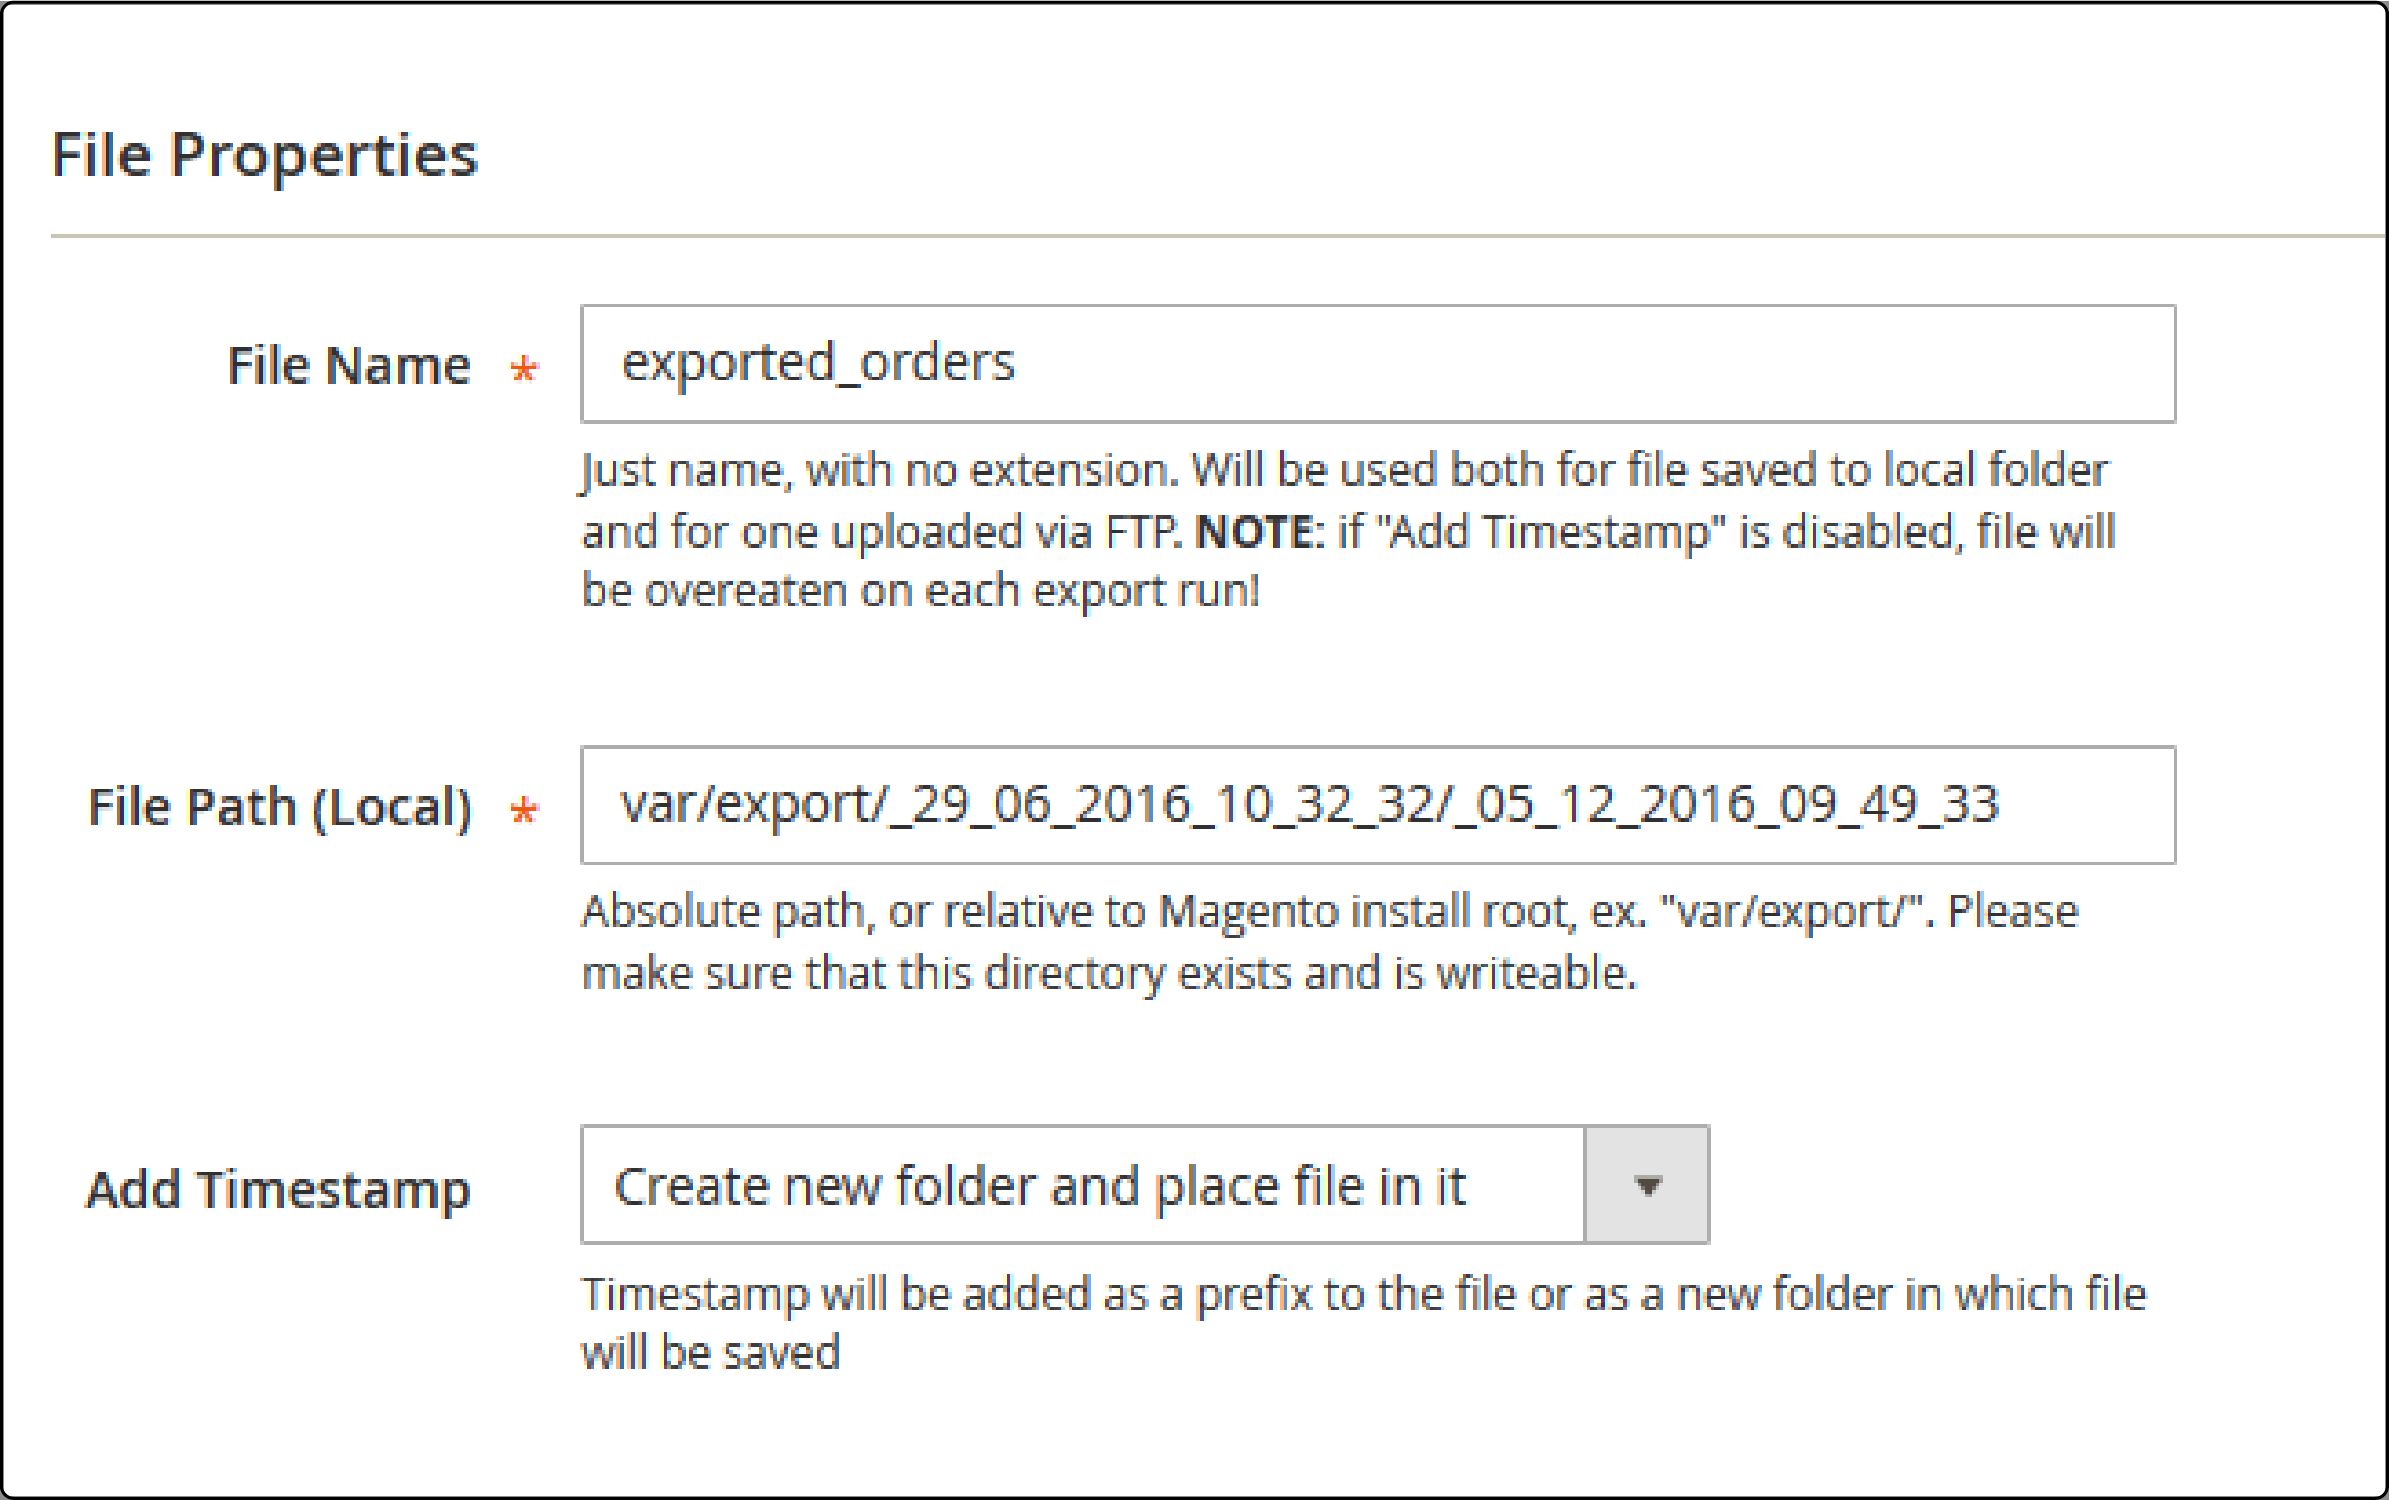
- File Name: Choose a unique name for the exported file. If the Add Timestamp option is disabled, the file will overwrite previous exports during each new export run.
- File Path (local): Specify where the exported file should be saved.
-
Add Timestamp: You have two options here:
- Prefix Timestamp: You can add a timestamp as a prefix to the file name.
- Create a New Folder: You can also create a new folder and place the file inside it.
2. File Format
Select the format for exporting orders. Remember that if you choose XML or CSV, additional configuration settings will be required for each format. Upload Exported File by FTP: You have two upload methods to choose from:
- FTP: Use FTP for file transfer.
- SFTP: Alternatively, you can use SFTP for secure file transfer.
Provide all the details about your FTP/SFTP server, including:
- Hostname or IP address.
- Port number (if different from the default).
- Username.
- Password or key (for SFTP).
- Directory path on the server where files should be uploaded.
3. Email Delivery
If you prefer to receive the exported file via email, specify the email address to which the file should be sent. Optionally, define a subject for the email message.
4. Field Mapping
Navigate to System > Efficient Order> History to access your export profiles. To export custom product options, you have two choices:
- Choose Export Specified Fields Only.
- Alternatively, you can also export all available fields.
1. Manage Mappings
To manage field mappings, follow these steps:
-
Choose the desired fields for export from the provided dropdown menu under Database Field.
-
For each field, specify how it should be named in the exported file.
2. Run History Tab
In the Run History tab, you will find the following options:
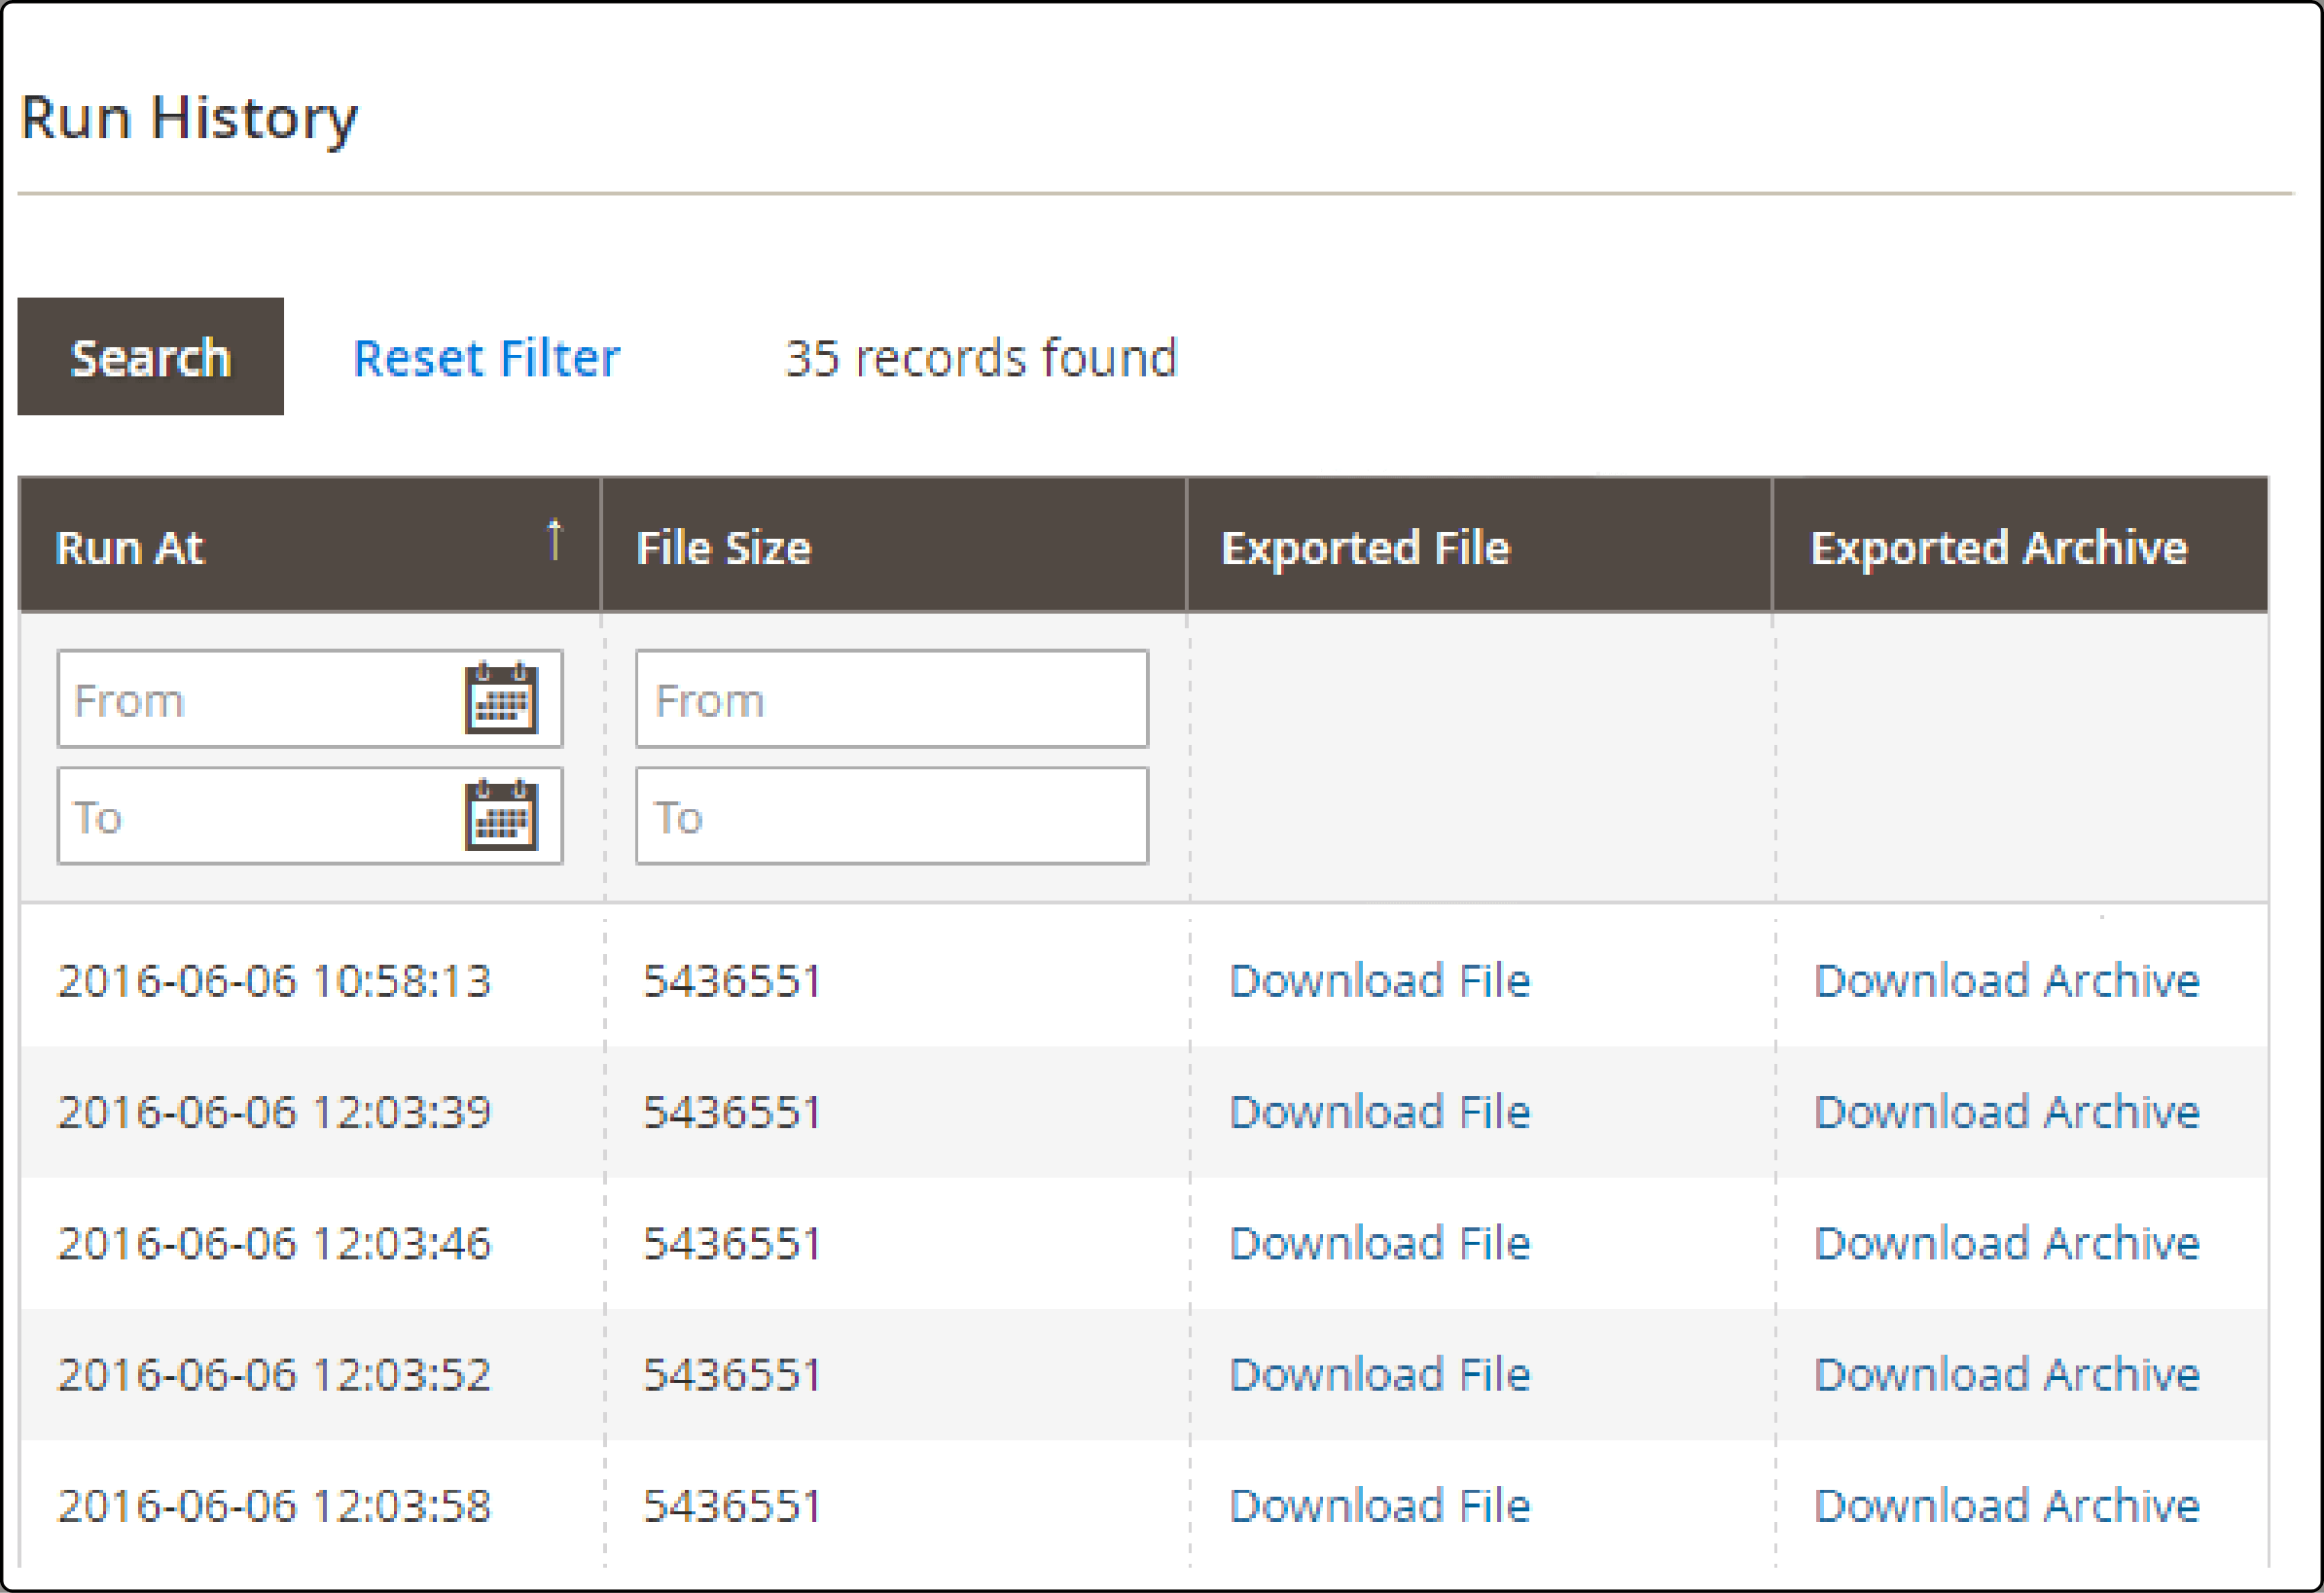
-
Download the exported file.
-
Access an archive containing the exported file.
Overview of Magento 2 Orders Import
Magento 2 Import Orders feature offers a wide range of valuable functions. It allows you to seamlessly migrate to another Magento 2 store, simplifying the data transfer. It streamlines the task of bulk editing and updating your order database, making it more efficient.
Importing orders also facilitates the integration of order data from third-party sources or external marketplaces. It's important to note that the default functionality in Magento 2 supports exporting orders to a CSV file but lacks the capability to import orders.
Key Considerations When Importing Orders With Magento 2
1. Entity_id and Increment_id Attributes
Orders are imported using entity_id and increment_id attributes. Entity_id serves as an internal order identifier within Magento 2's database. Magento 2 assigns entity_id automatically based on existing IDs in the database. If an imported order shares an ID with an existing order, Magento 2 will automatically assign a new ID.
Note- the imported order is not directly visible on the order details screen in the Magento 2 admin panel. To access it, you must navigate through the order details screen URL.
Increment_id represents the actual order number and is unique. It can be found in the order grid and on invoices. Magento 2 cannot process two orders with the same increment ID.
2. Product Assignment
Products are linked to orders via their SKUs. Even if the store lacks a product with a corresponding SKU, the imported order will still reference the product. However, remember that the 'reorder' functionality won't be available in such cases.
3. Customer Assignment
Customers are associated with orders using their email addresses. The imported order will still contain customer details if the store doesn't have a customer matching the provided email. However, these customers will be categorized as guests.
Note- Magento 2 Community (Open Source) and Enterprise (Commerce) edition order tables are compatible and can be seamlessly imported into each other.
How to Import Orders in Magento 2
Magento 2 does not offer a built-in feature for exporting data. To accomplish this task, you will need to utilize extensions. We will outline the steps for importing orders using the Magento 2 Import Orders extension by BSS Commerce. Keep in mind that there are various extensions available for this purpose.
-
Access the admin panel and navigate to the System menu.
-
Select Import by BSS and set Set Entity Type.
-
Configure Import Behavior: This setting offers three options.
- Select Add to insert new orders into the Magento 2 database.
- Choose Update to modify existing orders with new information from your CSV file.
- Click Delete to identify orders by entity_id in the CSV file and remove matching entries.
-
In Validation Strategy, determine how the system handles errors during the import process by selecting one option.
- Stop on Error makes the system halt the import when errors occur.
- Skip error entries allow the system to bypass errors and continue importing.
-
In Allowed Errors Count, set the maximum number of errors permitted during the import process. If the errors exceed this limit, the system will stop importing.
-
For Multiple Value separators, define the character that separates values in your CSV file. Typically, it's a comma (,), but ensure it matches your CSV data format.
-
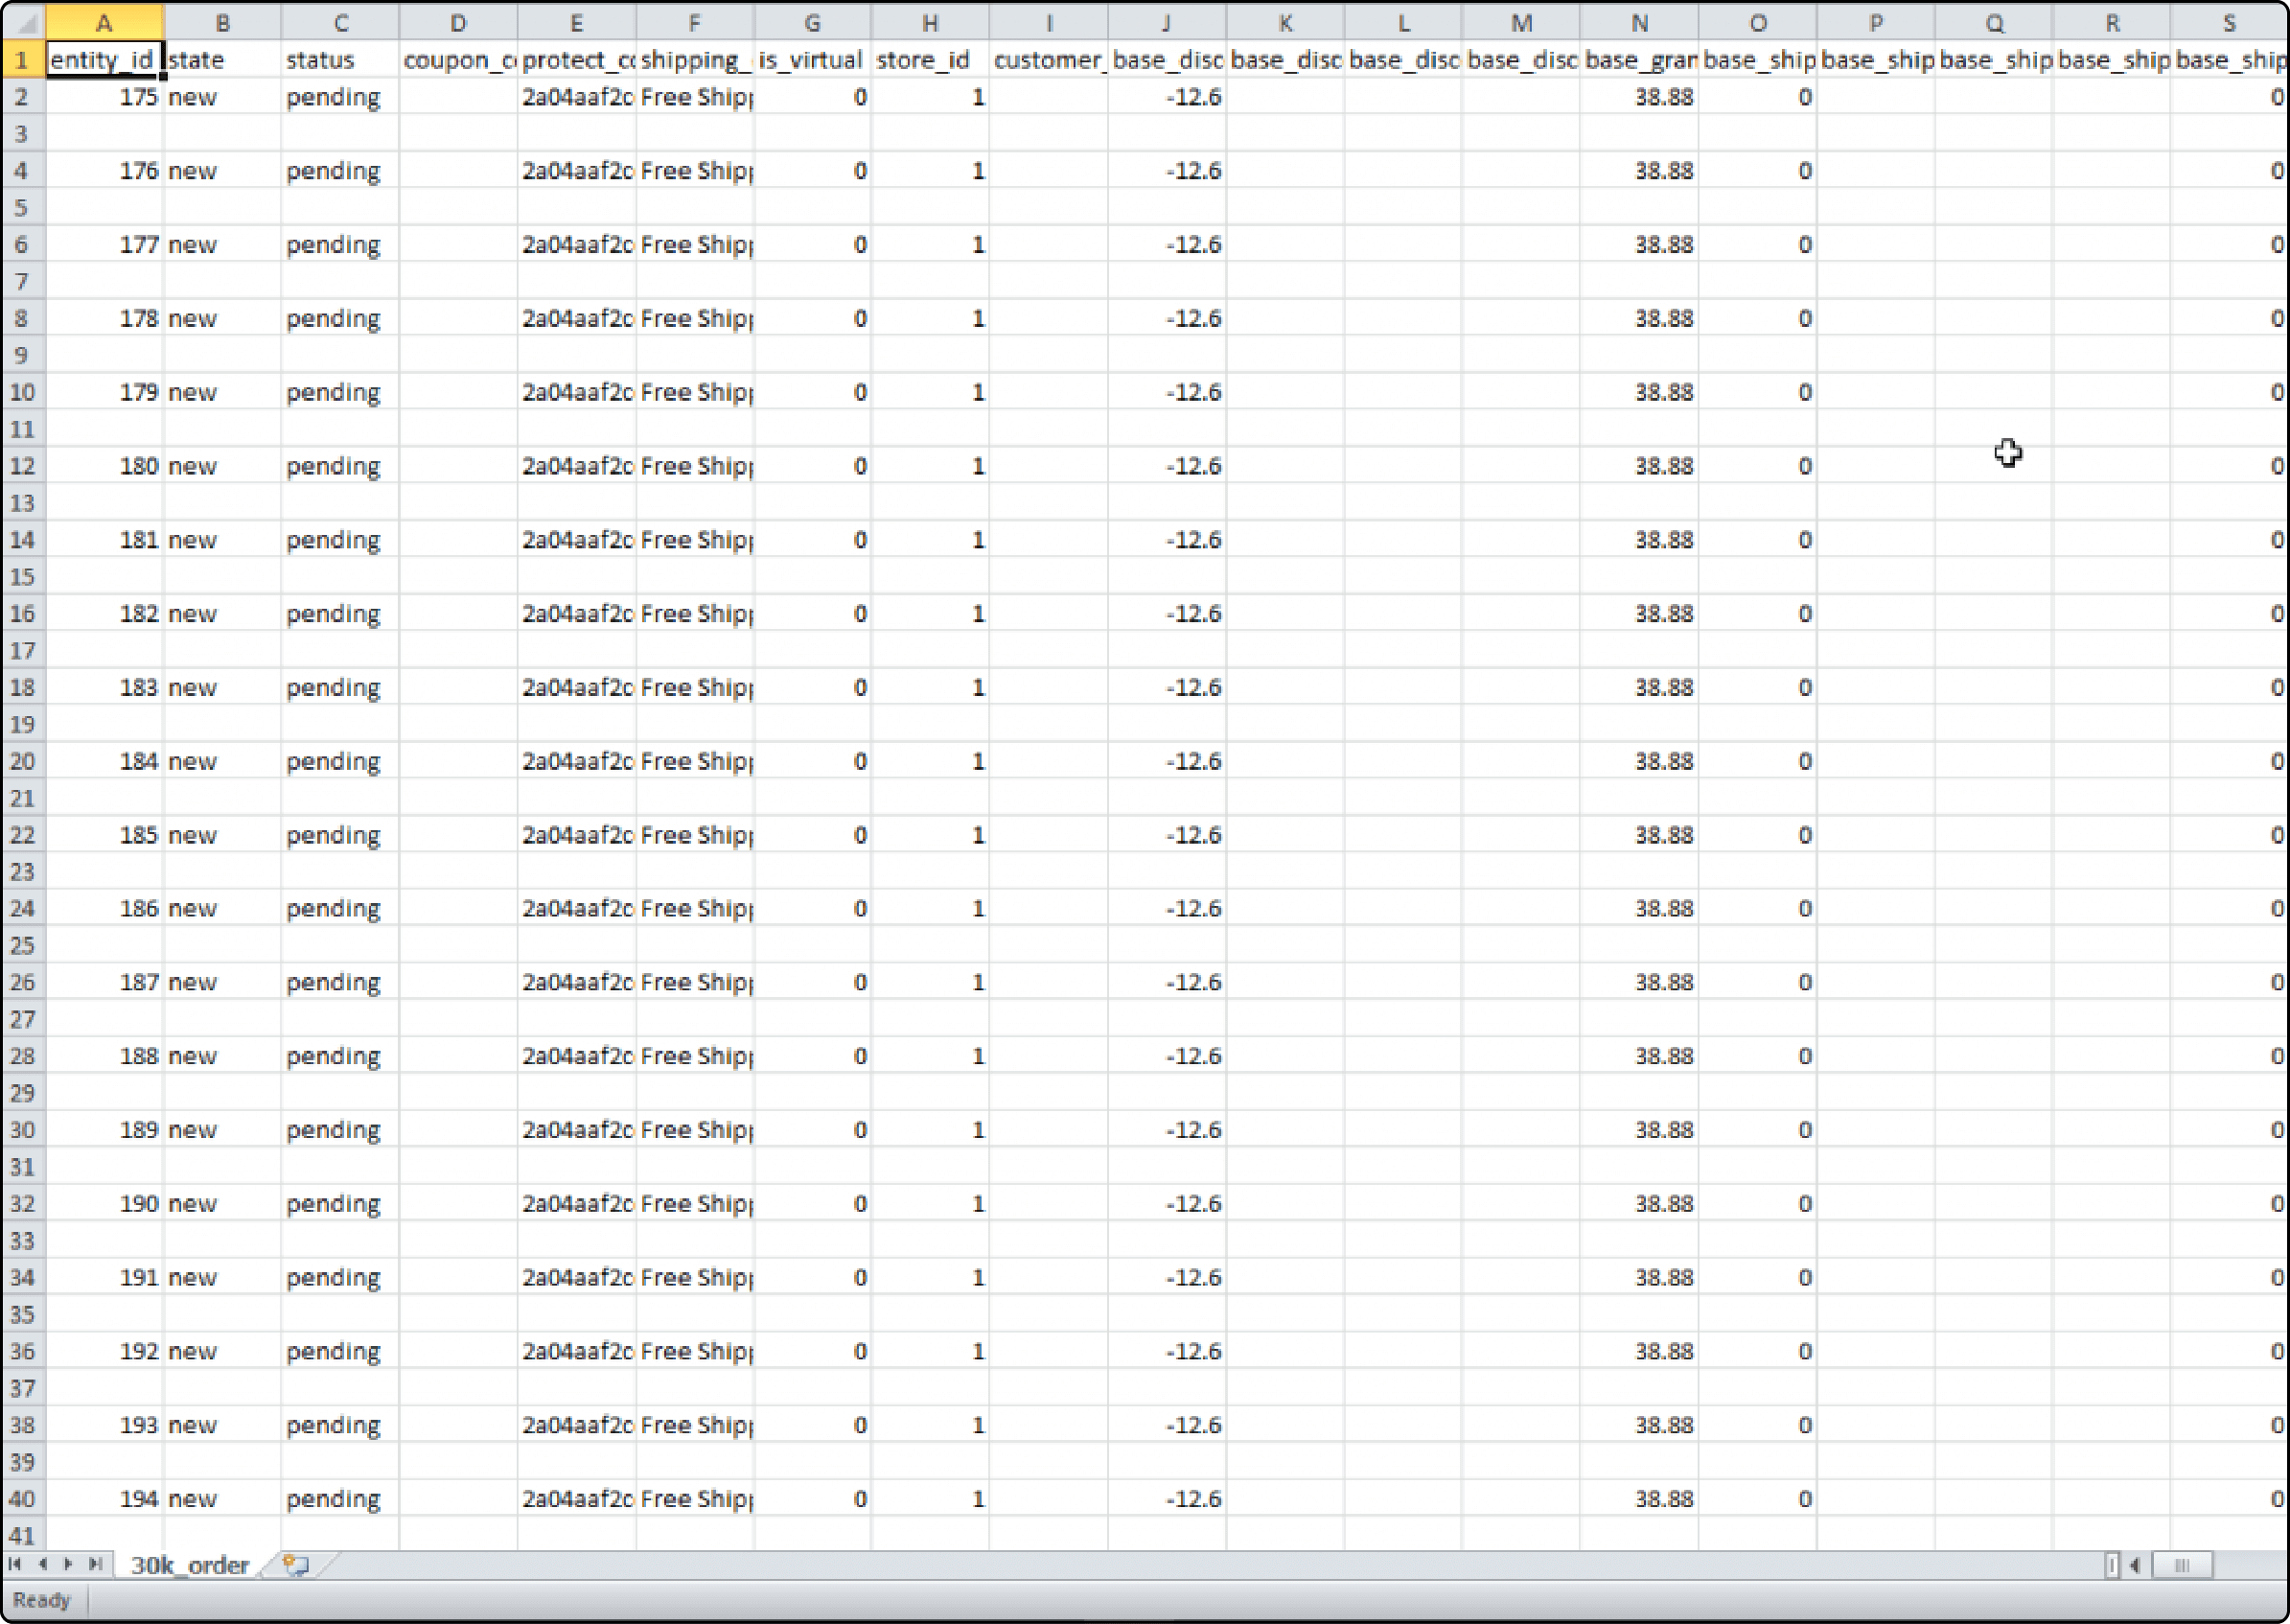
Click View sample data next to the Entity Type field and use it as a template.
-
Once your CSV file is ready, click the Choose File button to select the file you want to import.
-
After selecting the CSV file, click Check Data to validate the data for any errors.
-
If your CSV file is error-free, you can proceed. Click the Import button to initiate the import process.
FAQs
1. What are the benefits of using Magento 2 order export extensions?
Magento 2 order export extensions offer enhanced export options and automation through cron. It also has a support team, making managing and transferring order data easier. You can customize your exports and cancel order to include specific order data, such as customer information and product details.
2. Can I export orders to third-party applications using Magento 2?
Yes, you can export orders to third-party applications by utilizing Magento 2 order export extensions. These extensions enable smooth integration with external systems, ensuring efficient data sharing and management.
3. Is there a default Import order feature in Magento 2 ?
No, Magento 2 lacks a default order import feature. It requires extensions or custom development for this purpose.
4. What export options are available for Magento 2 order data?
You have two primary export modules for Magento 2 order data: CSV and XML. These choices offer flexibility, letting you select the format that aligns with your specific data export and analysis requirements.
5. How do I troubleshoot common problems with order import?
Order import issues are generally found in data format discrepancies, missing data fields, and conflicts with extensions. To resolve these, explore error logs, scrutinize field mappings, and seek guidance in required extension documentation.
6. How can I automate the export process in Magento 2?
Automating the export process is possible by configuring a cron job to run the export module at specified intervals. This smart automation reduces the need for manual intervention, ensuring timely and hassle-free order data exports.
Summary
Exporting orders in Magento and importing involves various techniques and tools. It helps businesses seamlessly manage order data, enhance productivity, and ensure smooth transactions. This tutorial covered essential aspects of exporting and importing orders in Magento. It includes choosing export options, configuring order profiles, and utilizing Magento 2 export extensions.
Consider exploring Magento server hosting plans to ensure the smooth performance of your online store.


