8 Steps to Enable/Disable Magento 2 WYSIWYG Editor
Struggling to edit product descriptions in Magento 2? The Magento 2 WYSIWYG (What You See Is What You Get) Editor simplifies content creation. It allows users to see how content will appear on the front end while editing. It is used to design appealing pages and products without HTML code configuration.
This tutorial will guide you through the steps to enable or disable the Magento 2 WYSIWYG Editor.
Key Takeaways
-
Learn how to use the Magento 2 WYSIWYG Editor.
-
See the benefits of using the WYSIWYG Editor.
-
Configure the WYSIWYG Editor in 8 steps.
-
Insert images into the WYSIWYG Editor in 8 simple steps.
-
Insert links into the WYSIWYG Editor.
-
Troubleshoot common issues with the WYSIWYG Editor.
What is a WYSIWYG Editor in Magento 2?
The WYSIWYG Editor in Magento 2, short for "What You See Is What You Get," is an essential tool for store owners and users.
This built-in tool helps store owners and users create content easily. It lets you see how your content will look on the front end without the need to write or understand code.
It offers a simple editing process. You can toggle between the code view and the live preview by just clicking the "Show/Hide Editor" button. It is located at the top left corner of the editor toolbar.
With the release of Magento 2.4, the editor was upgraded to TinyMCE 4. It includes a wide range of features:
- Text formatting options (formats, size, and color)
- Style enhancements (bold, italic, underline)
- Text alignment
- List creation (ordered and unordered)
- Link and image insertion
- Table creation
- Widget and variable addition
This upgrade to TinyMCE 4 in the Magento 2 WYSIWYG Editor simplifies the design and update process of content. It ensures that the back end accurately reflects what customers will experience on the Magento storefront.
WYSIWYG Editor Features and Benefits
| Feature | Description | Benefit |
|---|---|---|
| Text Formatting | Change font style, size, and color. | Enhances readability and visual appeal. |
| Image Insertion | Add images from your computer or the web. | Makes content visually engaging. |
| Link Addition | Insert hyperlinks to other pages or external websites. | Guides readers with additional information. |
| Table Creation | Create tables for organized data display. | Helps in structuring data clearly. |
| List Making | Generate ordered (numbered) or unordered (bulleted) lists. | Organizes information in a digestible format. |
| Media Embedding | Embed videos or other media. | Enhances content with multimedia. |
| HTML Editing | Switch to HTML view for manual code editing. | Offers control for advanced customization. |
| Undo/Redo Actions | Revert or reapply changes easily. | Facilitates error correction and experimentation. |
8 Steps to Configure WYSIWYG Editor in Magento 2
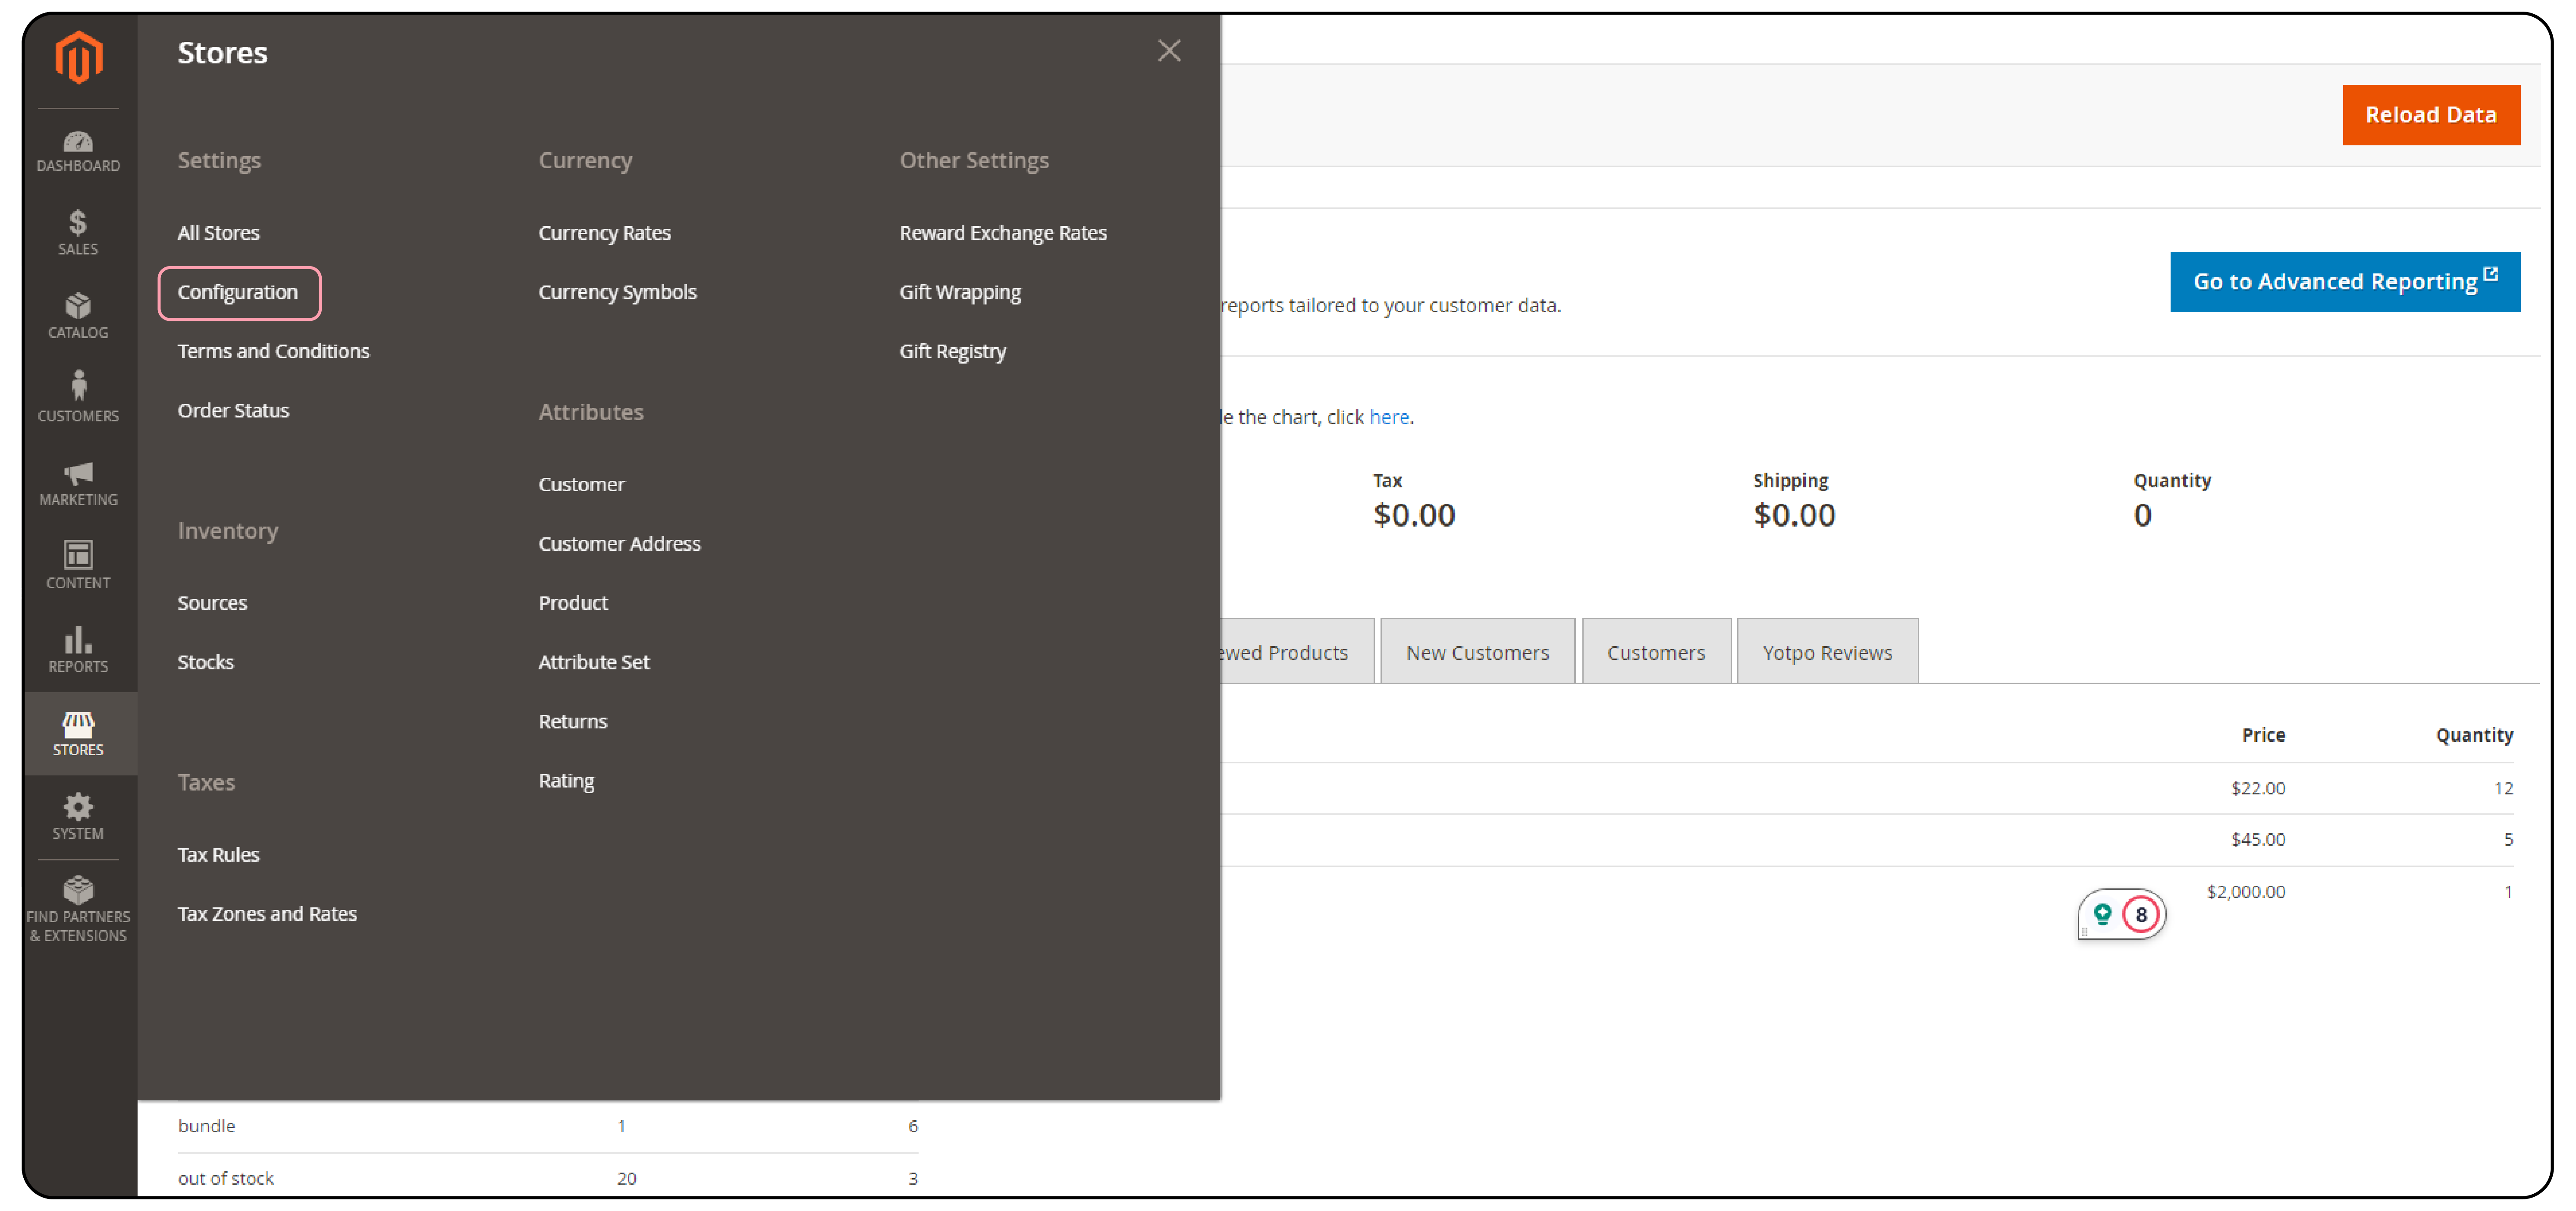
Step 1: Access the Admin Panel. Navigate through Stores > Settings > Configuration.
Step 2: Within the left sidebar, click General > Content Management.
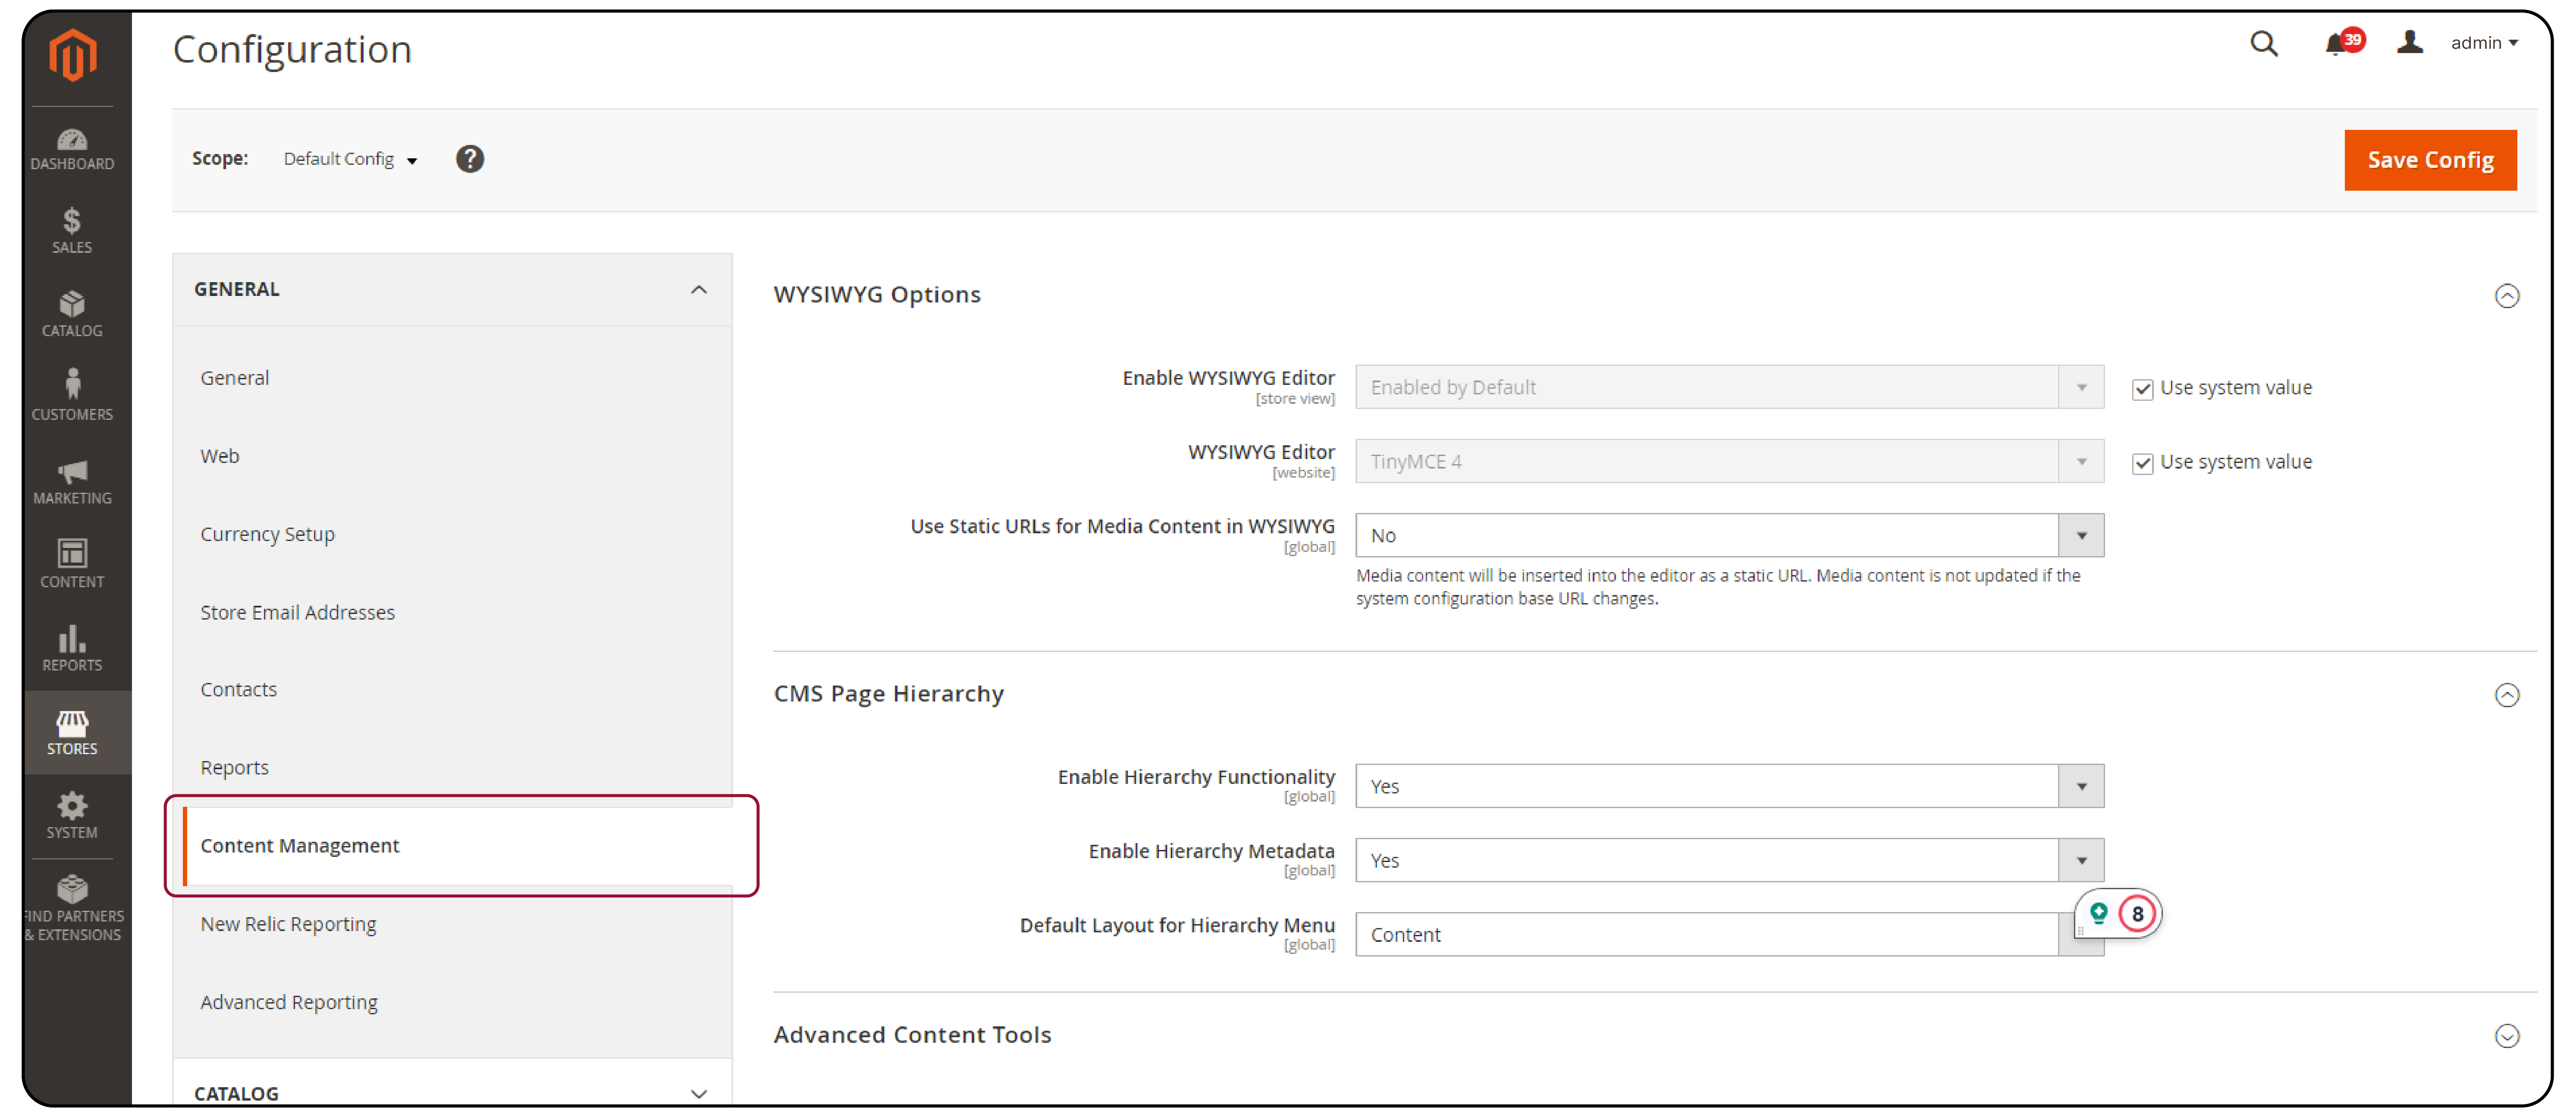
Step 3: The WYSIWYG editor is activated automatically. To modify settings, deselect the "Use system value" checkbox.

Step 4: Select your preferred setting from the options available:
- Enabled by Default
- Disabled by Default
- Disabled Completely

Step 5: The "WYSIWYG Editor" field defaults to TinyMCE 4.

Step 6: Choose Yes or No in “Use Static URLs for Media Content in WYSIWYG.”

Step 7: Confirm changes by clicking "Save Config".
Step 8: Clear the system cache. Proceed to System > Cache Management. Select all, choose Refresh, and press Submit.
8 Steps to Insert an Image in the WYSIWYG Editor
Step 1: Open your desired page, block, or dynamic block in Edit mode.
Step 2: Click on any text area that enables the editor.
Step 3: Place your cursor where the Magento image should go.
Step 4: Click the "Insert Image" icon on the editor toolbar to open the dialog.

Step 5: Choose Source:
-
To Upload a New Image:
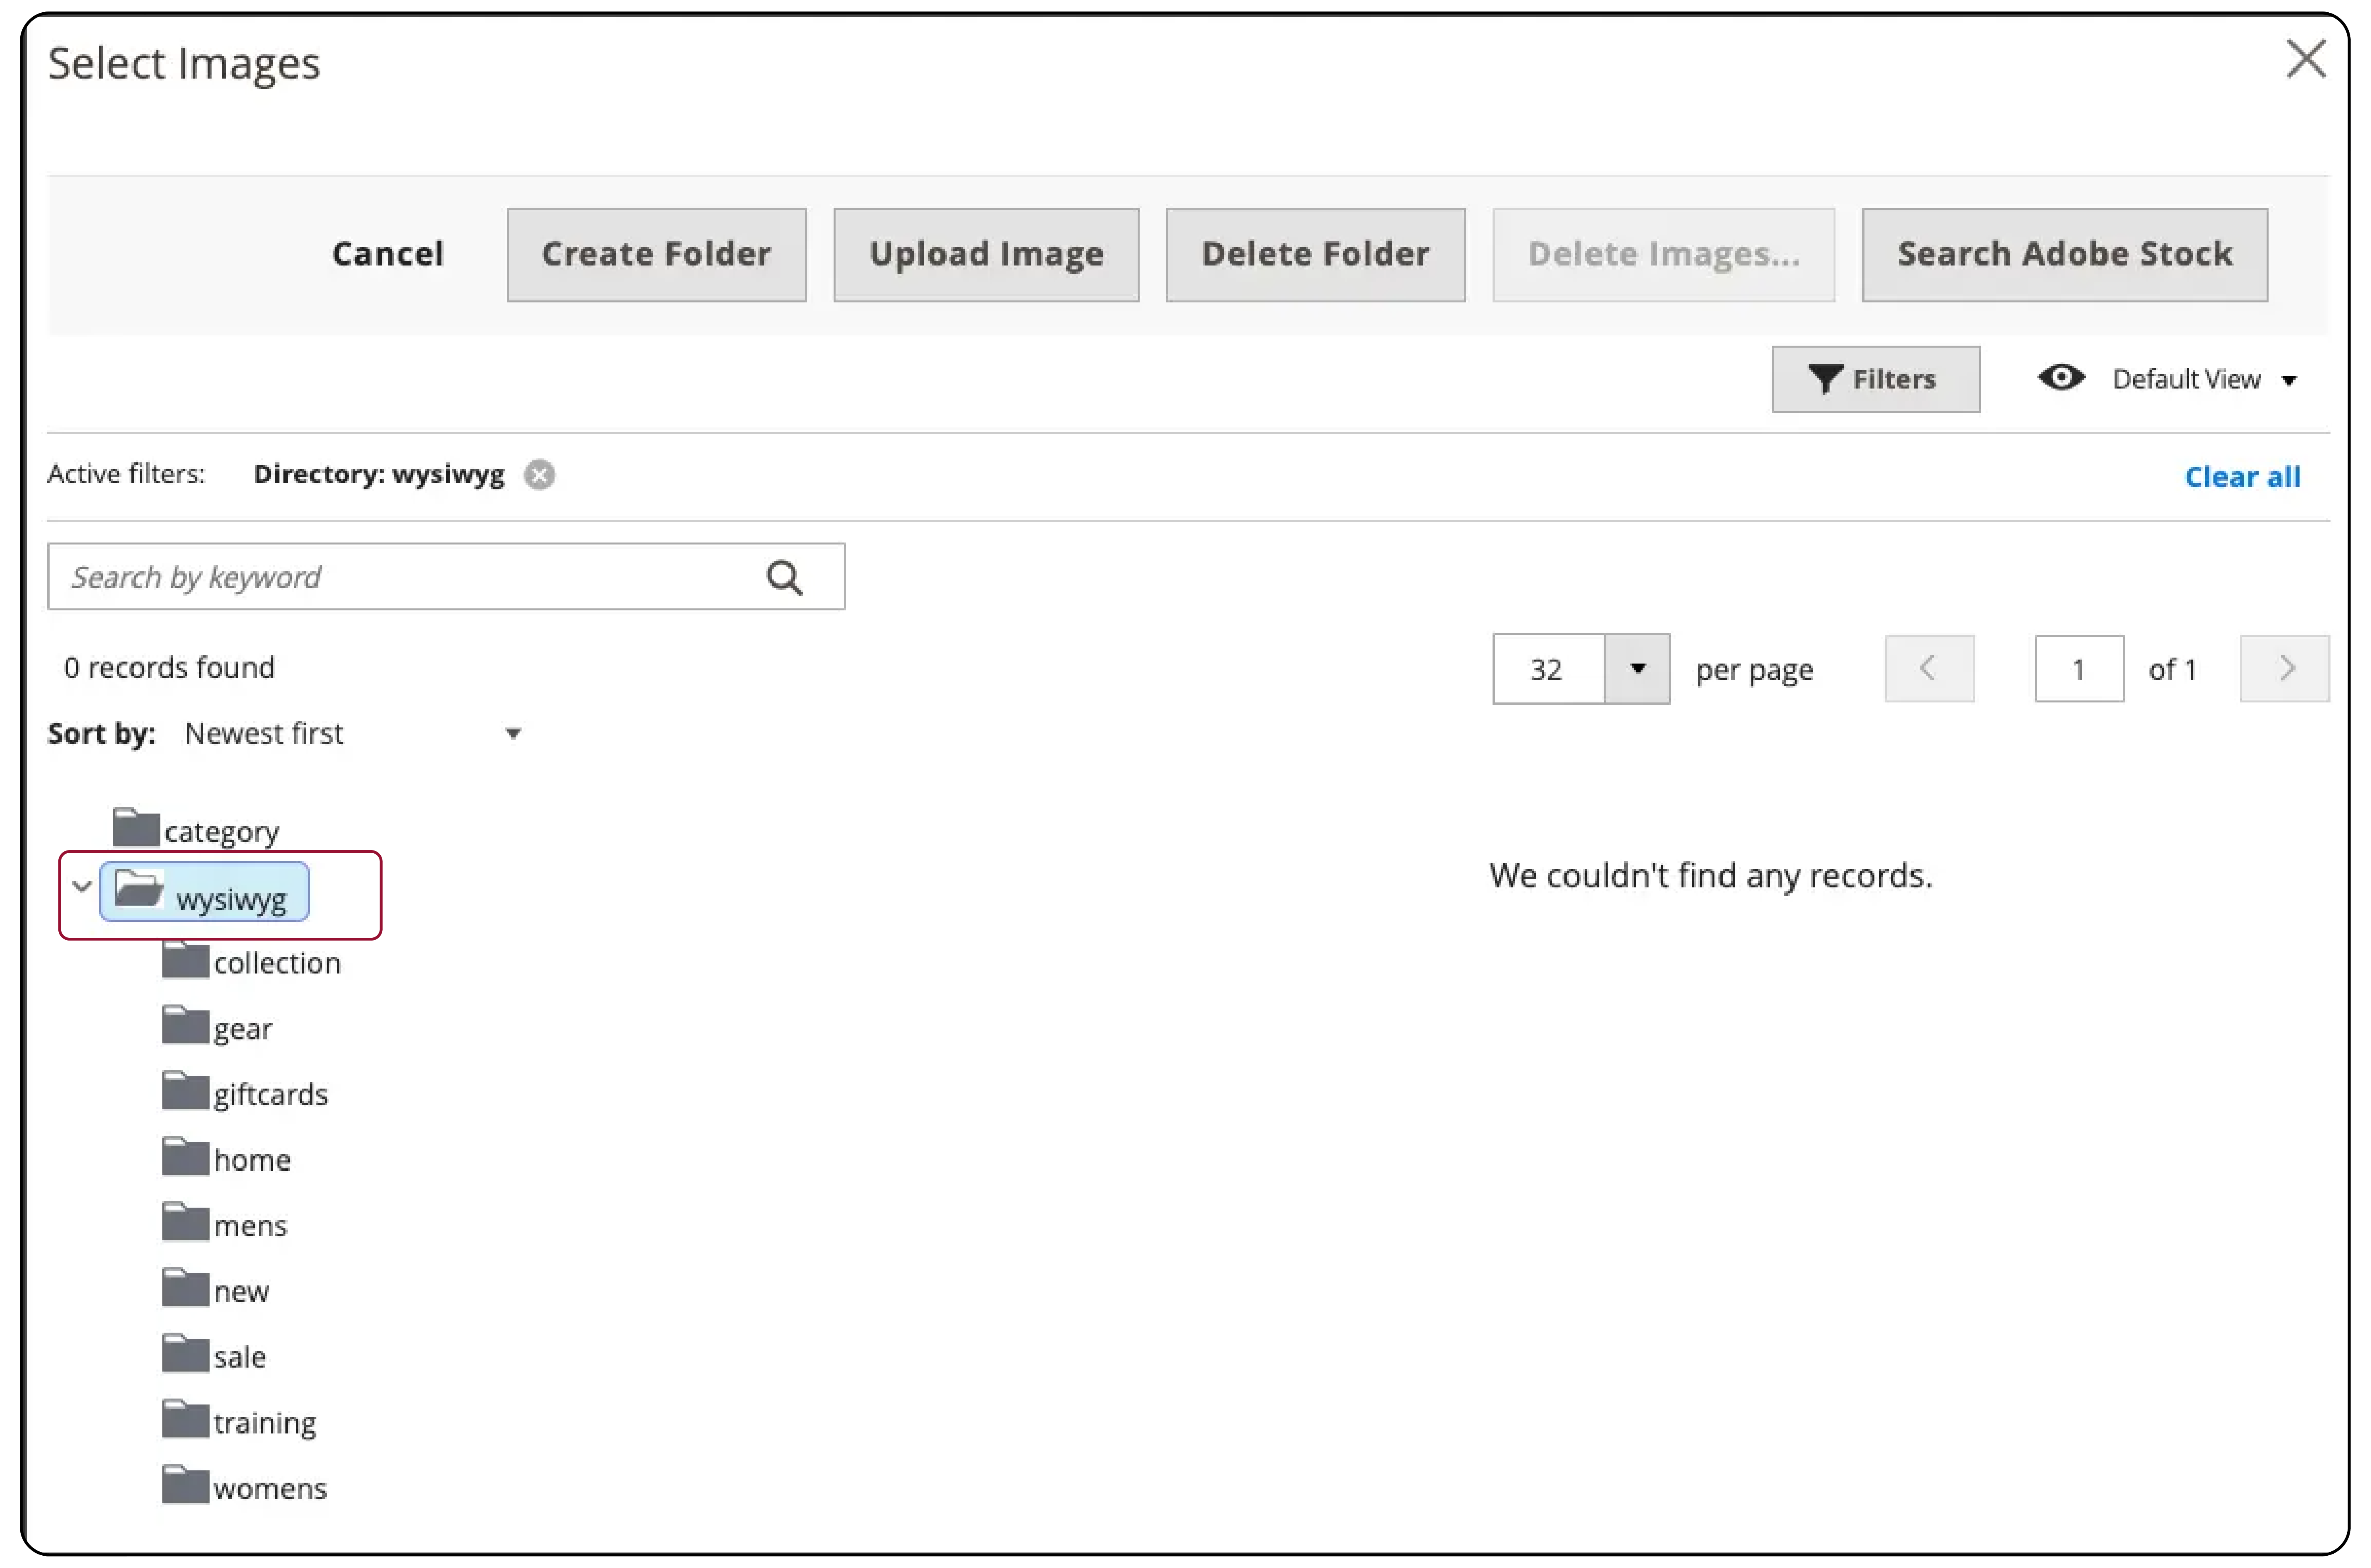
- Navigate to the desired folder in the directory tree.
- Click Choose Files, find your image, and upload.
- Select the image's thumbnail, then click Add Selected.
-
To Use an Existing Asset:
- Locate the image within the media storage using the directory tree.
- Click its thumbnail and then Add Selected.
-
To Utilize Adobe Stock:
- Click Search Adobe Stock, find your image, and add it to the gallery.
- Choose the image thumbnail in the gallery and Add Selected.
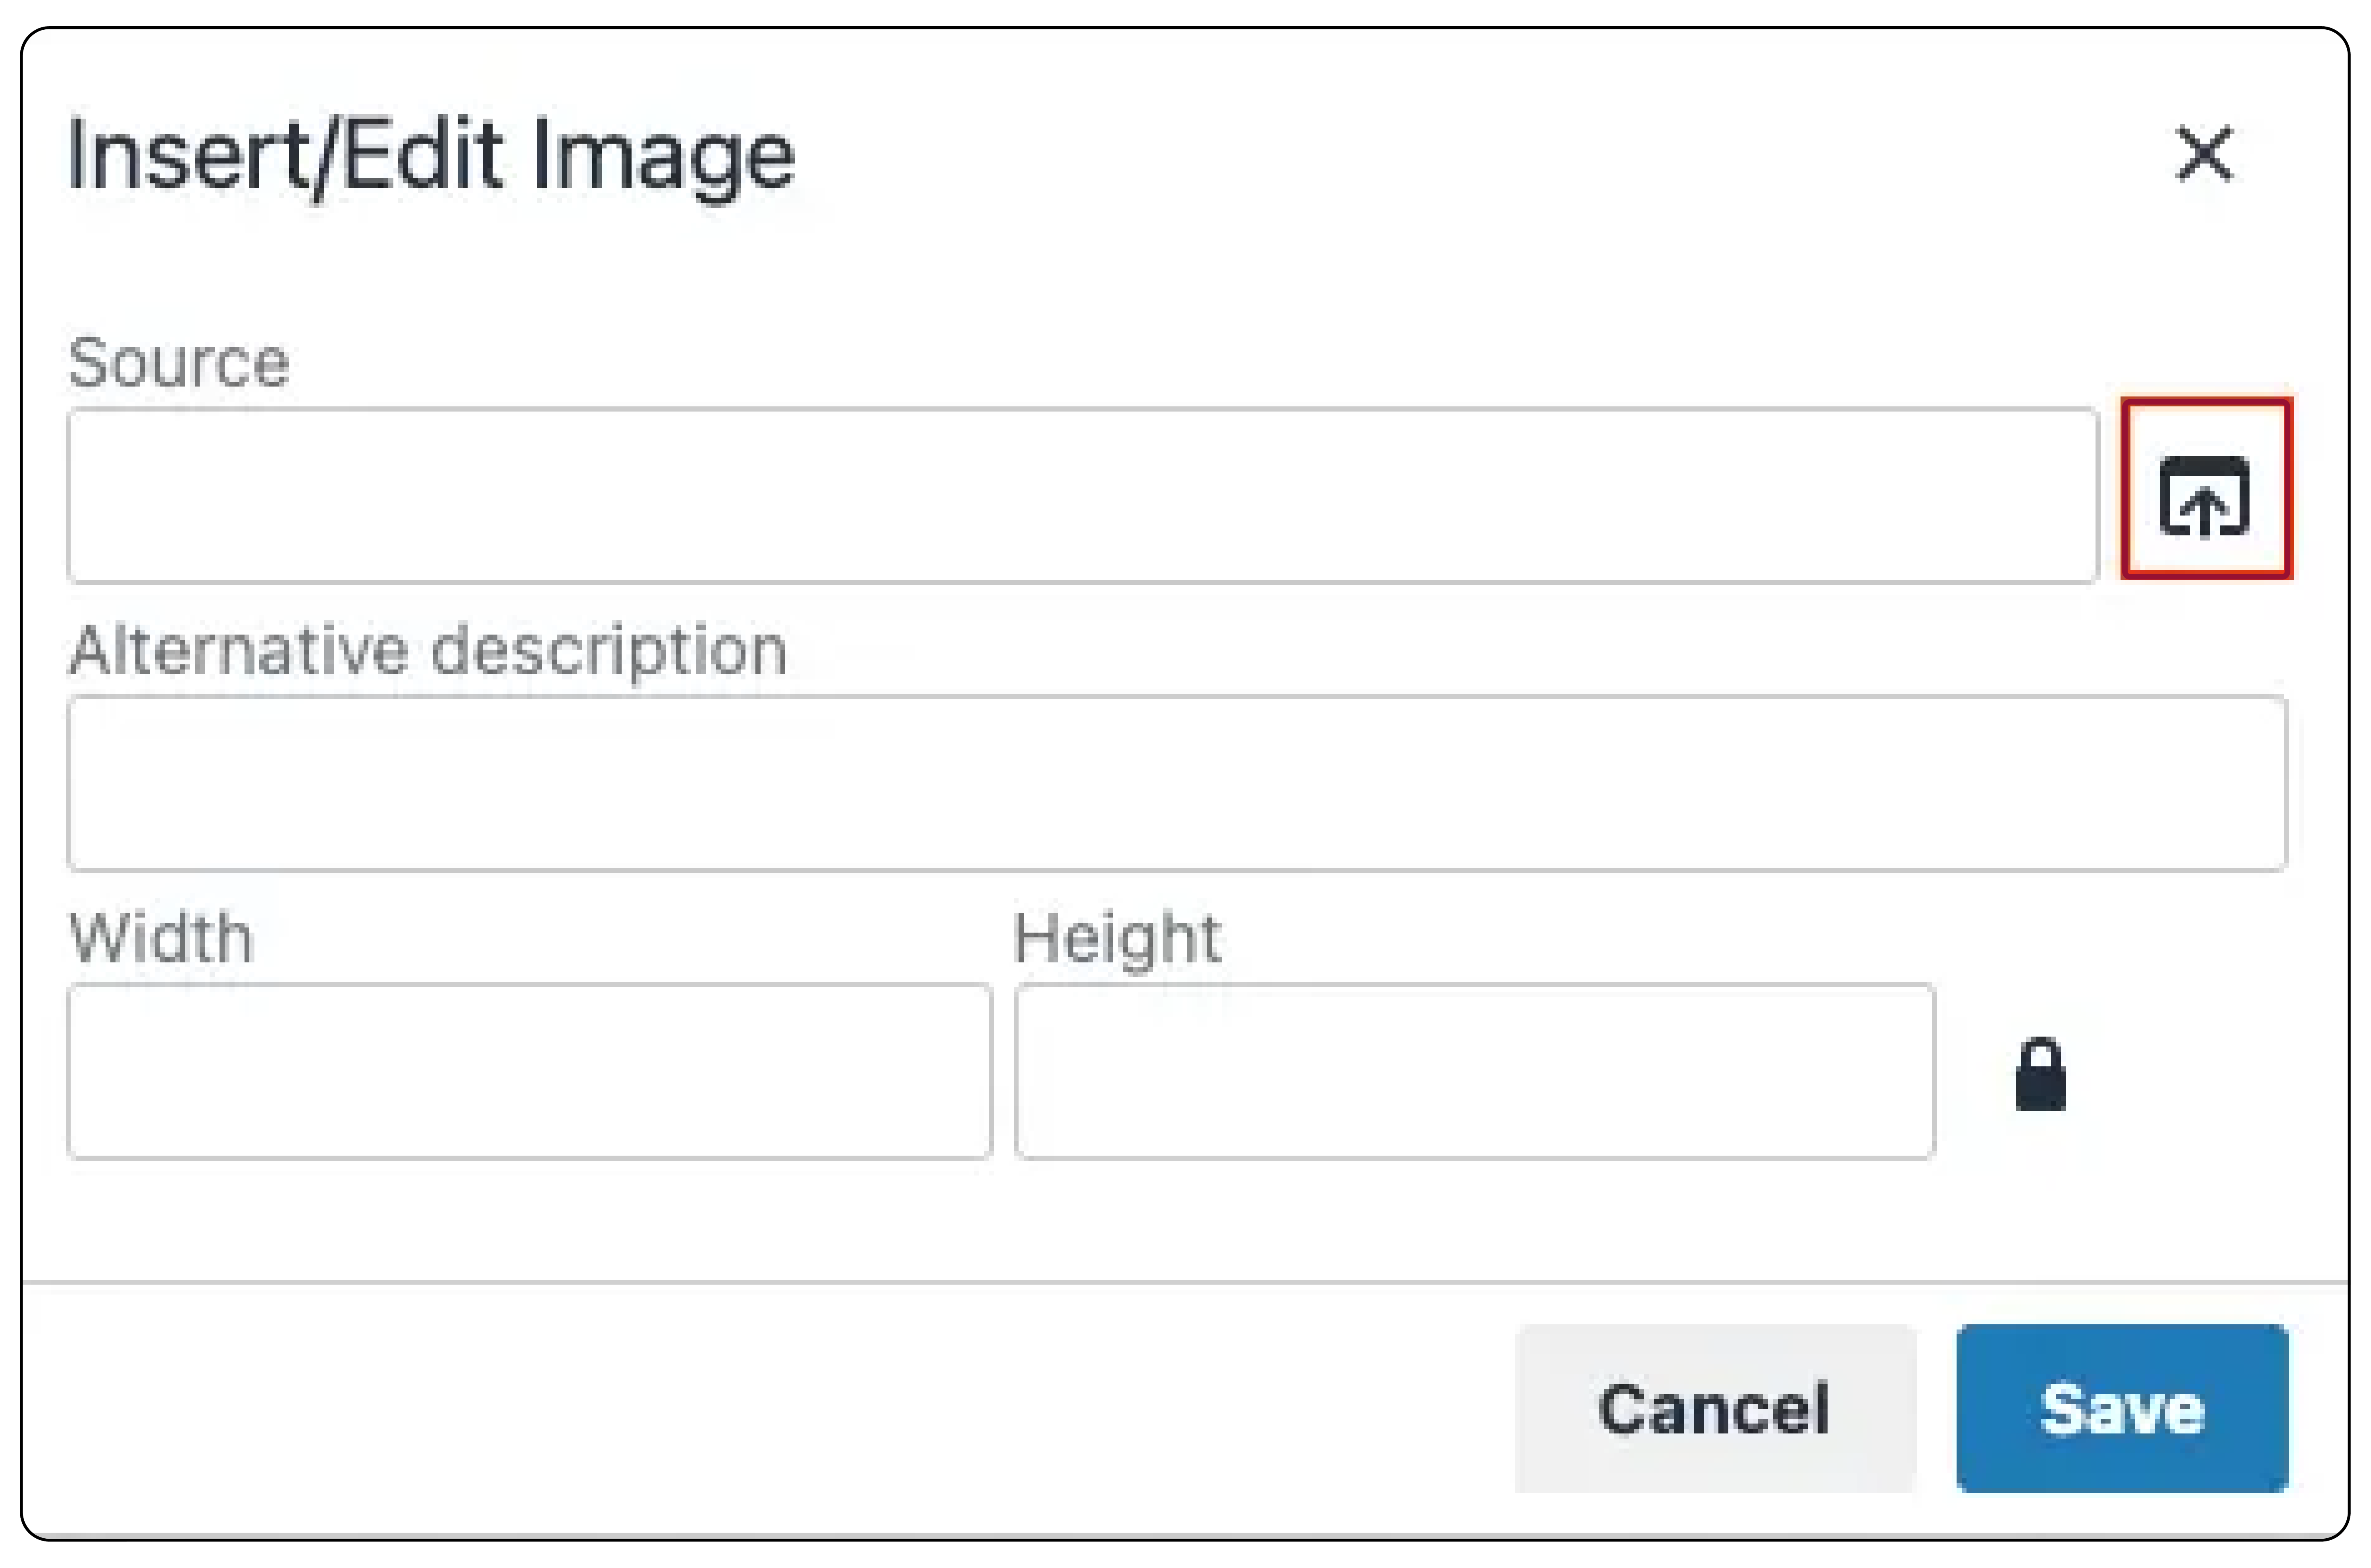
Step 6: Provide a short description of the image.
Step 7: Specify the Magento image size in pixels. Ensure Constrain proportions are checked to maintain aspect ratio.
Step 8: Click Insert to place the image into your content.
How to Insert a Link in the WYSIWYG Editor in Magento 2?
- Select Text: Highlight the text you wish to turn into a link.

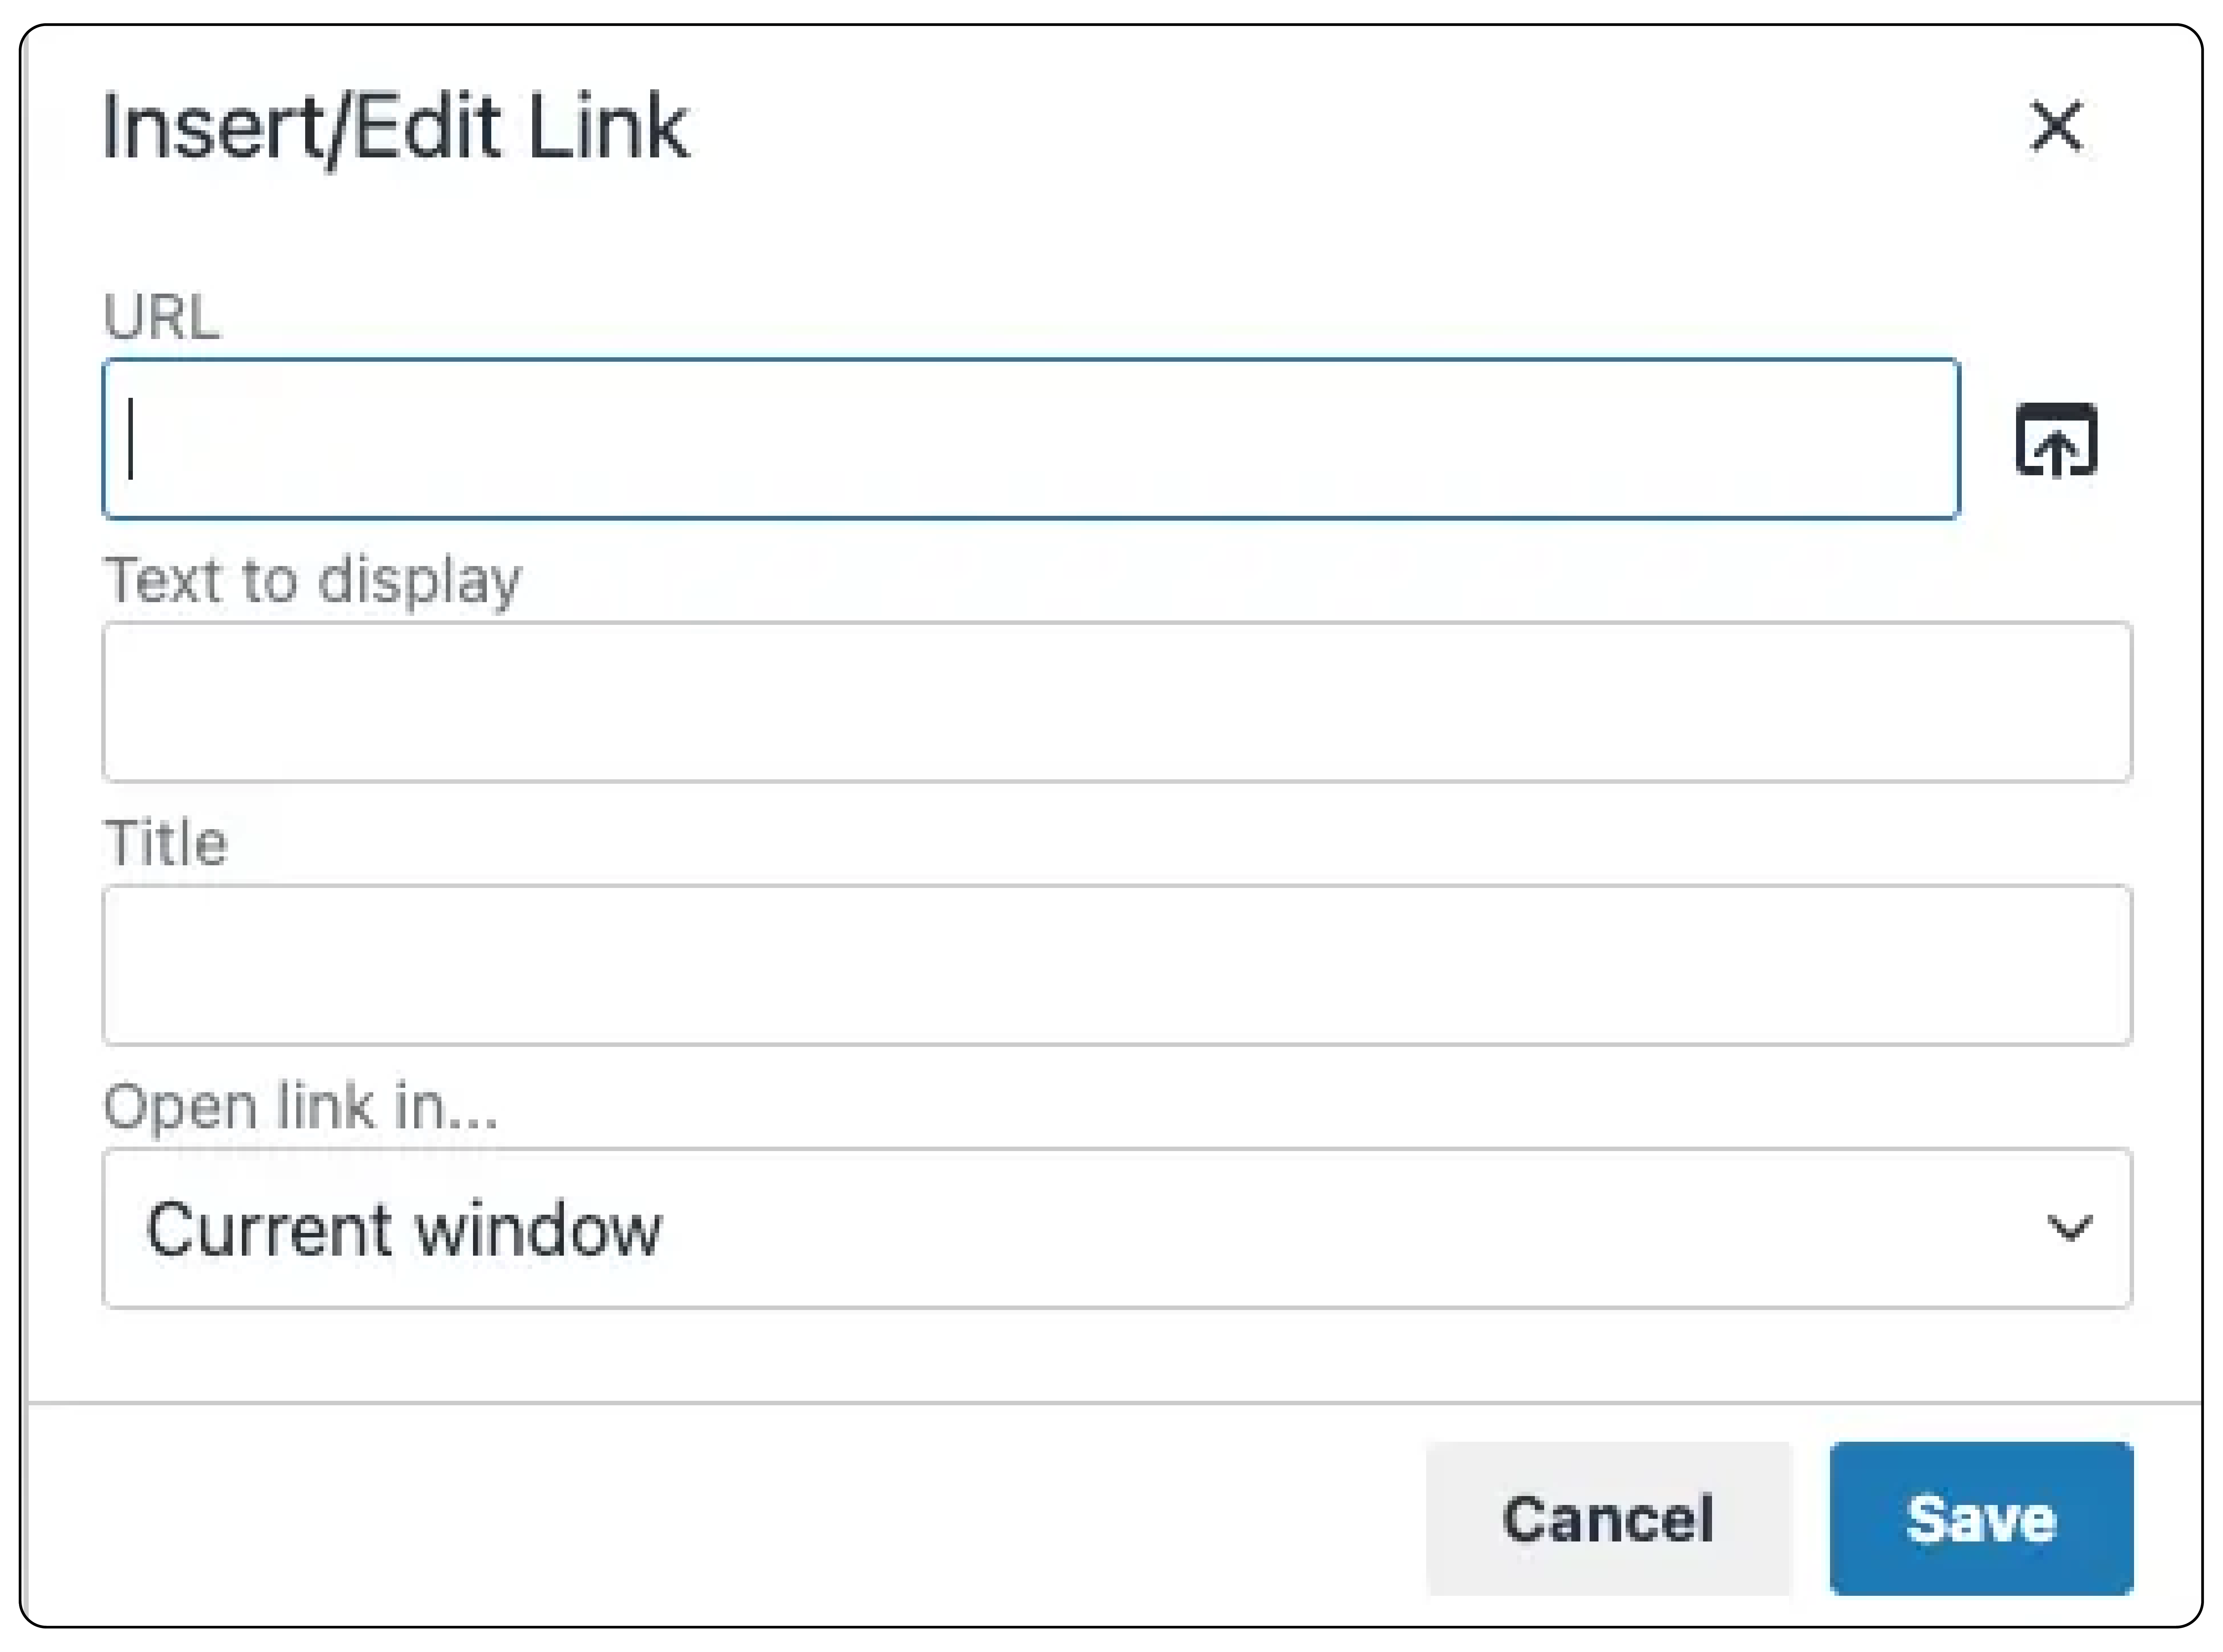
- Initiate Link Creation: Click the Insert/edit link icon in the toolbar to open the dialog.
-
Provide URL:
- Use a URL key for a page within your store.
- Enter the full URL for an external page link.
-
Customize Display Text: The default text is your selected text. Change it if necessary.
-
Add Title: Input a tooltip text for when the cursor hovers over the link.
-
Choose Target:
- To open the link in the same window.
- To open in a new window.
-
Confirm: Click OK to finalize the link insertion.
Troubleshooting Common WYSIWYG Editor Issues in Magento 2
1. Image Upload Failures
- Problem: Unable to upload images.
- Solution: Check file permissions in the media directory. Ensure they allow uploads. Verify your image file size does not exceed the limit set in Magento 2.
2. Link Insertion Not Working
- Problem: Clicks on the 'Insert Link' button have no effect.
- Solution: Clear your browser cache and Magento cookies. If the issue persists, check for JavaScript errors in your browser's console. It may be interfering with the editor's functionality.
3. Content Does Not Display as Expected on the Front-end
- Problem: The content looks different on the website compared to the editor.
- Solution: Ensure the "Styles" and "Formats" dropdowns are used for text styling instead of direct HTML editing. It helps maintain consistency across the site.
4. The Editor Toolbar Disappears or Fails to Load
- Problem: The editor toolbar is missing or not loading properly.
- Solution: This can happen after updates or when there are compatibility issues with custom themes. Try reverting to the default theme to see if the problem resolves. If it does, the issue lies within the custom theme's code.
5. JavaScript Errors in the Editor
- Problem: Receiving JavaScript errors while using the editor.
- Solution: JavaScript conflicts are often caused by third-party extensions or custom scripts. Disable these one by one to identify the culprit. Once found, contact the extension developer for support or a fix.
6. Slow Performance in the Editor
- Problem: The editor is slow or laggy.
- Solution: Large amounts of content or numerous high-resolution images can slow down the editor. Consider breaking the content into smaller sections or optimizing images for web use.
7. Difficulty with Content Formatting
- Problem: Struggling to format content as desired.
- Solution: Use the toolbar's formatting options for text alignment, bullet points, and headers. Avoid using manual HTML code as much as possible for consistent styling.
8. Trouble with HTML Code Editing
- Problem: HTML code changes don't reflect or cause issues.
- Solution: When editing HTML directly, ensure your changes are correct and compatible with Magento 2's front end. If unsure, consult the Magento documentation or a professional Magento hosting developer.
FAQs
1. How can I access the WYSIWYG editor page for help?
To access the WYSIWYG editor, navigate to the desired page or block in edit mode. Click on any text area that enables the editor, then proceed to place your cursor where you want to edit.
2. Can I also add videos or other media using the WYSIWYG editor?
Yes, you can. The WYSIWYG editor allows you to insert multimedia content such as videos and other media. Simply click on the appropriate icon in the editor toolbar and follow the prompts to add the desired media.
3. How can I learn more about troubleshooting common issues with the WYSIWYG editor?
To troubleshoot common issues with the WYSIWYG editor, you can refer to the provided guide. It offers solutions for various problems like image upload failures, link insertion issues, and more.
4. Where can I find additional information about formatting options in the WYSIWYG editor?
To learn more about the formatting options available in the WYSIWYG editor, you can refer to the tutorial. It provides detailed information about text formatting and image insertion. You can also explore link addition and other features of the editor.
5. Can I also customize the display text for inserted links in the WYSIWYG editor?
Yes, you can customize the display text to insert links in the WYSIWYG editor. Simply select the text you want to turn into a link. Click the insert/edit link icon, and then provide the desired URL and display text in the dialog box.
Summary
Magento 2 WYSIWYG Editor provides a user-friendly interface. It helps design appealing pages and products without the need to understand HTML code. Let's recap the key points:
- The WYSIWYG Editor offers a user-friendly interface and a wide range of features. It includes text formatting, image and link insertion, and table creation.
- Configuring the editor is a straightforward process. It involves accessing the admin panel, modifying settings, and clearing the system cache.
- Inserting images and links is made easy with step-by-step instructions. It allows users to enhance their content with visual elements and additional information.
- The guide provides solutions for common issues. It includes image upload failures, link insertion problems, and content display inconsistencies.
Explore Magento server hosting for optimal performance of your Magento 2 store with the WYSIWYG Editor.


