
How to Add Magento Google Maps on Magento 2 Page
Want your customers to find your Magento store easily? Magento Google Maps facilitates this by displaying your store's location directly on your website. This feature enhances the shopping experience, providing clear navigation and boosting customer engagement.
This tutorial will cover the steps to add Google Maps to a Magento 2 contact page, ensuring your store’s address is accessible to enhance your online presence.
Key Takeaways
-
Discover what Google Maps offers to enhance your website's user experience.
-
Explore the benefits of embedding Google Maps on your website, such as a streamlined search experience and increased site engagement.
-
Learn how to add Google Maps to your Magento 2 website using the default Page Builder.
-
Evaluate the need for a Google Maps extension for Magento 2, especially for Open Source Edition users.
-
Learn how integrating Google Maps can enhance user experience and improve customer engagement on your Magento website.
What are Google Maps?

Google Maps is a mapping service that provides detailed geographical information worldwide. It enables users to locate physical stores, navigate routes, and explore different map styles. It includes satellite, roadmap, and hybrid views.
For Magento store owners, integrating Google Maps into their Magento 2 website can significantly enhance the customer's shopping experience. It provides a vital touchpoint for customers seeking physical store locations.
The service relies on various APIs, with the JavaScript API being particularly relevant for ecommerce platforms. It includes markers and customized map styles to match your brand's visual identity.
Here’s an overview of the various Google Maps APIs available:
-
Maps JavaScript API: Enables the addition of interactive maps to web pages, complete with customizable features such as markers and zoom controls. Ideal for embedding dynamic, clickable maps on your Magento 2 site.
-
Maps Static API: Allows for the insertion of a simple, non-interactive map as an image on your website. Useful for static location displays where user interaction is not required.
-
Street View Static API: Offers the ability to display street view images of locations, giving customers a real-world view of your store’s location.
-
Maps Embed API: Simplifies the process of embedding Google Maps into your site using simple HTML. This API is perfect for adding basic maps quickly and without the need for extensive configuration.
-
Places API: Provides detailed information about millions of places around the world. It can be used to enhance your Magento store's location features by providing data such as store addresses, reviews, and photos.
-
Geocoding API: Converts addresses into geographic coordinates (latitude and longitude) and vice versa. It places accurate markers on the map for your store's location.
-
Directions API: Offers route directions between multiple locations for various modes of transportation, including driving, walking, and public transit. It can be used to guide customers to your physical store from their current location.
-
Distance Matrix API: Calculates travel distance and time between locations, which can be used to estimate delivery times and costs for your e-commerce operations.
-
Geolocation API: Determines the location of your customers based on IP address or device sensors, facilitating location-based services on your Magento site.
-
Time Zone API: Provides time zone information for any location worldwide. It is useful for syncing operations across different geographic locations.
-
Roads API: Helps to snap inaccurate GPS coordinates to the correct road segments. Beneficial for delivery services that rely on precise location tracking.
Benefits of Embedding Google Maps to Your Website

By integrating the Google Maps feature, you can improve site usability, engagement, and, ultimately, your Magento conversion rates. Here are the key advantages:
-
Streamlined Search Experience: Integrating Google Maps directly onto your site allows customers to easily find your physical store without leaving your webpage. It offers a cohesive and Magento user-friendly navigation experience.
-
Contact Information: Embedded Google Maps provides customers with essential details such as your store’s location, phone number, website, reviews, and ratings. It also includes operational hours and photos, all within the map interface on your site.
-
Site Engagement: The inclusion of Google Maps on your site encourages visitors to spend more time exploring your Magento products. This increased engagement is a critical factor in guiding potential customers through the sales funnel, enhancing the likelihood of conversion.
-
Local Landmarks Visualization: Google Maps can also suggest local attractions near your store. This feature helps customers place your location in a real-life context. It also adds an extra layer of familiarity and confidence for first-time visitors.
-
Drive Ready-to-Buy Traffic: Visitors directed from Google Maps to your website are often in a ready-to-purchase state. Targeted Magento traffic can lead to higher conversion rates and enhance your site’s authority, positively impacting your search engine rankings.
-
Visual Content: Incorporating appealing images, especially those generated by customers, can significantly influence online purchase decisions. Showcasing these images on your Google Business Profile, along with positive reviews, can elevate trust, brand recognition, and conversion rates.
Steps to Add Google Maps in Magento 2 with Default Page Builder
Magento 2, especially the Commerce Edition, supports the integration of Google Maps through its Page Builder feature. It allows for an easy and seamless addition to your site's Contact Us or About Us pages. Here are the steps:
Step 1: Create a Google Maps API key and Insert it in Magento 2
Before integrating Google Maps into your Magento 2 site, you must first generate an API key. It involves creating a billing account and a project on the Google Maps Platform and enabling the Google Map Javascript API. Upon completion, you'll receive your API key, which is essential for the next steps.
Steps to Insert the API Key in Magento 2:
-
Access your Magento 2 admin panel.
-
Navigate to Stores > Settings > Configuration.
-
Under Content Management, find Advanced Content Tools.
-
Enter your Google Maps API Key into the designated field.
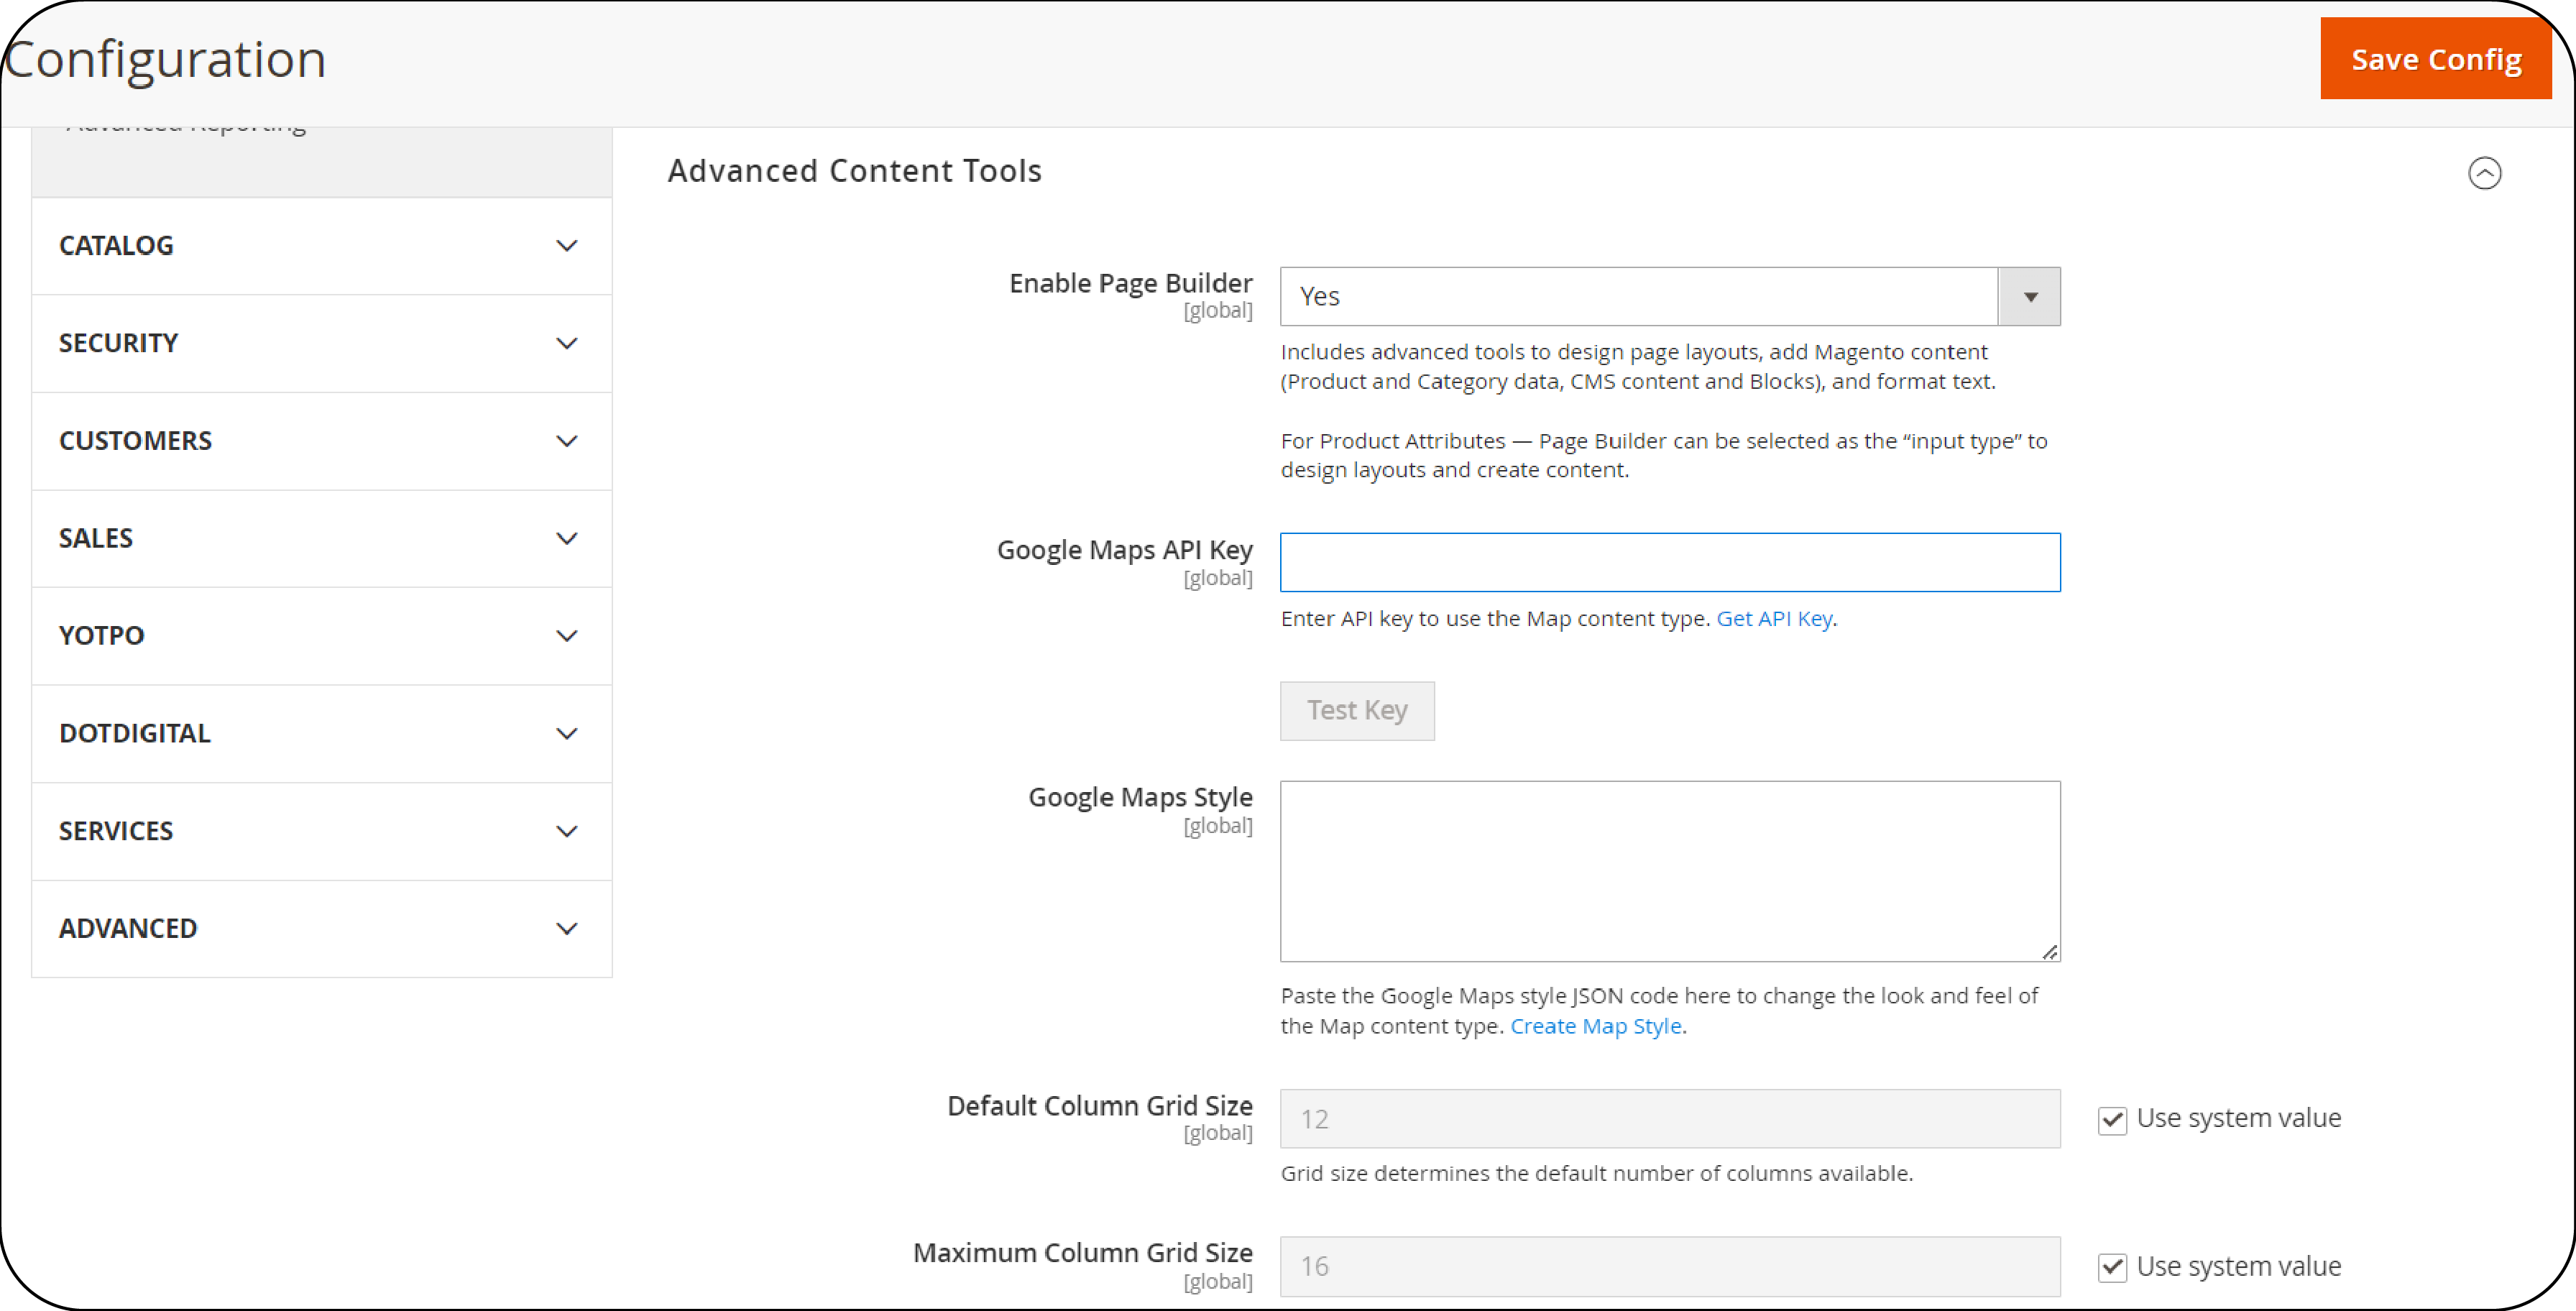
- Use the Test Key feature to verify the API key's functionality.
Step 2: Placing Google Maps on a Specific Page of your Magento 2 Website
-
In your Magento 2 admin area, go to Content > Pages.
-
Identify the page (e.g., Contact Us) where you wish to embed the map. Click Edit in the corresponding Action column.
-
Within the page's Content section, the Page Builder interface will be available.
-
Look for the Media section in the Magento Page Builder panel. Here, you will find the option to add various media elements.
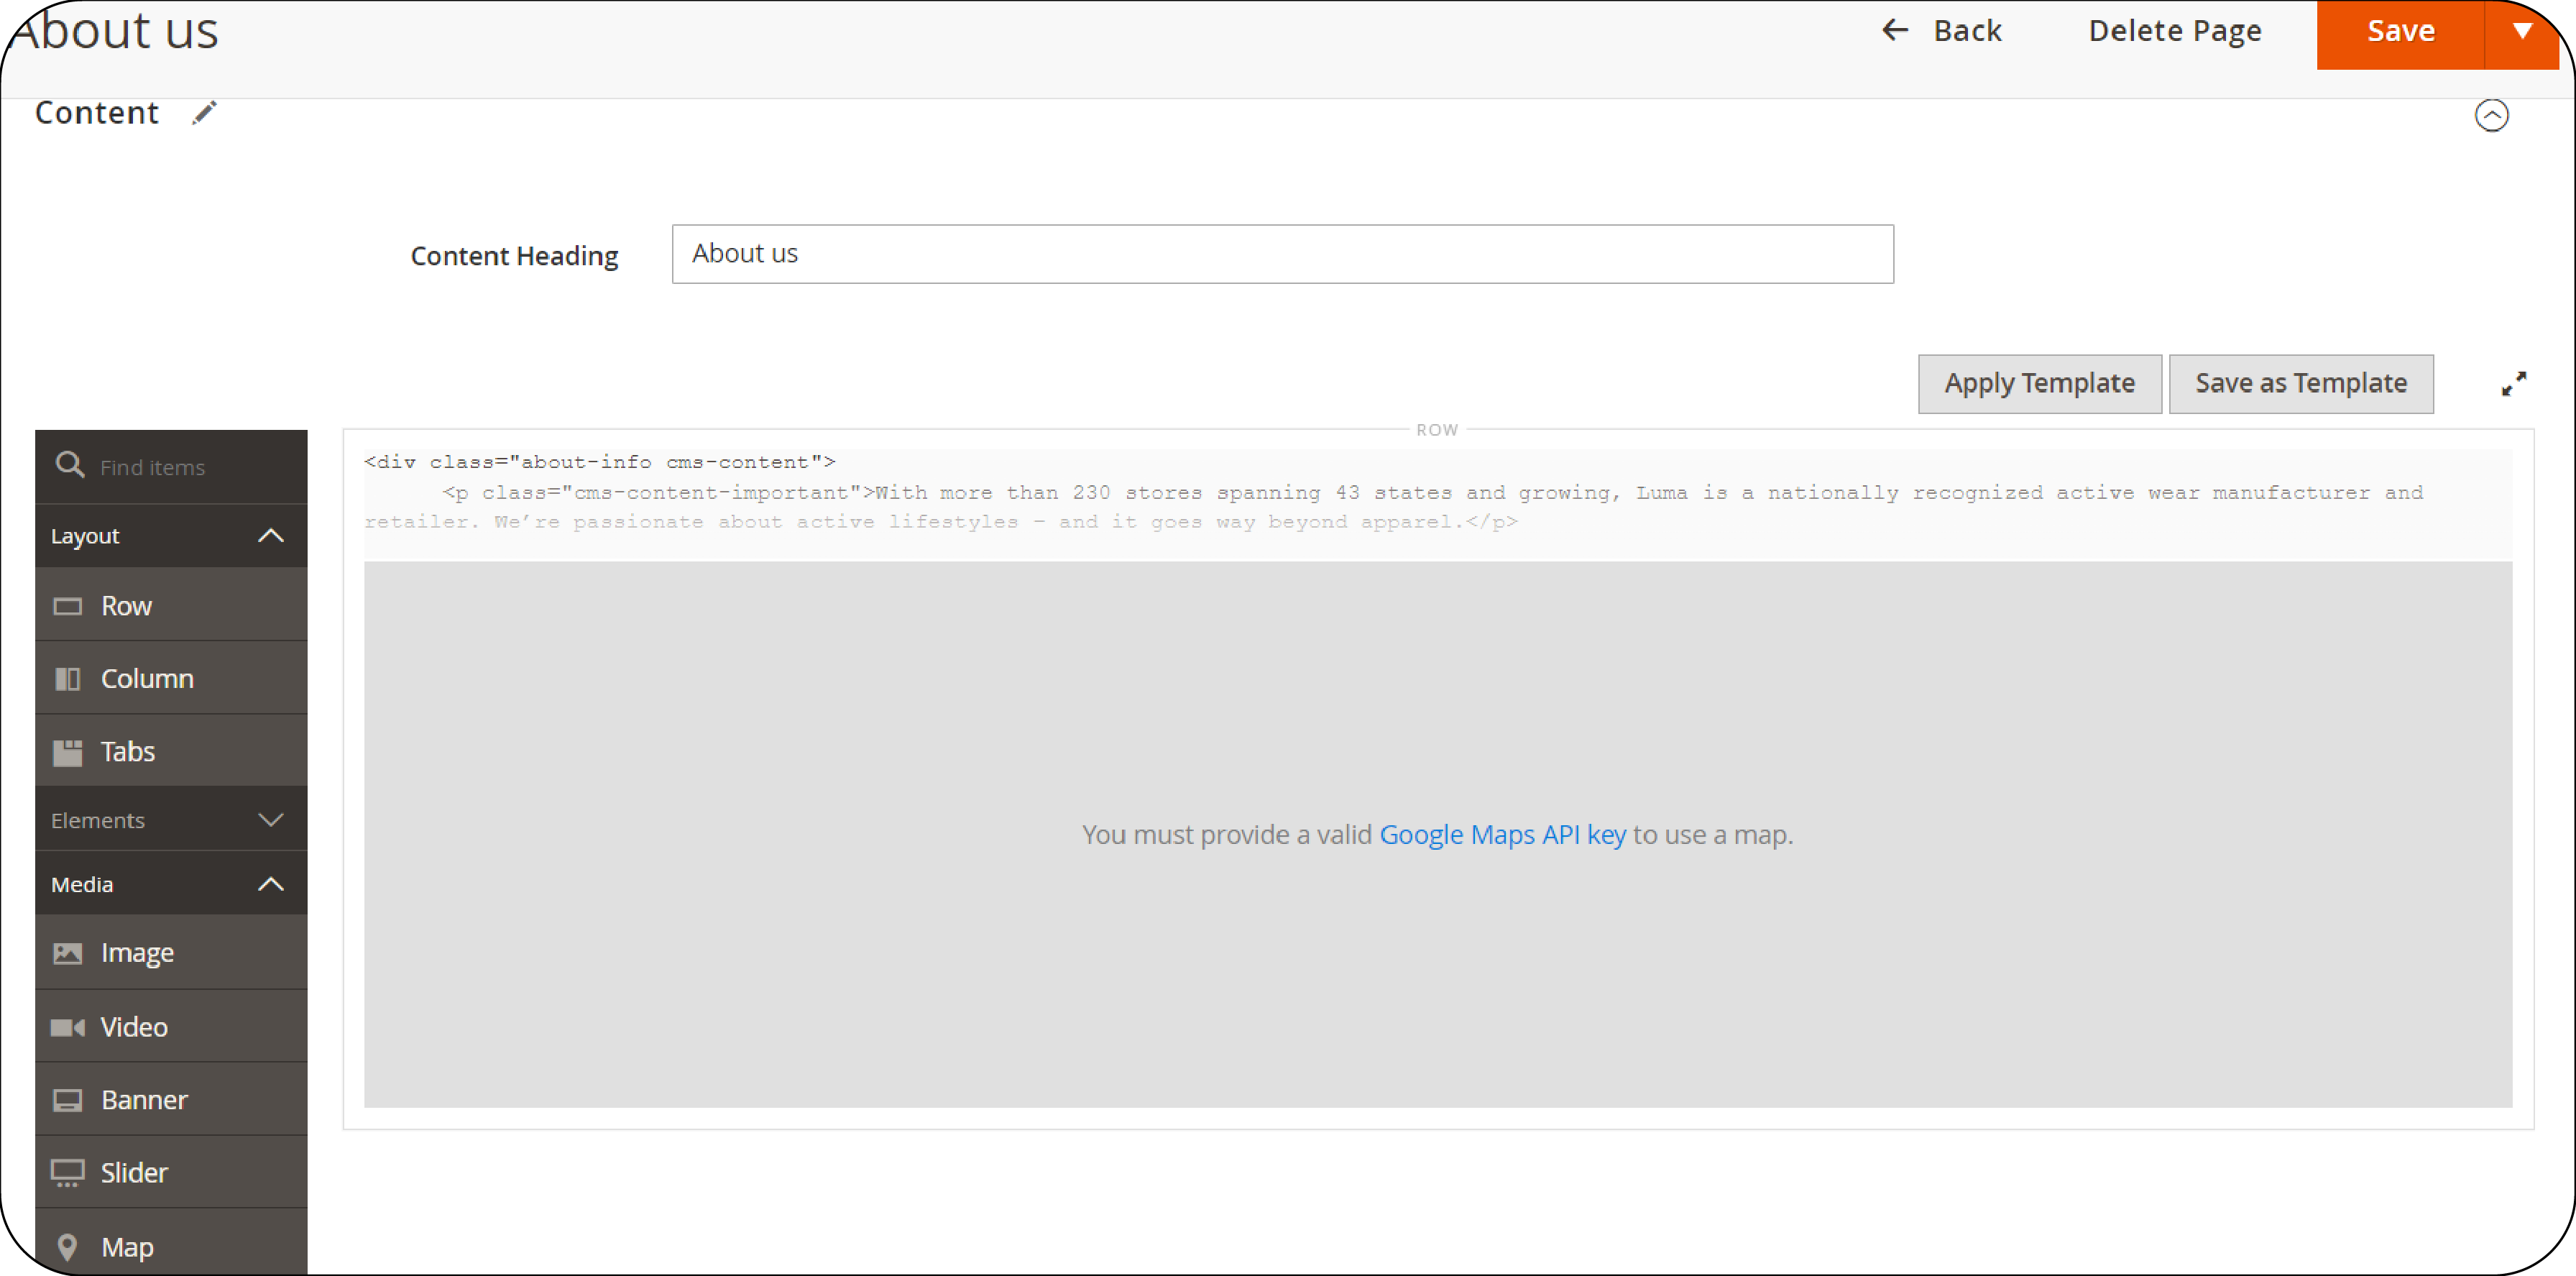
- Drag and Drop the Map widget onto your page's layout. This action places a Google Map block where you specify.
Note: Should the Google Maps Platform not be properly configured for your Magento 2 site, the map widget may display incorrectly. Ensure all settings, including the API key integration, are correctly applied to facilitate this feature's functionality.
Step 3: Pinpoint your Store's Location Directly on The Map
-
Hover over the map widget within the Page Builder to reveal the toolbox.
-
Click the Settings icon to launch the Edit Map interface.
-
In the Edit Map section, find and click the Add Location button located in the upper-right corner.
- Location Name: Input the name of your location. This label will appear on the map.
- Coordinates: Enter the precise latitude and longitude for your store's location. These coordinates ensure the marker accurately represents your physical store on the map.
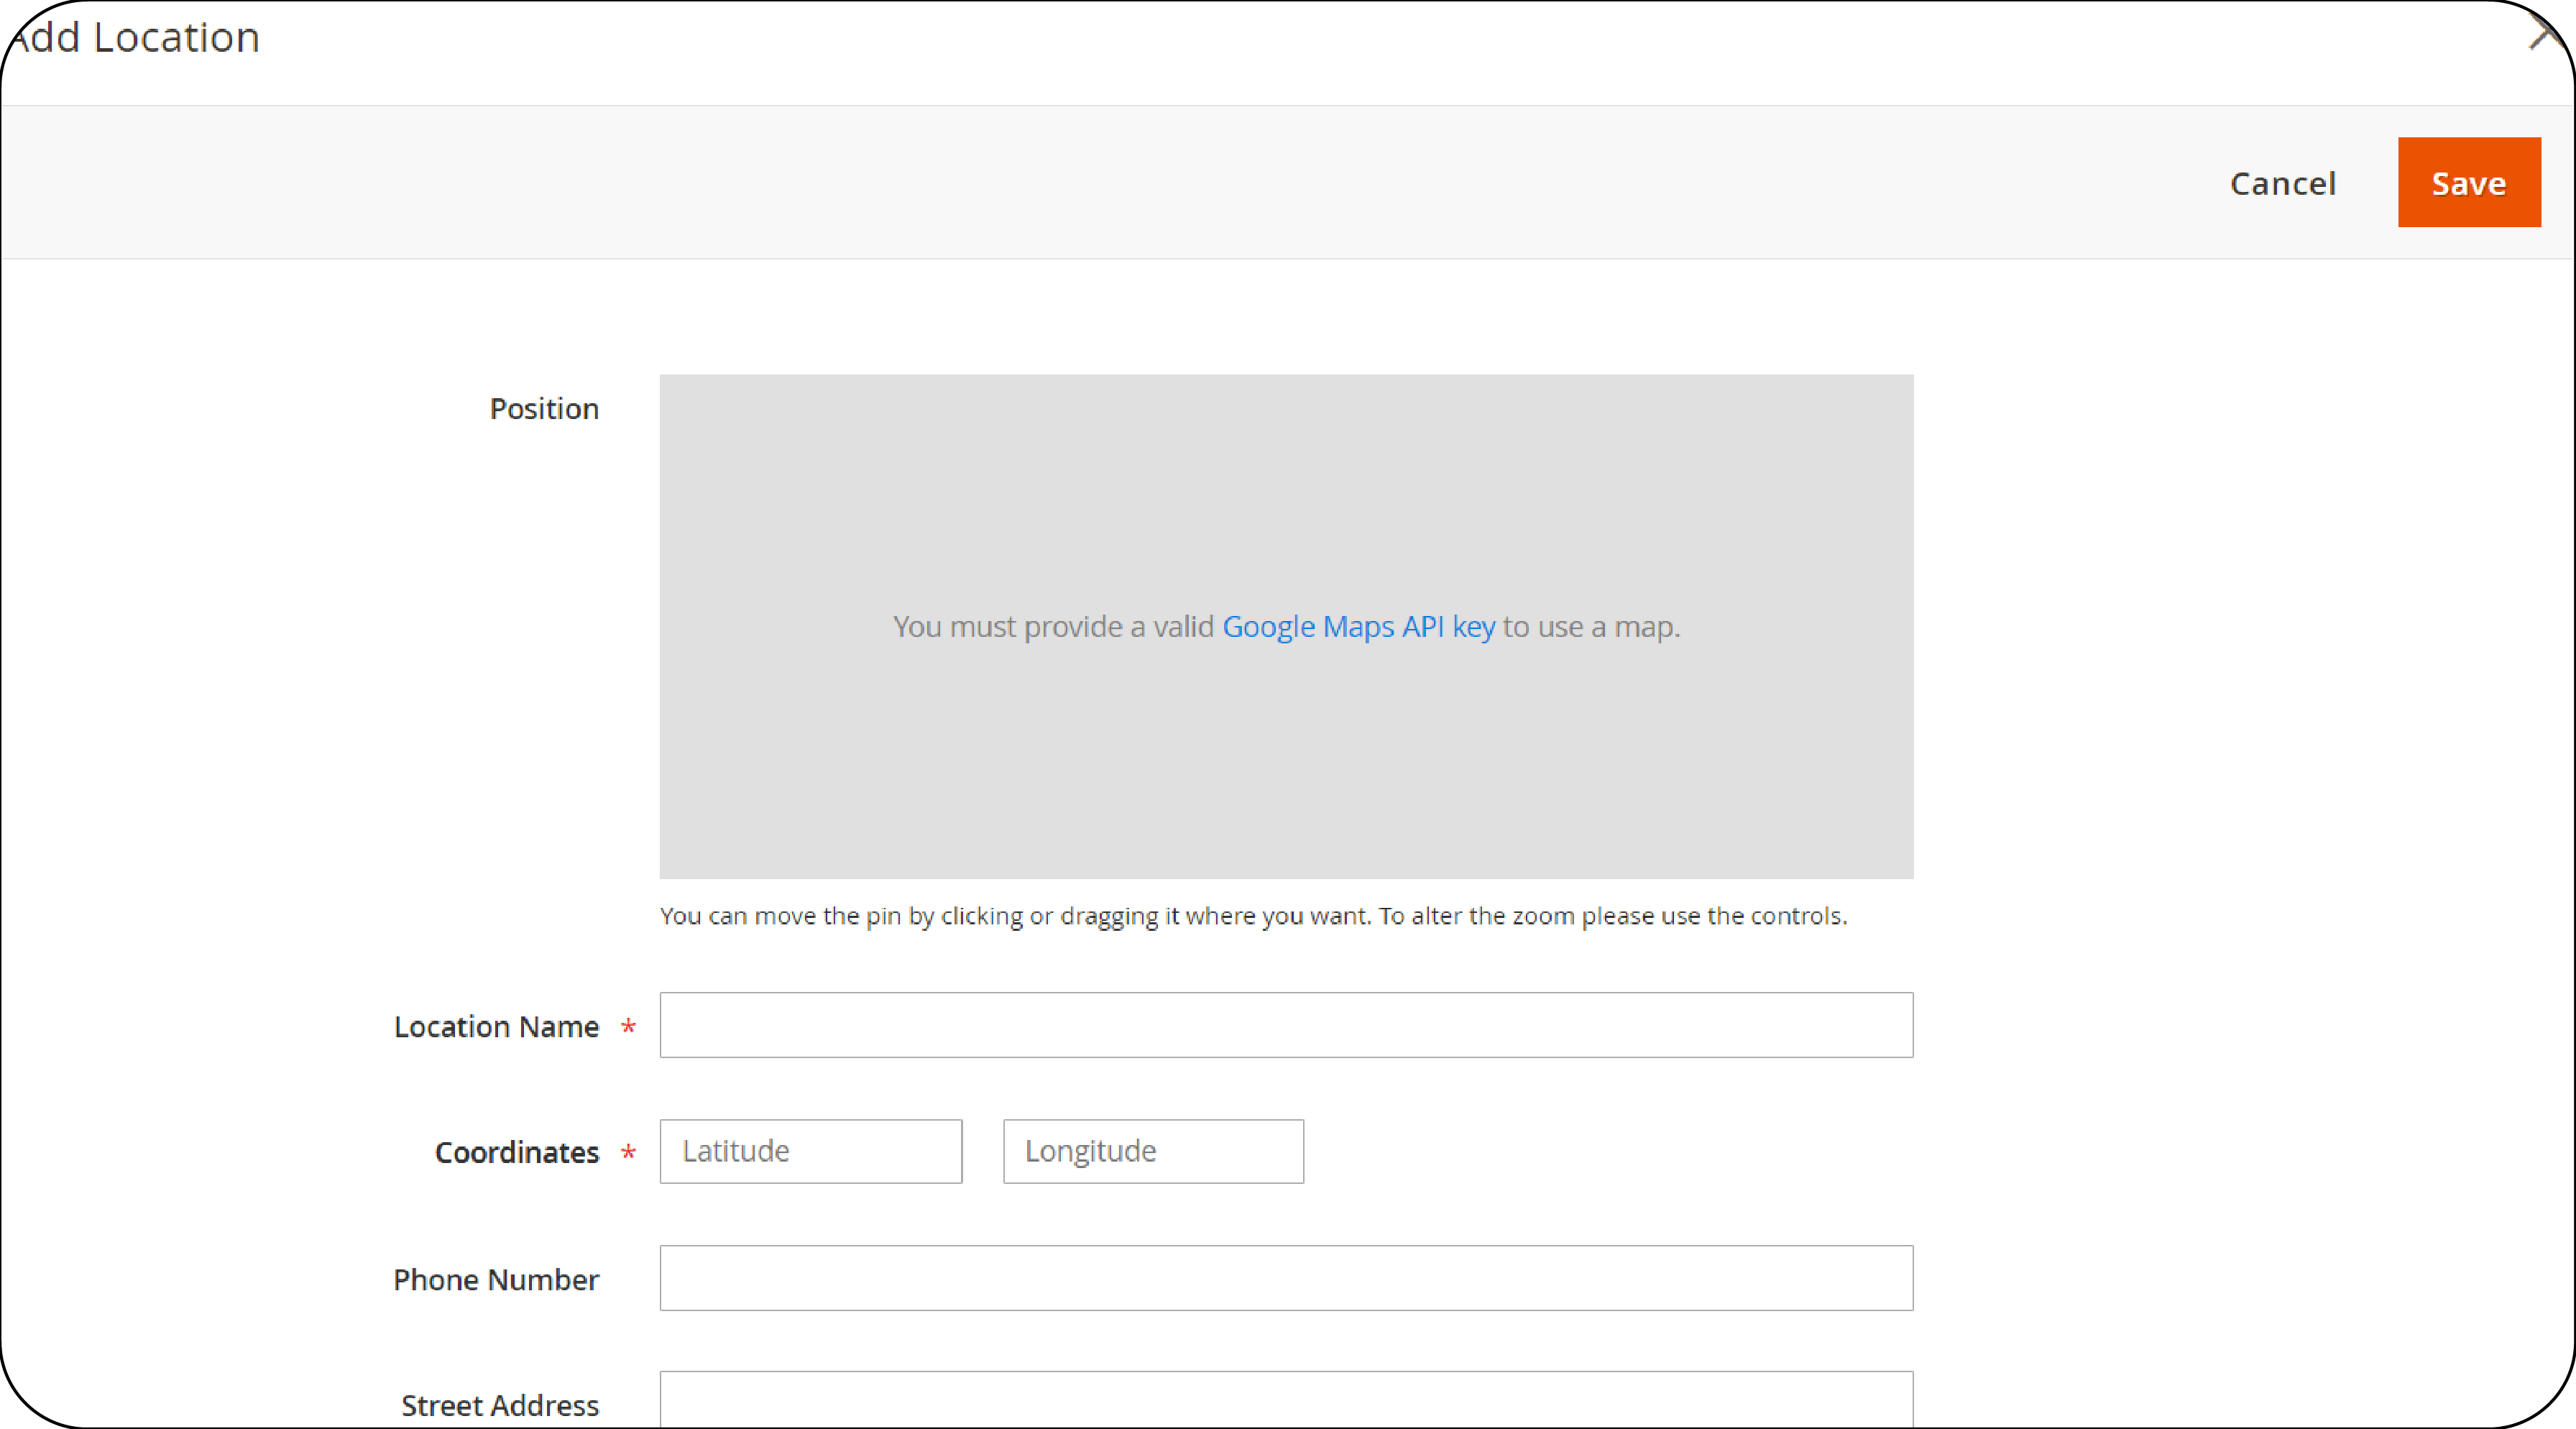
- Fill in any other relevant information about the business you wish to link with this map marker. It includes contact details, store hours, or a brief description.
If you're unsure of your store's exact coordinates, follow these simple steps to find them:
-
Visit the Google Maps website.
-
Search for your store's address or location.
-
The coordinates can then be found within the URL or by right-clicking the location on the map and selecting “What's here?” to display the coordinates.
Step 4: Customize Google Maps Appearance on Your Magento 2 Site
-
Navigate through Stores > Settings > Configuration.
-
Go to General > Content Management and select Advanced Content Tools.
-
Locate the Google Maps Style section.
-
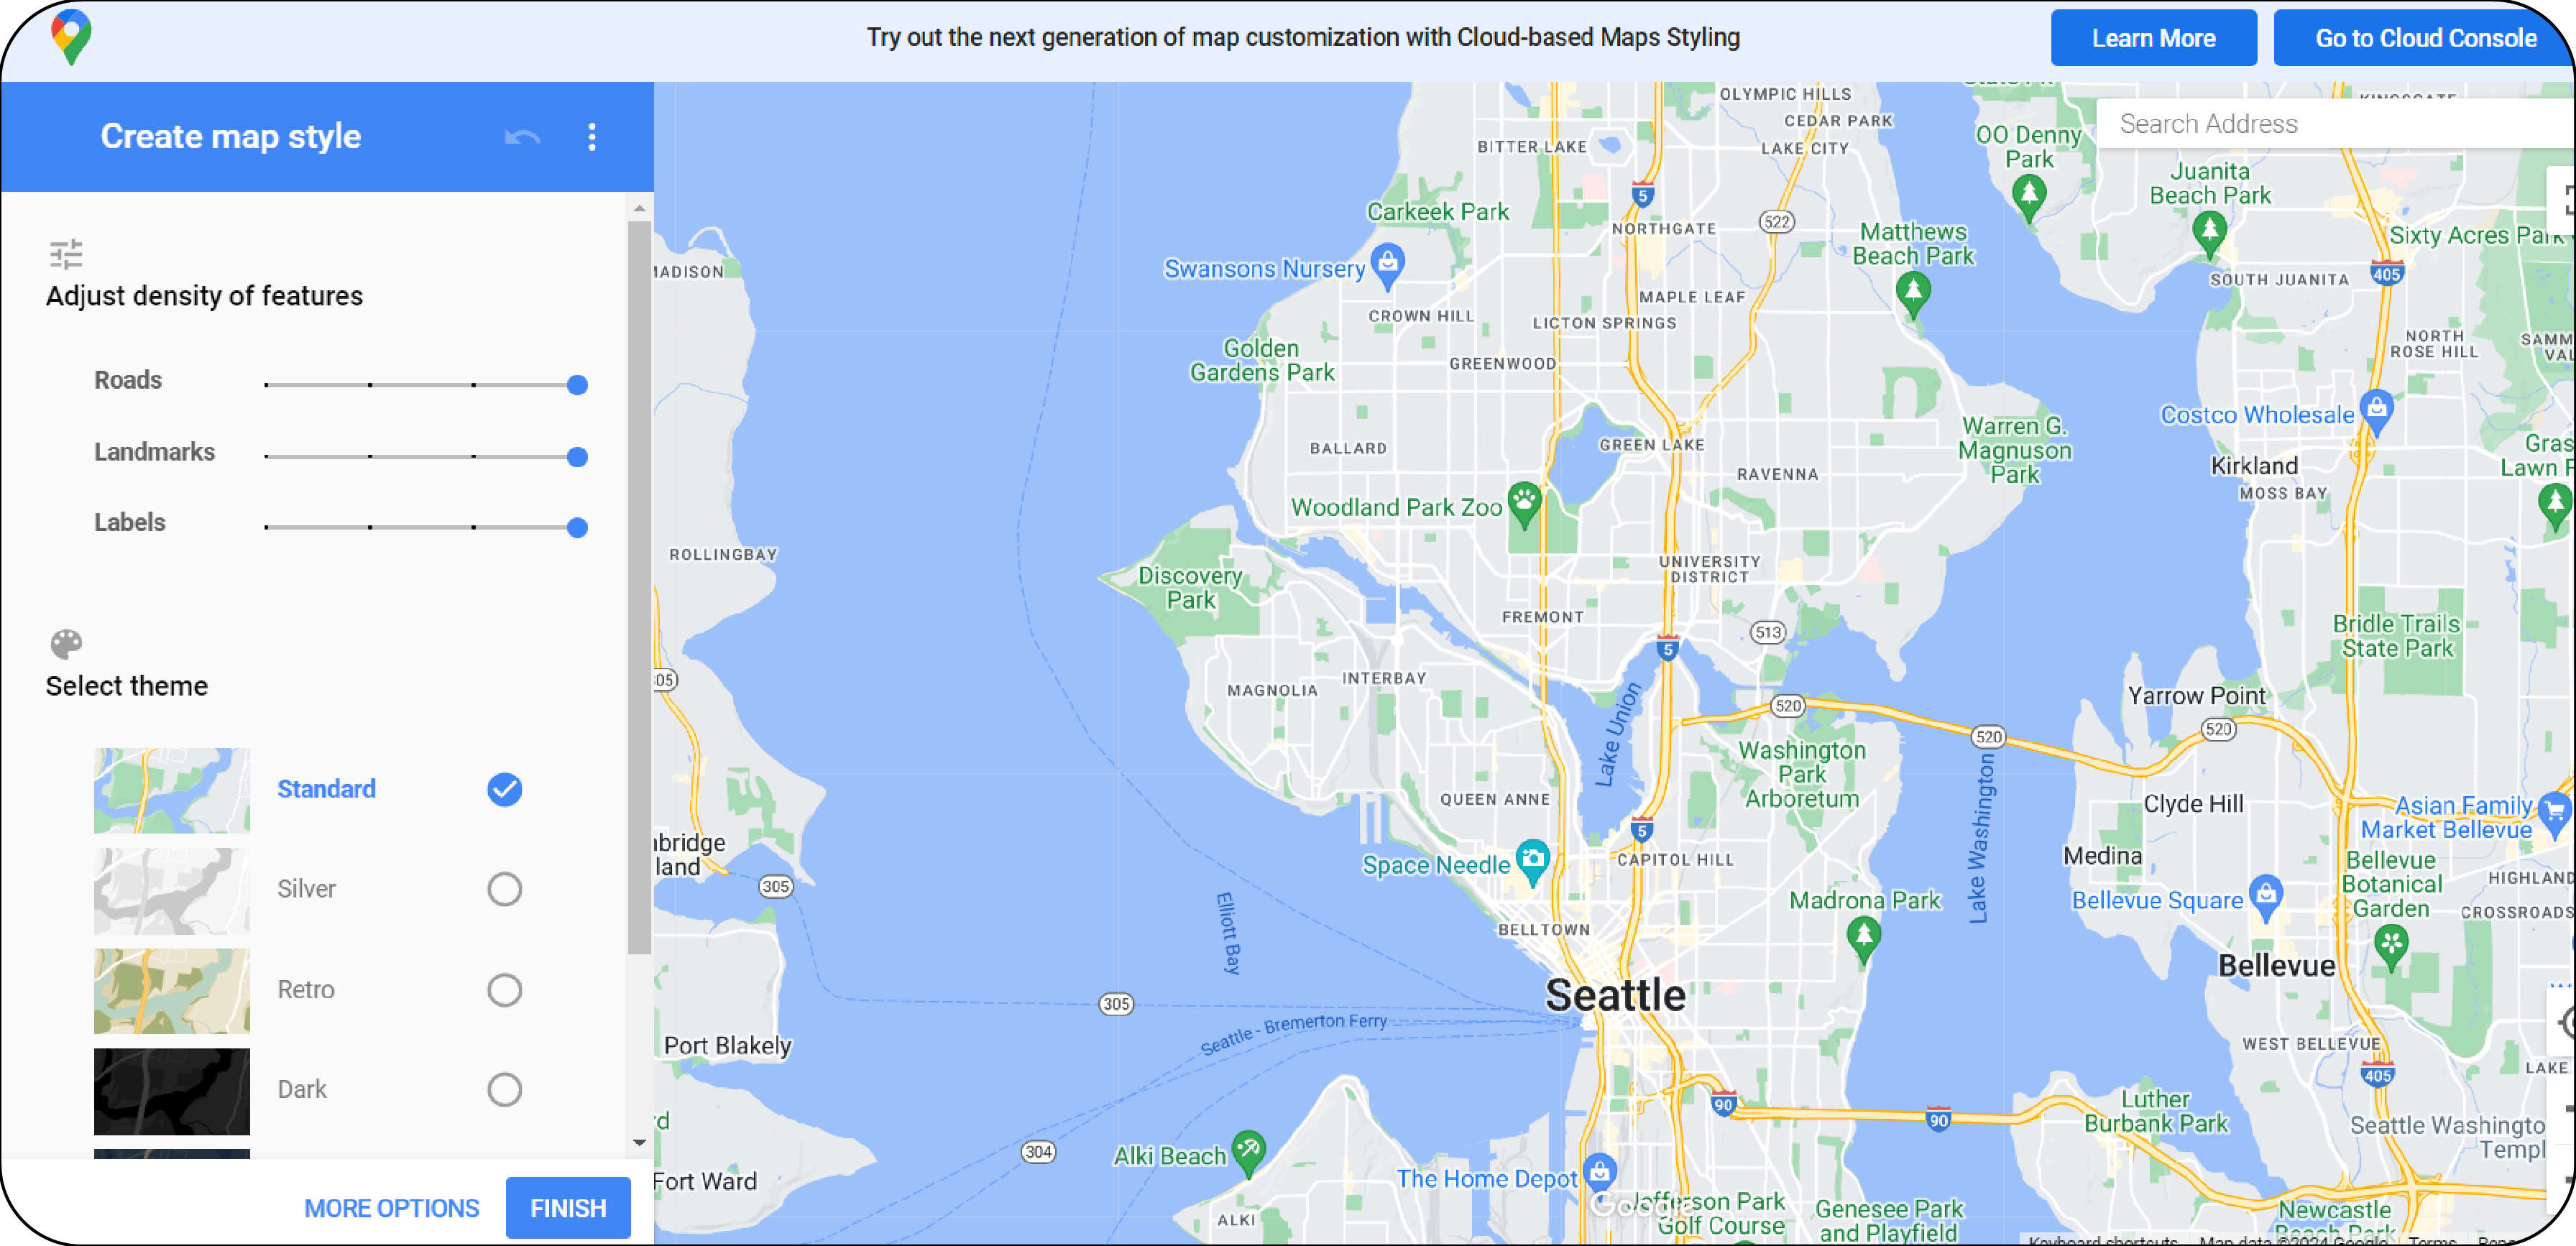
Click on Create Map Style to initiate the styling process.
-
Use the Create a Style option to customize the map’s appearance, such as feature density and theme selection.
-
After styling, select Finish to generate the custom style.
-
The style can be exported as JSON code or a URL.
-
Insert this code or URL into the Google Maps Style box within the Magento 2 configuration.
-
Click Save Config to apply your custom map style.
-
Your website will now display the Google Map with your selected aesthetic preferences.
Step 5: Additional Map Settings
1. Adjust Display Features:
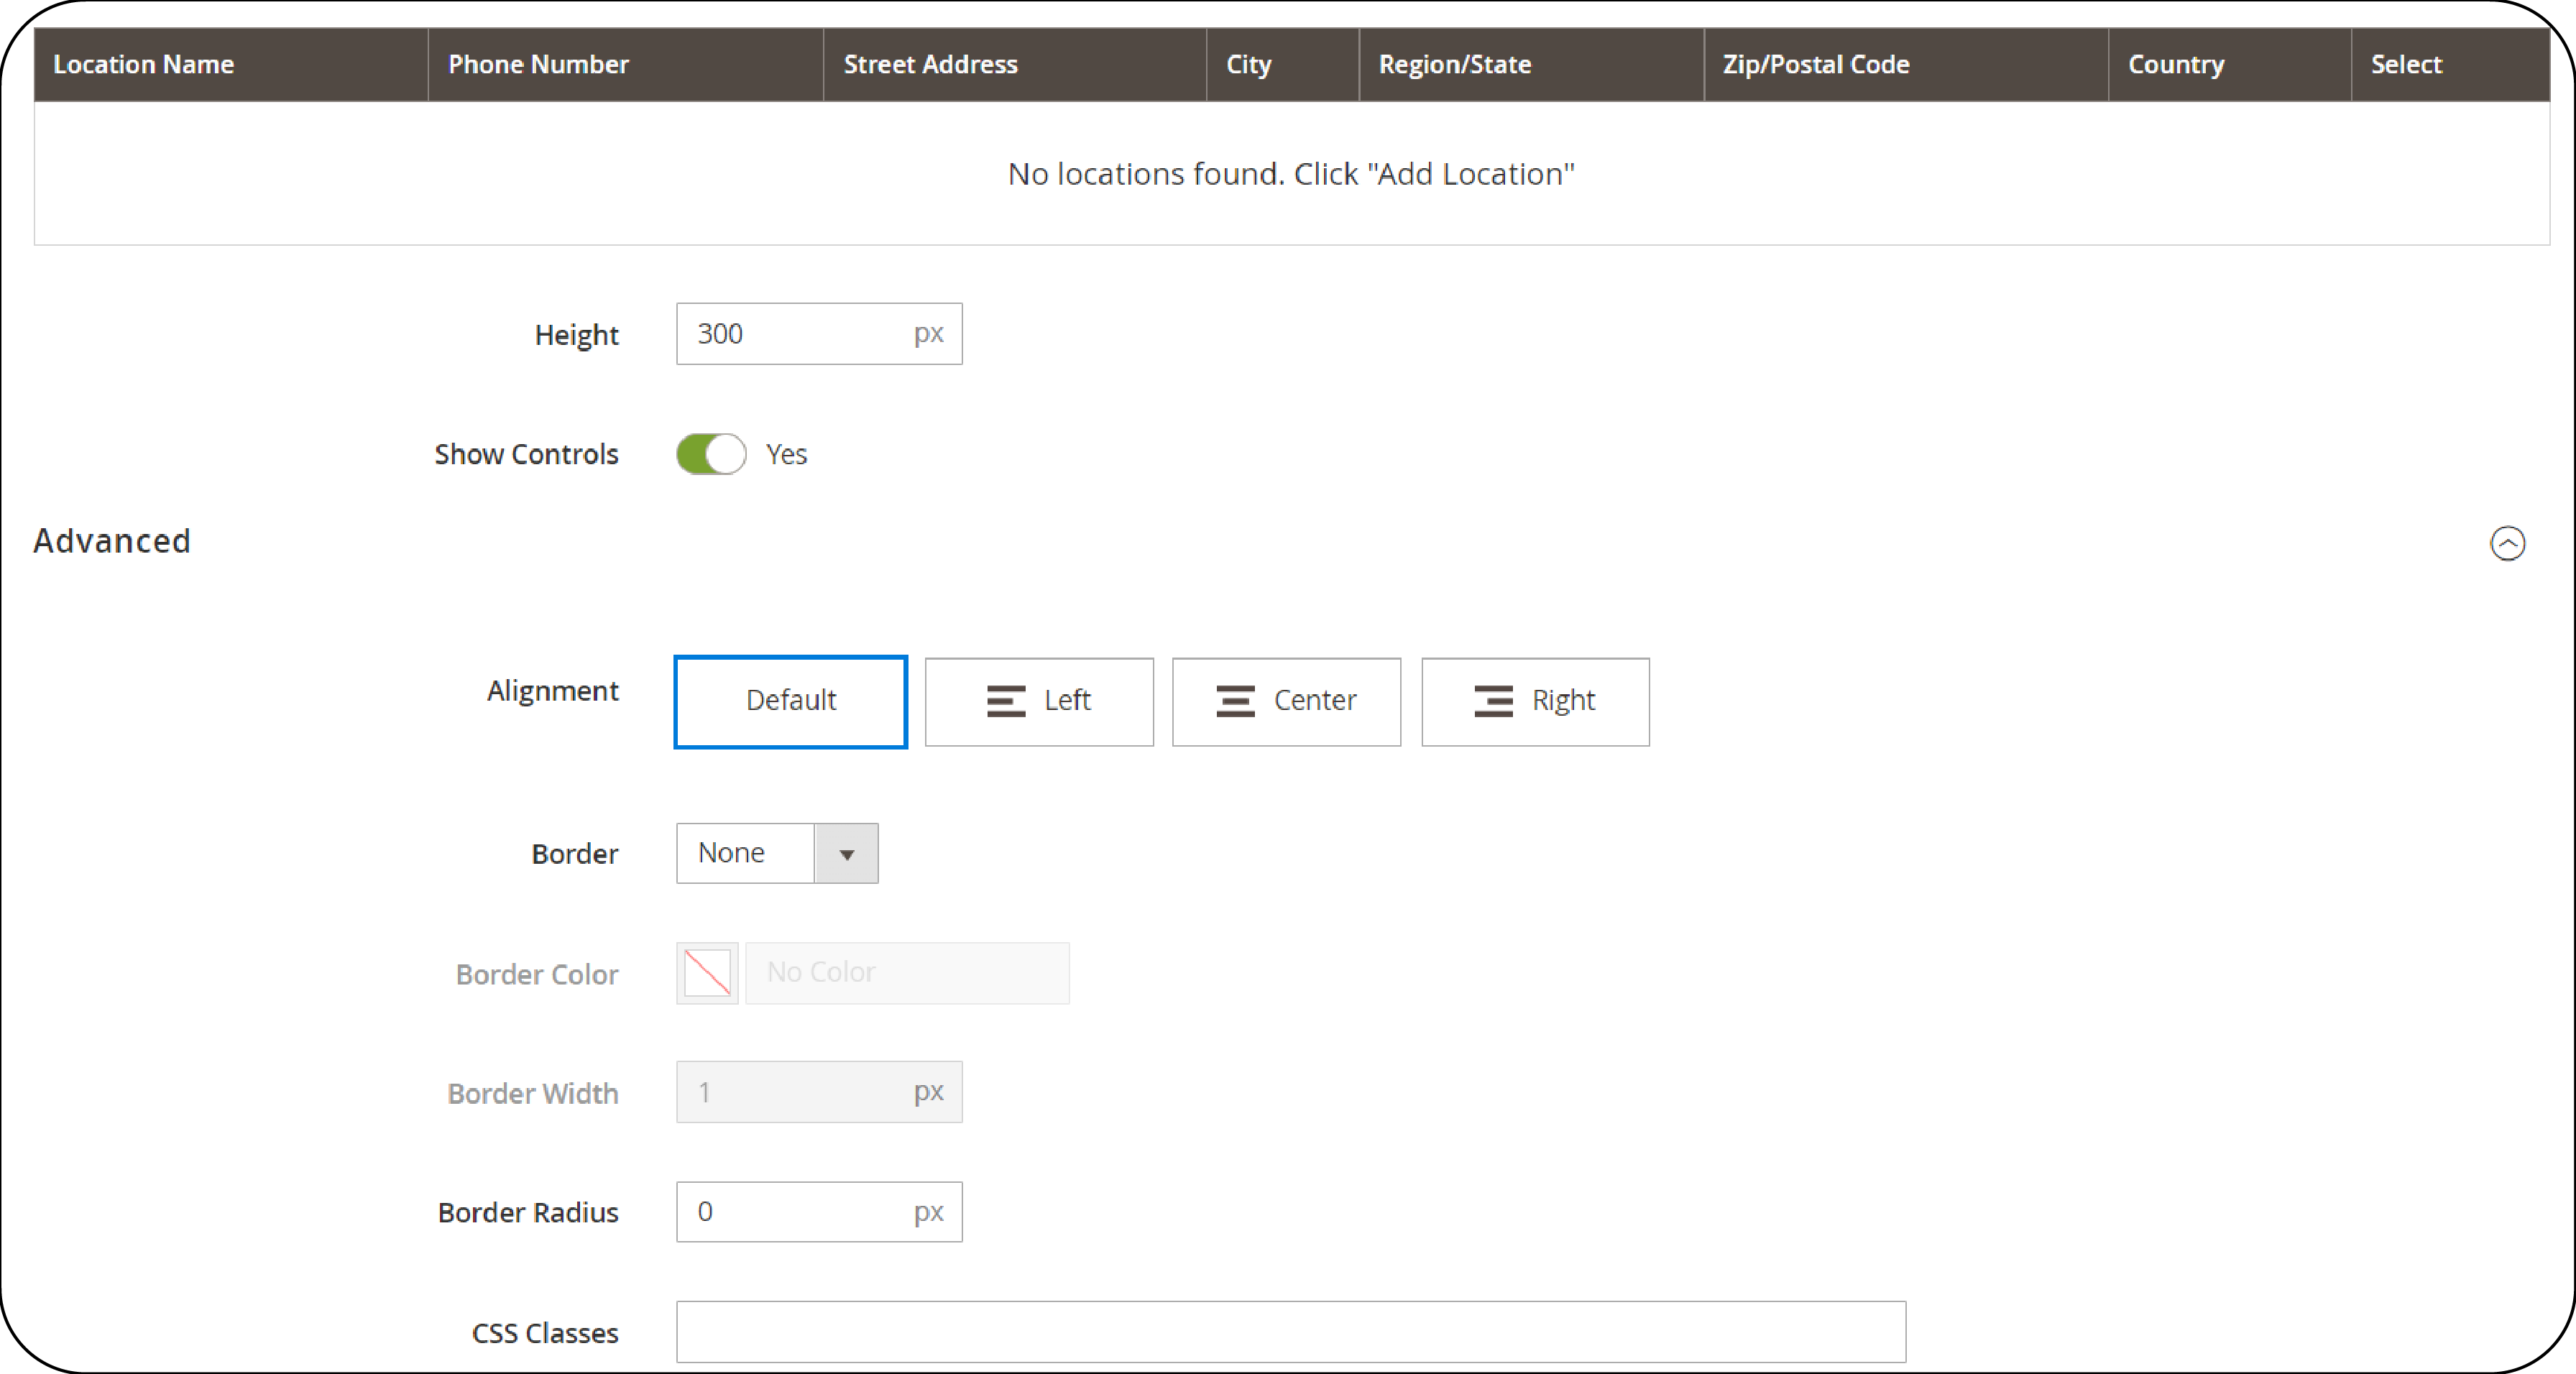
- Within the map’s toolbox, click the Settings icon to open edit options.
-
Map Height: Specify the map’s height in pixels according to your design needs.
-
Show Controls: Decide if standard Google Maps controls should be visible to users.
-
In Advanced settings, fine-tune alignment for how map content fits within the map container.
2. Customize Container Appearance:
-
Border Style: Select from 10 options to define the border look for all four sides of the map container.
-
Margins and Padding: Set the exact amount of space (in pixels) for the outer and inner edges of the container.
-
After adjustments, click Save to apply changes and return to the Page Builder workspace.
3. Configuring Grid Size for Map Placement
-
The grid size affects how the map aligns with the rest of the content based on the column layout of the Page Builder.
-
Navigate to Stores > Settings > Configuration > Content Management > Advanced Content Tools.
-
Adjust the Default Column Grid Size and Maximum Column Grid Size to suit your page layout.
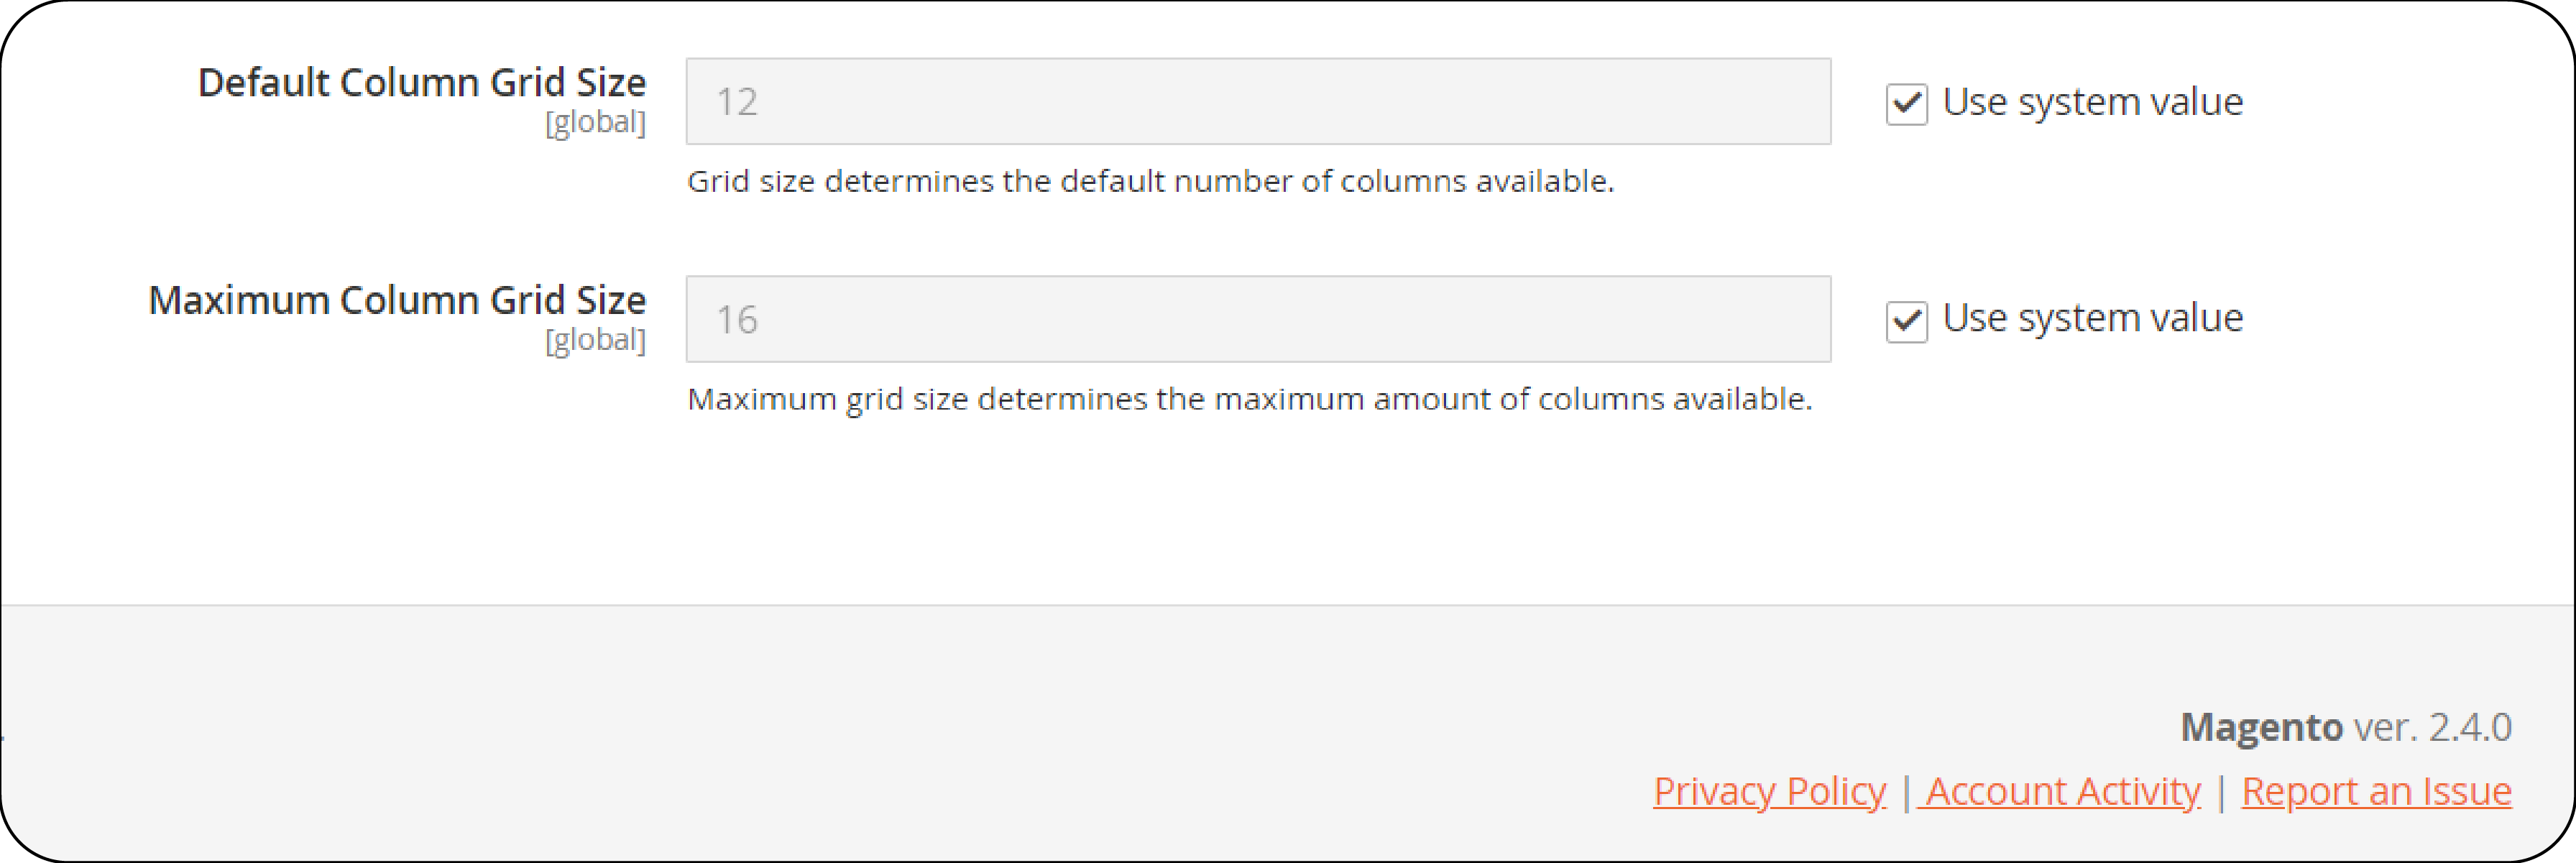
- Click Save Config to implement your grid size settings, ensuring the map integrates seamlessly with your page design.
Why do I need a Google Maps extension for Magento 2?
For Commerce Edition Users
The Magento 2 Commerce Edition offers Page Builder, which allows for easy customization and the addition of dynamic content, including Google Maps. This built-in capability means that, without needing additional extensions, you can provide customers with an interactive map. This map can guide them straight to your physical storefront, enhancing the shopping experience and potentially increasing foot traffic.
For Open Source Edition Users
Magento Open Source Edition doesn't include the Page Builder feature, making a Google Maps extension a necessary addition. These extensions are easy to install and configure. It bridges the functionality gap and offers the same location-enhancing features as Commerce Edition sites.
Integrating Google Maps not only makes it easier for customers to find your physical store but also adds a layer of trust and professionalism to your brand. Visitors can see your store's location, get directions, and even view your business's exterior, all without leaving your site.
FAQs
1. Can Magento 2 Google Maps be added to the contact page?
Yes, Magento 2 allows the integration of Google Maps into the website’s contact page. With the use of a free Google Maps extension or plugin, online merchants can effortlessly add this feature to enhance the user experience.
2. Is the configuration process complex for adding Google Maps to a Magento 2 contact page?
No, the configuration process is straightforward. By accessing the Magento 2 admin panel and navigating to the content management settings, merchants can easily add their Google Maps API key for seamless integration.
3. How does adding Google Maps to a Magento 2 page improve shopping navigation?
Integrating Google Maps onto the website’s contact page streamlines the shopping experience by providing customers with a clear and direct way to locate the physical store. It enhances navigation and encourages shoppers to visit in person.
4. Do online merchants need to purchase a separate file or package for Magento 2 Google Maps integration?
No, there is no need to purchase a separate file or package. Magento 2 allows for the addition of Google Maps through either built-in features or free Magento extensions available in the marketplace. It ensures a cost-effective solution for online merchants.
5. Can Google Maps be automatically associated with the website’s contact page during installation and configuration?
Yes, during the installation and configuration process, online merchants can easily associate Google Maps with the website’s contact page. With the assistance of a free extension or plugin, this integration can be achieved seamlessly, enhancing the user experience for shoppers.
Summary
Magento Google Maps ensures that customers can easily locate physical stores by displaying store locations directly on the website. It includes JavaScript API, Static API, Street View API, Places API, and Geocoding API.
This tutorial covered the process of adding Google Maps to a Magento 2 contact page, ensuring the store’s address is accessible to enhance its online presence. By following these simple steps, you can:
-
Harness the power of Google Maps APIs to create interactive, informative, and visually appealing maps.
-
Elevate your website's user experience by streamlining the search process and showcasing local landmarks that build trust and familiarity.
-
Boost site engagement and conversions by leveraging the ready-to-buy traffic that Google Maps directs to your website.
-
Customize your map's appearance and integration with ease using Magento 2's Page Builder or a dedicated Google Maps extension.
-
Use built-in features for Commerce Edition users and readily available extensions for Open Source Edition users.
Explore Magento server hosting options for optimal Magento performance, especially when integrating features like Google Maps.


